


To Prepare the Multimeter for Use
The following steps help you verify that the multimeter is ready for use.
1 Check the list of supplied items.
Verify that you have received the following items with your multimeter.
If anything is missing, contact your nearest Agilent Sales Office.
One test lead kit.
One power cord.
This User’s Guide.
One Service Guide.
One folded Quick Reference card.
Certificate of Calibration.
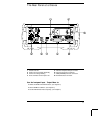
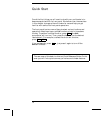
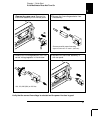
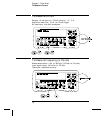
2 Connect the power cord and turn on the multimeter.
The front-panel display will light up while the multimeter performs its
power-on self-test. The
GPIB bus address is displayed. Notice that the
multimeter powers up in the dc voltage function with autoranging enabled.
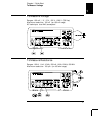
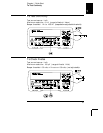
To review the power-on display with all annunciators turned on,
hold down
Shift as you turn on the multimeter.
3Perform a complete self-test.
The complete self-test performs a more extensive series of tests than
those performed at power-on. Hold down
Shift as you press the
Power switch to turn on the multimeter; hold down the key for more
than 5 seconds. The self-test will begin when you release the key.
If the self-test is successful, “
PASS” is displayed. If the self-test is
not successful, “
FAIL” is displayed and the ERROR annunciator turns on.
See the Service Guide for instructions on returning the multimeter to
Agilent for service.
1
Chapter 1 Quick Start
To Prepare the Multimeter for Use
13