


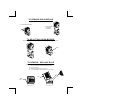
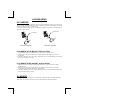
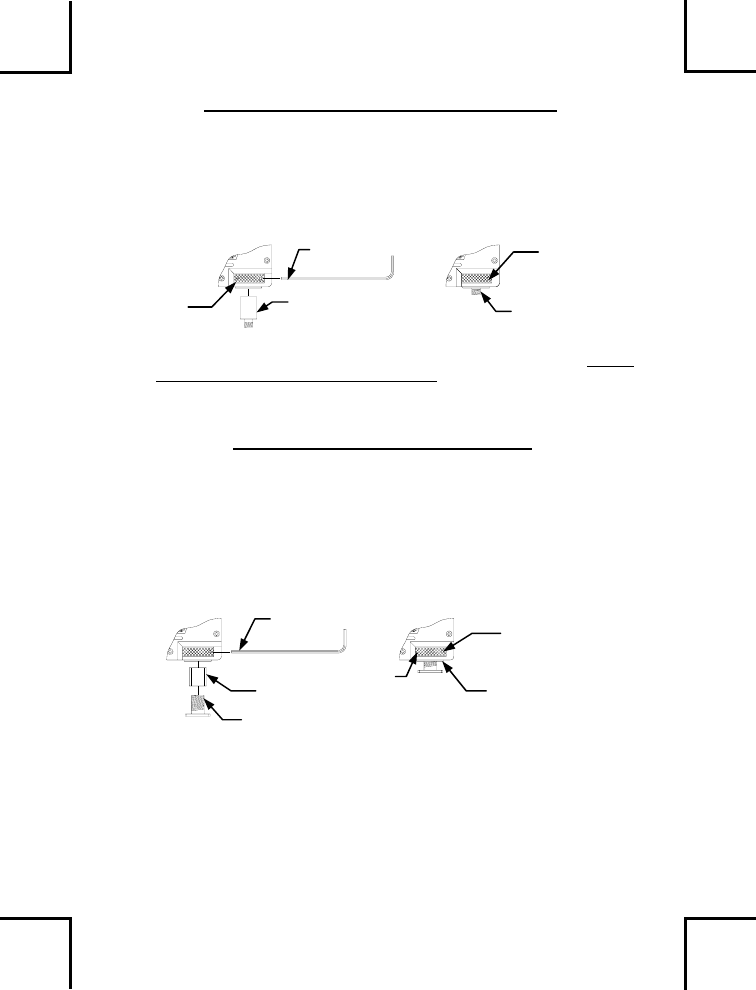
5/64 Hex Wrench
Shoe Sleeve
Shoe Mount
Thumbwheel
Set Screw
Be sure the Shoe Sleeve is
completely inside the light,
otherwise the light may
swing back & forth.
¼-20 STUD MOUNT APPLICATION
The Ultralight 2 is shipped standard with ¼-20 Stud Mount for attaching to the camera handle. To
remove/install a ¼-20 Stud Mount, follow these instructions.
1. With the supplied 5/64 hex wrench, loosen the set screw located in the thumbwheel.
2. Install a ¼-20 Stud Mount into the bottom of the thumbwheel. (Insert stud as far into light as
possible).
3. Tighten the set screw in the thumbwheel.
NOTE: In order for the ¼-20 Stud Mount to completely tighten down on the camera, the Stud
Mount must be fully inserted into the thumbwheel. Otherwise, the UL2 may swing back
and forth.
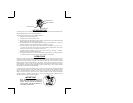
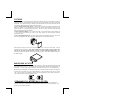
SHOE MOUNT APPLICATION
Certain lighting applications need a “Shoe Mount” to secure the light to the camera. Most JVC and
PANASONIC cameras will use this Shoe Mount.
For installation of Shoe Mount:
1. Remove existing Stud Mount from the Ultralight 2 base. (See previous page.)
2. Insert Shoe Sleeve into thumbwheel, pushing it as far into the thumbwheel as possible.
3. Using 5/64 Hex Wrench, tighten down the Shoe Sleeve.
4. Screw Shoe Mount into Shoe Sleeve about half way.
5. Slide the Shoe Mount onto the camera handle and then tighten down via the thumbwheel.
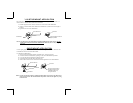
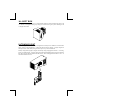
5/64 Hex Wrench
Thumbwheel
Stud Mount
Insert Stud Mount as far into
light as possible.
Set Screw
NOTE: In order for the Shoe Mount to completely tighten down on the camera, the Shoe Sleeve
must be inserted as far into the thumbwheel as possible. Otherwise, the light may swing
back and forth.