


Transferring images to your Macintosh with QuickTake Image Access
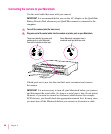
Before you can transfer images from the camera, it must be connected to your
Macintosh. For instructions, see “Connecting the Camera to Your Macintosh,”
earlier in this chapter.
IMPORTANT
Batteries can be quickly depleted while images are viewed or
transferred from the camera. To conserve battery power, it is recommended
that you use the QuickTake AC Adapter or Battery Booster Pack whenever
your QuickTake camera is connected to the computer.
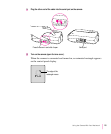
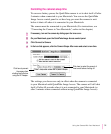
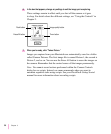
1 If the camera is off, turn it on by sliding open the lens cover.
When the camera is turned on and the serial connector is plugged in, an
animated rectangle appears on the camera’s control panel display.
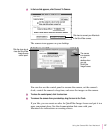
2 On your Macintosh, open the QuickTake Image Access control panel.
3 In the box that appears, click Connect To Camera.
The QuickTake Camera icon appears on your desktop.
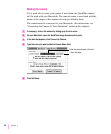
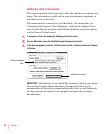
4 Drag the camera icon to your hard disk or to the folder in which you want to store
your images.
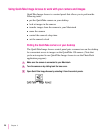
If you only want to transfer certain images from the camera, double-click the
camera icon to open it, then drag the individual image files to your hard disk.
You can use these images to create a catalog of PhotoFlash images (refer to
the PhotoFlash Getting Started manual for instructions on creating a catalog).
If you want to erase the images from the camera, use the Erase All button.
(See “Erasing Images From the Camera,” later in this chapter.)
29
Using the Camera With Your Macintosh