B. PhotoPrinter
Click Start-Programs-Digital Camera Suite, double click on the PhotoPrinter.
Select the Get Photos icon.
Select the Camera icon.
Select the source : Digital Camera. Click OK.
It will appear the dialog panel.
Uplaod any or all photos to a new template in the PhotoPrinter.
C. PhotoFantasy
Click Start-Programs-Digital Camera Suite, double click on the PhotoFantasy.
Select the Get Fantasy icon. It will show the photos stored in the templates.
Select one of them and click OK.
Then select the Get Photo icon (#1).
Select the Camera icon.
It will appear the dialog panel.
Upload any or all photos to a new template in the PhotoFantasy.
**There is the help file for each Arcsoft program. Click the Help or the ? icon to read it if you have problems to use
the software.
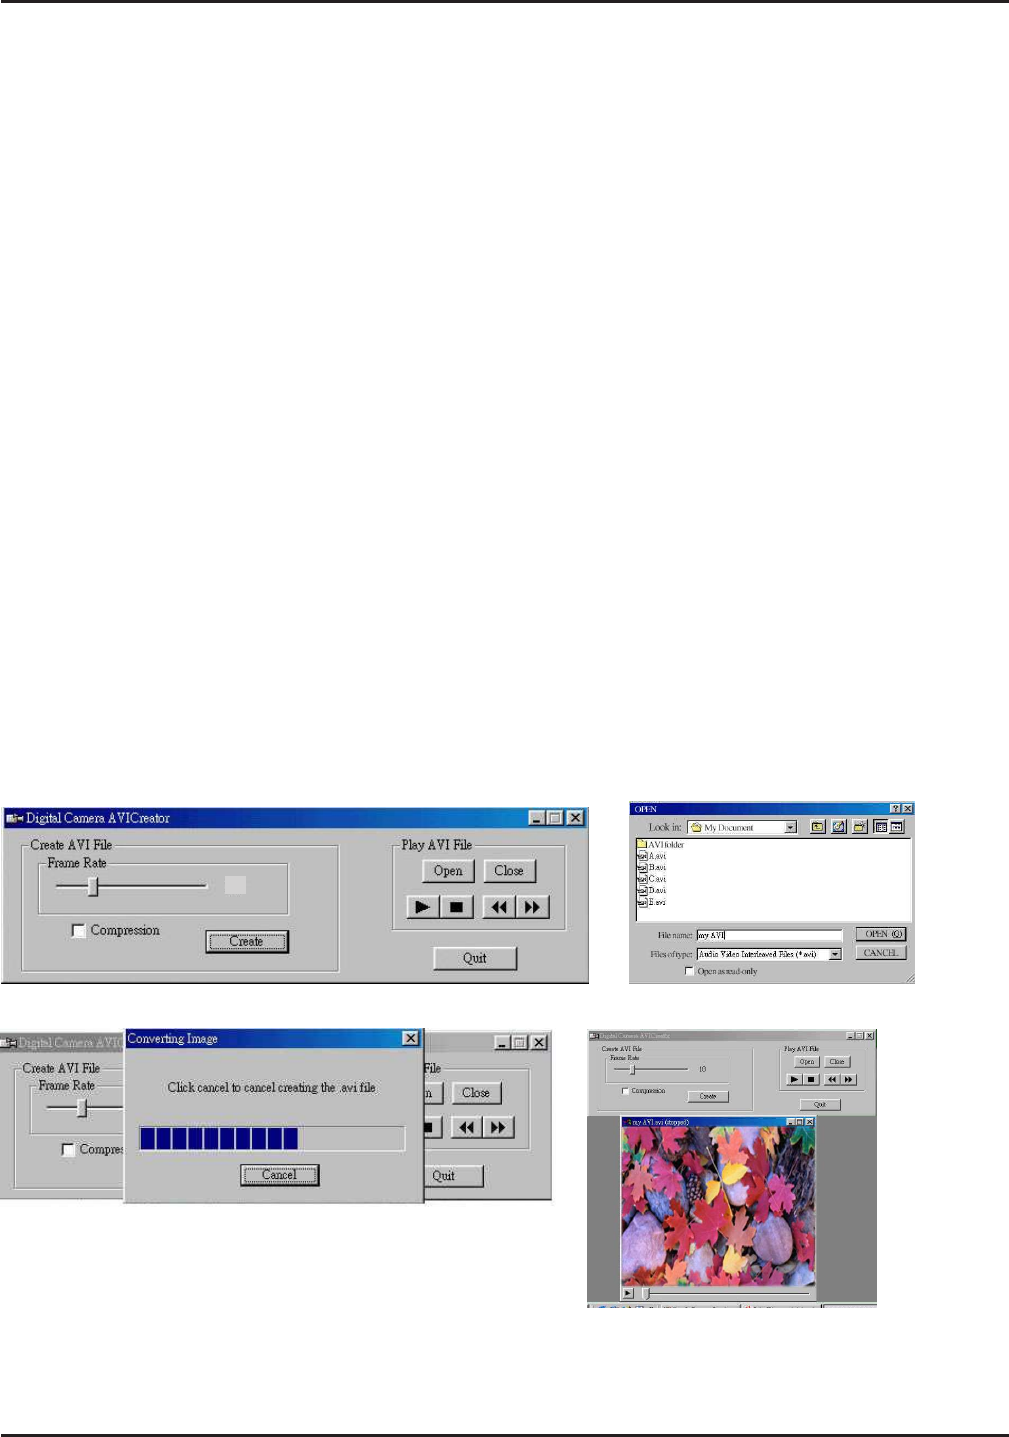
How to play AVI Creator
It is recommended to use the Low resolution mode(QVGA size, 320 x 240) to take 107 photos.
Press the Mode button once, it will show Ct. Press and hold the shutter and pointed to the object. The film counter
is counting down and beep beep sound is heard. Until it counts to 00, you can release the shutter button. Connect
the camera to the PC with the USB cord.
Select Start-Programs-Digital Camera Suite, double click on the AVICreator.
Double click the Create icon. Enter the filename you want.
Press the ‘Enter’ key to start making the AVI video file.
Wait until the first frame is appeared. Click on the play icon to start movie playback.
• It will take very long time to make the AVI video if you use RS232 port. Please use the USB port.
• The file size of such AVI video is very large (24MB for 15s playback of CIF size video). It is recommended to use
Compression. Tick the box beside the Compression icon. This will reduce the size to 6MB.
Open AVICreator
Input the filename
Create
Ready to play
Digital Camera User Guide
7
21


