


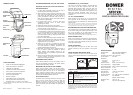
NOMENCLATURE
FLASH FEATURES
• Guide No: 28m/92ft (ISO100@50mm)
• Flash ready indicator in viewfinder
• Full Digital TTL dedication
• Autofocus Infra-Red Assistance beam
• Zoom, bounce and swivel construction
• Automatic shutter speed setting
• Auto check (OK) indicator
• Red eye reduction*
• Second/Rear curtain synchronization*
• Slow synchronization (For Nikon only)
• Dedication: ETTL I / II (Canon), iTTL (Nikon)
* Camera dependent features. Please check your camera operating
instruction manual
PLEASE READ BEFORE YOU USE THE FLASH
IMPORTANT NOTES FOR FLASH PHOTOGRAPHY
AND MAINTAINANCE
1. For best flash photography results, set your ISO to
200 and above in both indoor and outdoor.
2. After each picture, wait for at least 4-5 seconds for the
flash to be fully charged before taking the next shot
even though the ready light is on. This w
ill help to
prolong the lifespan of the flash tube as well as to
attain the full charging capacity of the flash capacitor
for precise flash photography.
3. For precise flash output, it is best to wait till an
intermittent humming sound is heard before
depressing the shutter.
4. Maintain at least 2m away from your subject.
5. Always set the flash zoom head position according to
the zoom position of your camera lens.
6. In the event that the flash exposure is incorrect (over
or under exposed or green auto check light does not lit
up), you may take either one or more of the corrective
action: (1) move closer to the subject (2) Re-adjust
your bounce/swivel angle (3) Adjust flash zoom head
(4) Increase ISO setting.
7. Bounce or swivel should only be used on lighter colour
ceiling or white walls with zoom head set at the 50mm
position. Note that w
hen using this feature, 2-3 f/stop
of light will be lost due to reflection.
8. Always use a fresh set of 4 batteries of the same
brand and type when old batteries are depleted. Mix
and match batteries of different types/brands will
greatly deteriorate flash performance.
9. When flash is not being used for extended period of
time (>2 weeks), remove all batteries to prevent
battery leakage. After batteries removal, do not
expose the flash unit and batteries to excessive heat
such as fire or sun.
10. Charge up and test fire the flash unit at least once per
month to maintain the optimal performance of the
flash tube and charging capacitor.
BATTERIES INSTALLATION
Ensure that the ON/OFF is in the OFF position. Insert 4
new AA size batteries according to the battery polarity
indicated inside the battery chamber.
MOUNTING THE FLASH ON THE CAMERA
Ensure that the On/OFF switch is at the OFF position.
Slide the flash hotshoe base onto the camera’s
hot shoe
contact and fasten the lock ring in an anti-clockwise
motion. Slide the ON/OFF Switch to the ON position.
When the Ready Light lights up, the flash is ready to fire.
Pressing the Test Button will test fire the unit.
AUTO CHECK LIGHT
The Green Auto Check Light located on the back of the
flash is used to confirm that your subject is within the
effective TTL range of the flash unit. If your subject is
within the effective TTL flash range after shooting, the
green Auto Check Light will illuminate for approximate 2
seconds
PROGRAM TTL (P) / AUTO MODE
This flash unit provides automatic Through-The-Lens
(TTL) control of the flash exposure when used with
dedicated digital cameras. When using this mode, the
flash unit will automatically emit the flash output for a
balance illumination of the subject and background. The
inbuilt AF infra-red assistance beam will turn on
automatically to assist the camera to focus in low lighting
conditions.
TTL AV, TV AND M MODE
When this flash unit is used
in AV, TV or M mode, the
flash exposure will be automatically controlled by the
camera based on the combination of shutter speed and
aperture value.
*For TV mode, do not exceed the maximum camera’s flash synchronization
speed. In AV mode, setting at a slow speed will usually result in blur pictures
caused by handshake. In such situation, the use of tripod is recommended.
SECOND/REAR CURTAIN SYNCHRONIZATION
This mode permits you to release the flash just before the
shutter closes during slow shutter speed shooting. In this
way, a trail of lighting can be taken behind the main
subject when slow shutter speed is being used.
*For rear curtain synchronization setting, refer to your camera instruction manual.
RED EYE REDUCTION
When red eye reduction is activated on the DSLR body,
the flash unit will activate a series of preflash before the
main flash to reduce the possibility of red-eye occurrence
during digital photography.
USING ZOOM HEAD
For proper angle coverage, set the flash zoom head
position according to the zoom position of the camera
lens.
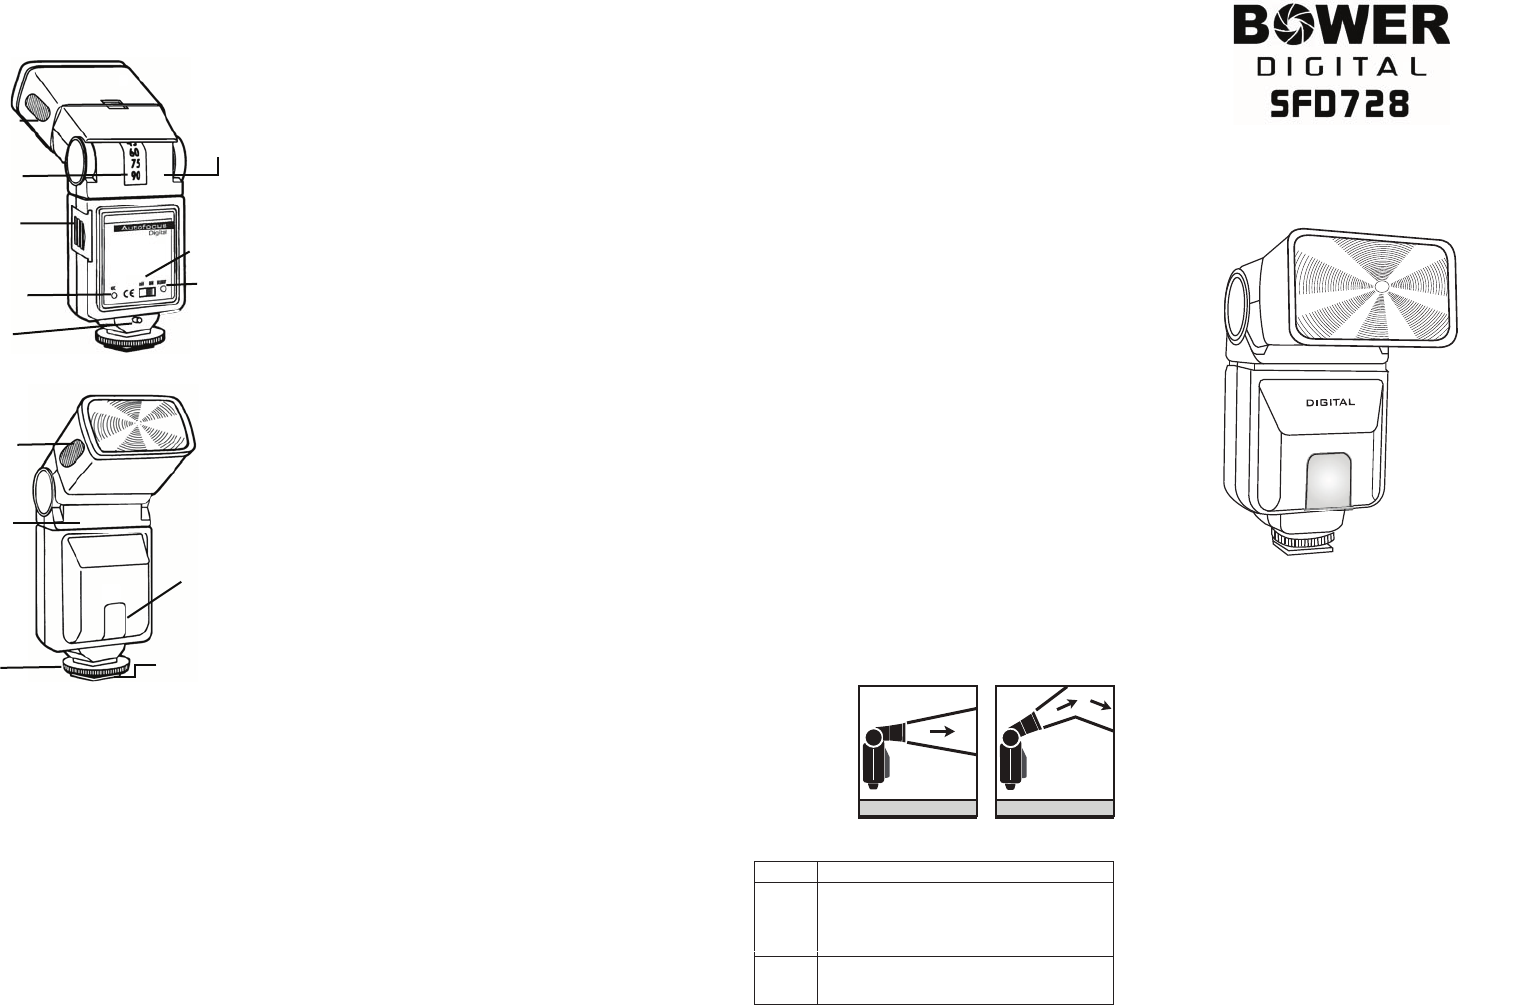
USING BOUNCE AND SWIVEL HEAD
Various combination of bounce and swivel angle can be
used to cut off unwanted shadow or for special soft effect
purposes.
CAMERA COMPATIBILITY CHART:
Type Model
Canon
(AFC)
Powershot Models:
G1, G2, G3, G5, G6, G7, G9,G10, S5 IS, Pro 1
EOS Models:
5D, 5D MKII, 20D, 30D, 40D, 50D, 300D, 350D
400D, 450D, 1000D
Nikon
(AFN)
Coolpix 8400, 8800
D40, D40x, D50, D70, D70s, D80, D200, D2xs
D2Hs, D2x, D2H
READY LIGHT
SWIVEL PIVOT
ON/OFF SWITCH
AUTO FOCUS TTL
DIGITAL DEDICATED FLASH
4 POSITION
ZOOM SHROUD
BATTERY
COMPARTMENT
BOUNCE ANGLE
SCALE
AUTO CHECK
LIGHT
TEST BUTTON
FLASH HEAD
BOUNCE HEAD
BASE
AF ILLUMINATOR
SPECIFICATIONS:
Guide Number: 28m / 92ft (ISO 100@50mm)
Circuitry: IGBT and series circuitry
HOTSHOE BASE
LOCK RING
Automatic TTL Range: 14m / 46ft (F2.0)
AF Illumination: 8m / 26ft
Dedication:
- For Canon E-TTL/E-TTL II
- For Nikon iTTL
Exposure check: Green Auto Check Light
Color Temperature: Daylight 5600K
Zoom Head Position: 28mm to 85mm (35mm equiv)
Bounce Adjustment: 0 ~ 90°
Horizontal Swivel: 0 ~ 330°
Flash Duration: 1/700 sec. (Full power)
Recycling Time: 0.5 ~7 sec.
Number of flashes: 100 – 300 per set of new batteries
Power Source: 4 AA Batteries
(Alkaline, NiCd or NiMH)
Dimension (mm): 168 × 48 × 76
Weight: 221 grams (w/o batteries)
Printed in Singapore (PK6528-12 REV02 11/05/07)
Due to the rapid introduction of new digital cameras, the above
compatibility list may not be updated to indicate the respective new
models at the time of printing. Nevertheless, the flash unit is still
compatible with new camera
models that utilize the latest digital
dedication system.
DIRECT FLASH INDIRECT FLASH