


38
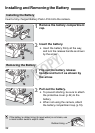
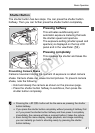
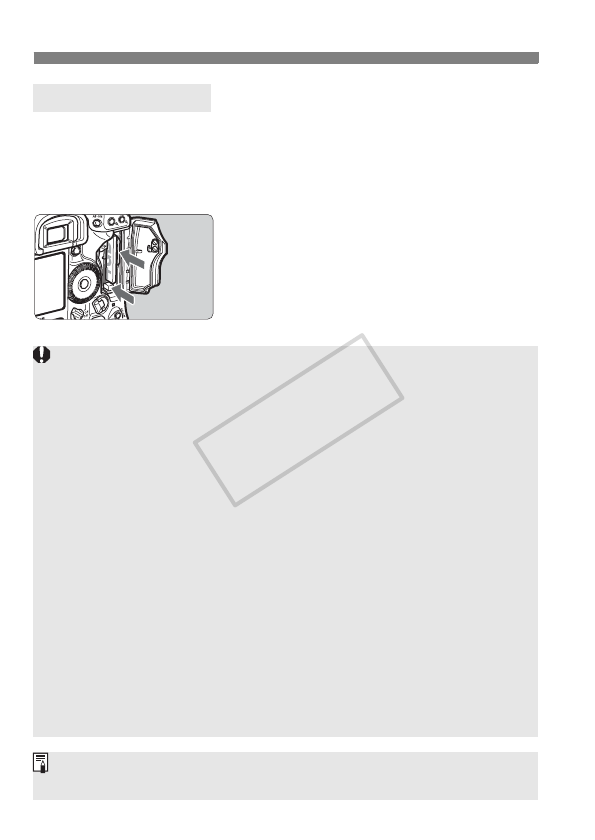
Installing and Removing the Card
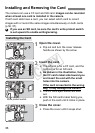
1
Open the cover.
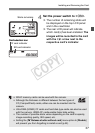
Set the power switch to <2>.
Make sure the access lamp is off,
then open the cover.
2
Remove the card.
To remove the CF card, push the
eject button.
To remove the SD card, push it in
gently and release it. Then pull it out.
Close the cover.
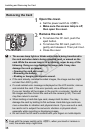
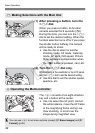
Removing the Card
The access lamp lights or blinks while data is being transferred to
the card and when data is being recorded, read, or erased on the
card. While the access lamp is lit or blinking, never do any of the
following. Doing so may damage the image data. It may also
damage the card or camera.
• Opening the card slot cover.
• Removing the battery.
• Shaking or banging the camera around.
If the card already contains recorded images, the image number might
not start from 0001 (p.88).
If a card-related error message is displayed on the LCD monitor, remove
and reinstall the card. If the error persists, use a different card.
If you can transfer all the images in the card to a computer, transfer all
the images and then format the card with the camera (p.50). The card
may then return to normal.
When holding a hard disk-type card, always hold its sides. You may
damage the card by holding its flat surfaces. Hard disk-type cards are
more vulnerable to vibration and physical shock. If you use such a card,
be careful not to subject the camera to vibration or physical shock
especially while recording or displaying images.
Do not touch the SD card’s contacts with your fingers or metal objects.
Even with the power switch set to <2>, when you insert or remove a
card, the access lamp might blink.
COPY