24
System Installation Example
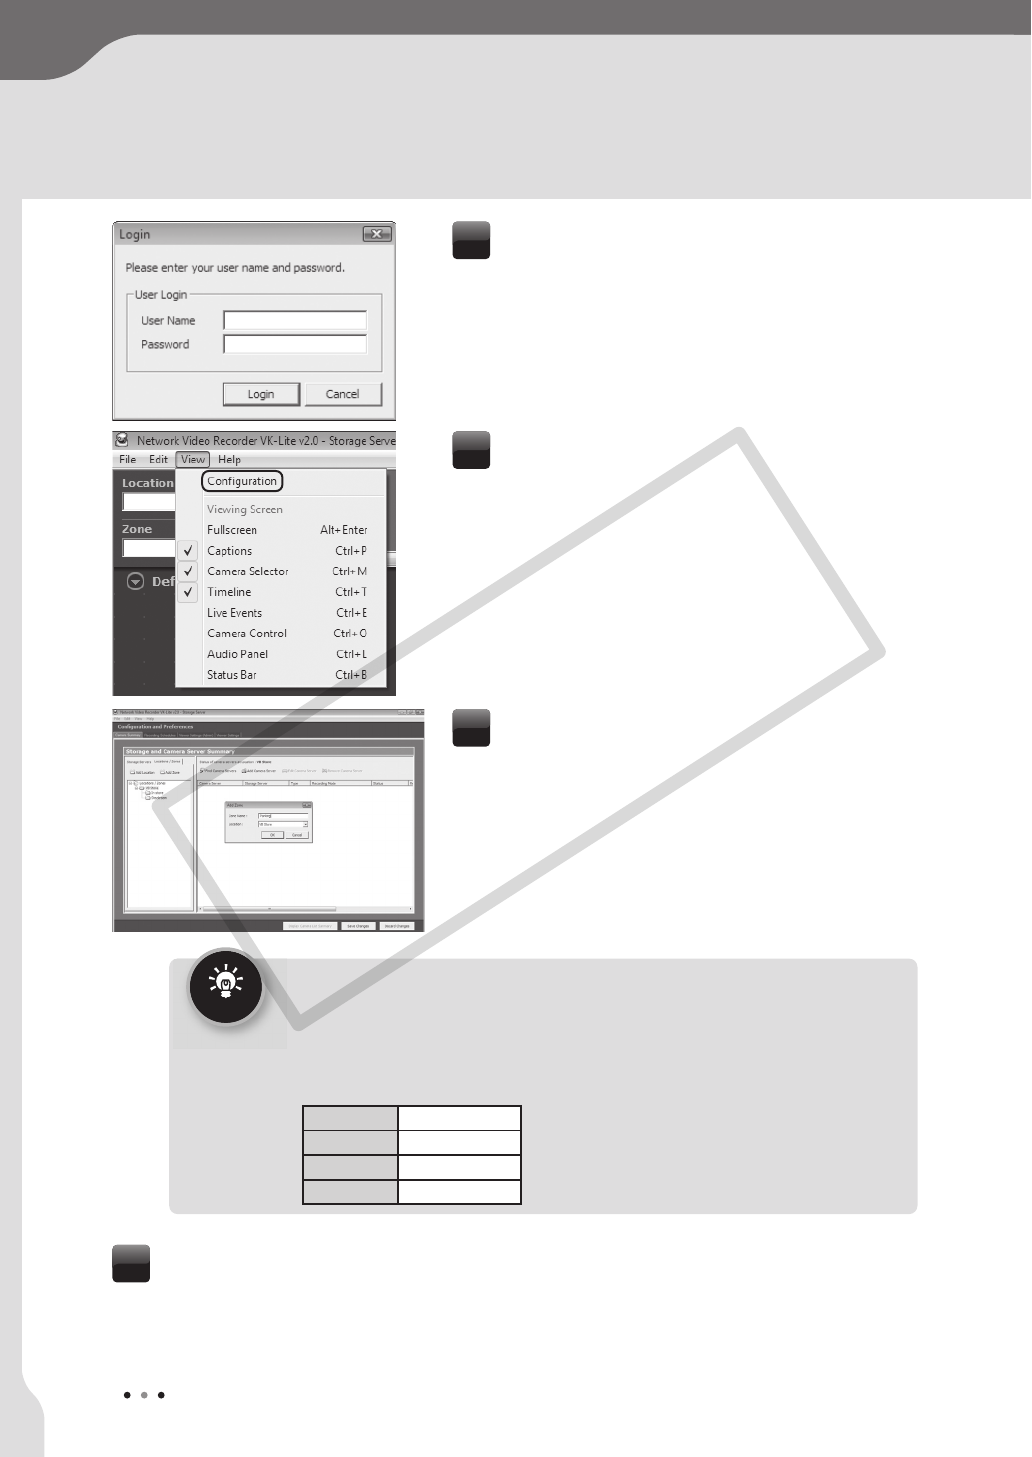
Enter the “User Name” and “Password”, and
click Login.
The Viewer Screen is displayed.
3
Select View / Configuration from the menu.
The Configuration and Preferences screen is
displayed.
4
Click the Locations/Zones tab to create
locations and zones.
5
Tip
● You can set location names to identify each monitoring site, for example
“Office Building”, “Store”, etc.
●
You can set zone names for particular places in each Location, such as
“Entrance”, “Elevator Lobby”, “Inside Store”, “Stock Room”, “Parking Lot”, etc.
● The following example shows a location name and zone names used for a small
retail (Only one Location is set, on the assumption that there is one branch only).
Location VB Store
Zone 1 Inside Store
Zone 2 Stock Room
Zone 3 Parking Lot
Click Find Camera Servers.
Camera servers that can be registered are displayed in the Search Results dialog
box.
6
COPY


