


CHAPTER
2-1
Cisco Video Surveillance 5010/5011 Indoor Fixed HD IP Dome Camera User Guide
OL-22669-02
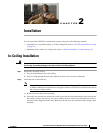
2
Installation
You can install the 5010/5011 network dome camera using one of the following methods:
• Installation in a suspended ceiling or a fixed ceiling/wall (refer to “In-Ceiling Installation” section
on page 2-1).
• Mounting to the surface of a ceiling/ wall (refer to “Surface Installation” section on page 2-4).
In-Ceiling Installation
Warning
Remove the foam insert from the back box before installing the system. The foam is inserted to secure
the tilt ring; preventing damage to the optical chassis during shipment.
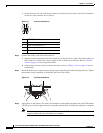
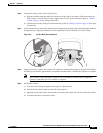
Step 1 Prepare the mounting surface:
a. Cut a 6-inch diameter hole in the ceiling.
b. Pull all wiring through the hole and terminate all wires (if not already terminated).
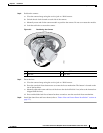
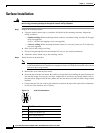
Step 2 Install the lens on the back box:
Note Megapixel lenses are designed and tested to deliver optimal image quality to megapixel cameras.
A
standard definition lens installed on a megapixel camera will limit the resolution of the camera
and create poor image quality.
a. Remove the cover from the lens mount.
b. Screw the lens onto the lens mount. Be careful to prevent dust from entering the space between the
lens and the imager. If necessary, use clean, compressed air to remove any foreign matter (refer to
the instructions shipped with the lens). Make sure the lens does not touch the camera imager when
installed.