


3-7
Cisco Video Surveillance 5010/5011 Indoor Fixed HD IP Dome Camera User Guide
OL-22669-02
Chapter 3 Operation
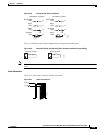
System Tab
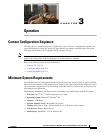
Accessing the Camera Menus
Step 1 Log on to the camera.
Step 2 Click the Settings link in the navigation bar located in the upper-right corner of the page; a list of menu
tabs appears.
Step 3 Place the mouse pointer over a tab to display a list of submenus.
Refer to the following sections for more information:
• System Tab, page 3-7
• Network Tab, page 3-9
• Turning On Window Blanking, page 3-24
• Events Tab, page 3-35
System Tab
Use the System tab to change the device name, configure the time settings, set up the text overlay for
the live view, and display system information. You can also use the System tab to generate a system log,
reboot the camera, or to restore the camera's factory default settings.
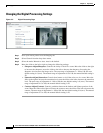
General Settings
The General Settings page includes programmable fields for the device name, time server, and text
overlay settings. The device name is the user-friendly description of the camera displayed in the gray
area near the top of screen. The time server is an external server that uses Network Time Protocol (NTP)
to synchronize the camera date and time settings. The text overlay settings allow you to customize the
appearance of the Web browser by displaying the device name and the date and time at the top or bottom
of the live view.
You can also use the General Settings page to turn the camera’s power LED on or off and to configure
the Simple Mail Transfer Protocol (SMTP) server to send an email notification when an event handler
is activated.
Note Consult your network administrator for information on configuring email notification on your local
network.
Information Settings
The System Information page fields are read-only and include the firmware version, hardware version,
model number, and serial number of the system.
Changing the Device Name
Step 1 Click the System tab.