


42-9
User Guide for Cisco Security Manager 4.4
OL-28826-01
Chapter 42 Configuring Attack Response Controller for Blocking and Rate Limiting
Blocking Page
Field Reference
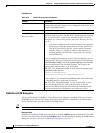
Table 42-1 IPS Blocking Policy
Element Description
General tab The basic settings required to enable blocking and rate limiting. For
information about the options on the General tab, see General Tab, IPS
Blocking Policy, page 42-10.
User Profiles tab The connection credential information profiles for logging into the
blocking devices. Before you define a blocking device, create the user
profile required to log into the device. The table shows the profile
name, username, and the passwords, which are masked with a fixed
number of asterisks.
• To add a profile, click the Add Row button and fill in the Add User
Profile dialog box (see User Profile Dialog Box, page 42-12).
• To edit a profile, select it and click the Edit Row button.
• To delete a profile, select it and click the Delete Row button.
Before you delete a profile, ensure that it is not currently being
used by a blocking device.
Master Blocking Sensors tab The master blocking IPS sensors (see Understanding the Master
Blocking Sensor, page 42-6). A master blocking sensor manages blocks
for other IPS devices. The table shows the IP address (or network/host
object) of the master blocking sensor, the username and password for
logging into it, the port used for connections, and whether TLS is used
for login.
• To add a master blocking sensor, click the Add Row button and fill
in the Add Master Blocking Sensor dialog box (see Master
Blocking Sensor Dialog Box, page 42-13).
• To edit a master blocking sensor, select it and click the Edit Row
button.
• To delete a master blocking sensor, select it and click the Delete
Row button.
Router tab The IOS routers and Catalyst 6500/7600 devices (that are running IOS
Software) to be used as blocking or rate limiting devices. The table
shows the IP address (or network/host object) of the device, the
communication method used to log into it, the NAT address of the
sensor (0.0.0.0 if NAT is not used), the name of the profile that is used
for logging into the device, and the device’s response capabilities
(blocking, rate limiting, or both).
• To add a router, click the Add Row button and fill in the Add
Router Device dialog box (see Router, Firewall, Cat6K Device
Dialog Box, page 42-14).
• To edit a router, select it and click the Edit Row button.
• To delete a router, select it and click the Delete Row button.