8-51
User Guide for Cisco Secure Access Control System 5.3
OL-24201-01
Chapter 8 Managing Users and Identity Stores
Managing External Identity Stores
The External User Groups dialog box appears displaying a list of AD groups in the domain, as well as
other trusted domains in the same forest.
If you have more groups that are not displayed, use the search filter to refine your search and click Go.
Step 3 Enter the AD groups or select them from the list, then click OK.
To remove an AD group from the list, click an AD group, then click Deselect.
Step 4 Click:
• Save Changes to save the configuration.
• Discard Changes to discard all changes.
• If AD is already configured and you want to delete it, click Clear Configuration after you verify
that there are no policy rules that use custom conditions based on the AD dictionary.
Note It is not recommended to use domain local groups in ACS policies. The reason is that the membership
evaluation in domain local groups can be time consuming. So, by default, the domain local groups are
not evaluated. Therefore, if you install patch 3 or later, ACS 5.3 does not retrieve domain local groups.
Note When configuring the AD Identity Store on ACS 5.x, the security groups defined on Active Directory
are enumerated and can be used, but distribution groups are not shown. Active Directory Distribution
groups are not security-enabled and can only be used with e-mail applications to send e-mail to
collections of users. Please refer to Microsoft documentation for more information on distribution
groups.
Note Logon authentication may fail on Active Directory when ACS tries to authenticate Users who belong to
more than 1015 groups in external identity stores. This is due to the Local Security Authentication (LSA)
limitations in Active Directory.
Configuring AD Attributes
Use this page to select attributes that can then be available for policy conditions.
Step 1 Select Users and Identity Stores > External Identity Stores > Active Directory, then click the
Directory Attributes tab.
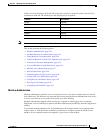
Step 2 Complete the fields in the Active Directory: Attributes page as described in Table 8-11:


