


3-17
Cisco IPICS Server Installation Guide
OL-8155-01
Chapter 3 Upgrading Cisco IPICS
Performing the Upgrade from a Downloaded File
Performing the Upgrade from a Remote Location
Cisco IPICS allows you to perform an upgrade remotely, using the SSH Tectia
Client on a PC. This upgrade process includes all of the steps that you would
follow if you performed the procedure at the server. However, this procedure
displays all of your instructions in text, rather than in the graphic format of the
installer utility.
The procedure in this section assumes that you have transferred the upgrade file
to the Cisco IPICS server. If you have not completed the download and transfer,
see the “Transferring the Upgrade File to the Server” section on page 3-10
Note Before you begin the upgrade procedure, back up your data and log files. For more
information, refer to the Cisco IPICS Backup and Restore Guide.
To perform the upgrade from a network PC, perform the following procedure:
Procedure
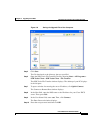
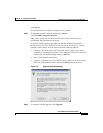
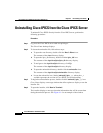
Step 1 From a PC, click Start > All Programs > SSH Tectia Client > Secure Tectia
Client.
The SSH Tectia Client displays.
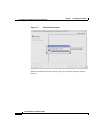
Step 2 Click Quick Connect on the button bar.
The Connect to Remote Host window displays.
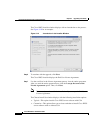
Step 3 In the Host field, enter into the DNS name or the IP address for your Cisco IPICS
server. Then, press Tab.
Step 4 In the User Name field, enter root. Then, click Connect.
The Enter Password window displays.
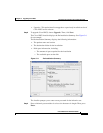
Step 5 Enter the root password and then click OK.
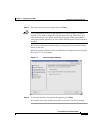
An SSH Tectia Client window displays.
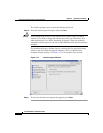
Step 6 To view the upgrade file, type the following command and then press Enter:
[root] #ls -l
The contents of the root directory display in the window.
Step 7 To begin the upgrade, type the following command and then press Enter: