


2-53
Cisco IPICS Server Installation Guide
OL-8155-01
Chapter 2 Installing the Cisco IPICS Server Software
Preparing to Use Cisco IPICS
b. Open a terminal window to enter commands. To do so, open the Red Hat
menu on the Cisco Linux desktop by clicking the Red Hat icon and choosing
System Tools > Terminal.
A terminal window displays.
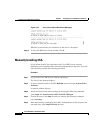
c. To view the MAC address for your hardware, enter the following command:
[root] #ifconfig -a
Information displays about the network interface cards.
d. Locate the eth0 heading and note the HWaddr field. This is the MAC address
for the server.
e. To log out of the server, enter Exit at the command line and press Enter.
f. To close the terminal window, click X.
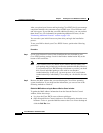
Step 3 Access Cisco.com using one of the following URLs:
• If you are a registered user of Cisco.com, use this URL:
http://www.cisco.com/go/license
• If you are not a registered user of Cisco.com, use this URL:
http://www.cisco.com/go/license/public
After you process your license order at Cisco.com, Cisco sends you an e-mail with
the license file as an attachment.
Note Cisco IPICS does not support the edit or modification of the license file
name or file contents in any capacity. If you change or overwrite the
license file name, you may invalidate your license and cause the system
to operate incorrectly.
Step 4 Use the attached license file to upload licenses to Cisco IPICS after you finish the
installation.
If you processed several separate Product Authorization Keys, then you would
receive several e-mail responses with a license file attached to each. When you
upload these files, Cisco IPICS adds the licenses from each file and monitors your
system activity according to the total number.