


Chapter 3 Upgrading Cisco IPICS
Performing the Upgrade from a CD
3-2
Cisco IPICS Server Installation Guide
OL-8155-01
Performing the Upgrade from a CD
When Cisco provides an upgrade to Cisco IPICS, you may receive a CD so that
you can perform the upgrade in a similar manner to the way that you performed
the original Cisco IPICS installation.
Note Before you begin the upgrade procedure, back up your data and log files. For more
information, refer to the Cisco IPICS Backup and Restore Guide.
To upgrade Cisco IPICS from a CD, perform the following procedure:
Procedure
Step 1 To log in to the Cisco Linux operating system on the Cisco IPICS server, enter
root in the Username field of the Login window and press Enter.
Cisco Linux displays a window with a password field.
Step 2 Enter your root password and press Enter.
The Cisco Linux desktop displays.
Step 3 Back up your data and log files. For more information, refer to the
Cisco IPICS Backup and Restore Guide.
Step 4 Insert the Cisco IPICS installation CD into the Cisco MCS disk drive.
If you did not install CSA, or if CSA is not running on the Cisco IPICS server,
continue to Step 6.
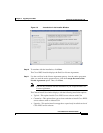
If you installed CSA, a window displays a message about the removable media
you placed in the disk drive and allows you to continue or terminate the mounting
of the CD.
Step 5 To continue with the upgrade, click the Yes radio button and then click Apply.
Note You must click Yes and Apply before the time limit of the window expires
or CSA will terminate the application by default.
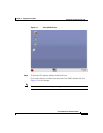
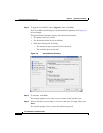
The Cisco IPICS CD icon displays on the desktop. See Figure 3-1 for an example.