


Chapter 3 Upgrading Cisco IPICS
Performing the Upgrade from a Downloaded File
3-12
Cisco IPICS Server Installation Guide
OL-8155-01
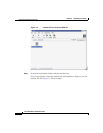
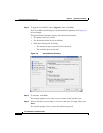
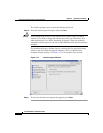
The SSH Tectia File Transfer Client connects to the Cisco IPICS server and
displays the contents of the root directory in the right pane of the window.
Step 11 In the left pane of the window, navigate to the directory on your PC to which you
saved the upgrade file.
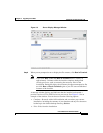
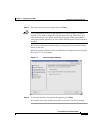
Step 12 To initiate the copy procedure, drag the upgrade file from the left pane of the
window to the right pane.
A progress window displays while the file copies to the server. When the copy
completes, the upgrade file displays in the right pane.
Step 13 To close the SSH Tectia File Transfer Client, click X.
Performing the Upgrade at the Server
When you perform the upgrade directly from the server, you use a Cisco Linux
terminal window. The procedure in this section assumes that you have transferred
the upgrade file to the root directory of the Cisco IPICS server. If you have not
already performed this step, see the “Transferring the Upgrade File to the Server”
section on page 3-10.
Note Before you begin the upgrade procedure, back up your data and log files. For more
information, refer to the Cisco IPICS Backup and Restore Guide.
To perform the upgrade at the Cisco IPICS server, perform the following
procedure:
Procedure
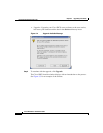
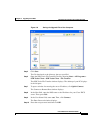
Step 1 Log in to the Cisco IPICS server with root privileges.
The Cisco Linux desktop displays.
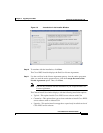
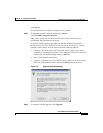
Step 2 To open a terminal window, click the Red Hat menu and choose System Tools >
Terminal
A terminal window displays.
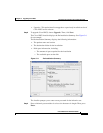
Step 3 To view the upgrade file, type the following command and then press Enter: