


How to Obtain Factory Service
Limited 2 Years Warranty
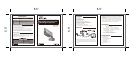
Model # RD135H
(562)282-5700
Check the AC outlet , AC Adapter and turn the power switch ON
Connect the Yellow-Plug to the Monitor or TV correctly
Remove strong spotlight in the field of view
Please adjust brightness level of your Monitor or TV properly
Please adjust V-Hold level of your Monitor or TV properly
• KEY FEATURES
• INSTALLATION
8.5”
5.5”
8.5”
5.5”
• SPECIFICATIONS
• PACKAGE INCLUDES
(Indoor/Outdoor Use)
Wall
Outlet
Wall
Outlet
VIDEO IN
LOOP OUT V - OUT2
V - OUT1 A - IN
A - OUT
CH1 CH2 CH3 CH4
ETHERNET
POWER
AC INPUT
AC100-240V, 50/60Hz
MODEL NO : DVR4170
AC100-240V, 50/60Hz,25W
CLOVER ELECTRONICS
13073 EAST 166TH STREET, CERRITOS CA 90703
Factory ID/DHHS CODE : BC
ALARM IN ALARM OUT
GND
RS485
+ -
®
US LITED
E233232
AUDIO VIDEO EQUIPMENT 2UW2
ATTENTION
NE PAS ENLEVER
RISQUE DE CHOC ELECTROIQUE
DO NOT OPEN
RISK OF ELECTRONIC SHOCK
CAUTION
Rear View
Monitor
REAR VIEW
VIDEO AUDIO
OUT IN
IN
OUT
CH1 CH2 S-VHS CH1 CH2 S-VHS
Adapter
(Not Included)
(Not Included)
Camera
60’
Power Adapter
(Not Included)
Yellow (Video)
Red (DC jack)
Black
High Resolution Color CCD Cameras
with IR LED Lights for Night Vision
1. Attach the mounting bracket to the desired location on the wall or
ceiling, wherever you want to install the camera. Locate a wall stud
or ceiling joist and secure the mounting bracket using the supplied
screws.
Troubleshooting
If the unit does not function properly, check the following points before contacting the service center.
NO Power
NO Picture
Picture flickering
Dim picture, too bright/dark
Rolling or jumping Picture
1. Original Purchaser must fill out a warranty card and mail it to Clover Electronics USA with mode number,
serial number and date of purchase
2. Please pack the products carefully and securely by using the original packing materials, and send it
prepaid and insured to: 13073E. 166th St. Cerritos, CA 90703.
Please include a note stating how the unit is defective.
3. If the unit is returned with in the warranty period, please include a proof of purchase and check for $15.00
to cover the cost of return postage and handling.
If the unit is out of warranty, please include a check for $15.00 to cover the cost of return postage and
handling, you will receive an estimate of the repair cost for your approval before repair work will be started.
4. Clover will repair or replace and return the products to the owner under this limited warranty.
This warranty gives the original purchaser specific legal rights and you may also have rights, which may
vary from state to state.
If our products do not function because of any defect in material or workmanship, we will repair it for free
for 2 years on parts and labor from the date of original purchase.
This warranty does not cover modification, abuse, incidental or consequential damages unless the state of
owner's residence specially prohibits limitation on incidental or consequential damages.
• CA060 60'6 Pin DIN Extension Cable
• CA100 100'6 Pin DIN Extension Cable
• CA300 300'6 Pin DIN Extension Cable
• CN020 6pin Din Coupler for Extension Cables
• TLV1280A 960 hrs Time Lapse VCR
• CDR4450 4Ch Stand-alone DVR
• CDR4460 4Ch Stand-alone DVR
• CDR0850 8Ch Stand-alone DVR
• CDR0860 8Ch Stand-alone DVR
• CDR1650 16Ch Stand-alone DVR
• CDR1660 16Ch Stand-alone DVR
• Easy to Install
• Weather Resistant
• Rugged Steel Construction
• Universal Mounting Bracket
• Resolution 420 TV Lines
• Sun Visor Hood to Shield from Direct Sunlight
• High Resolution for Viewing High Quality Images
• Built-in Water Proof Microphone for Indoor / Outdoor Use
• IR LED Lights for Night Vision
• 60ft Cables (BNC) & A/C Adapter Included
• Connect the Cameras to Any DVR Systems or a monitor/TV.
r
o
t
i
n
oM
(Not Included)
2. Connect the one end (6pin Din) of 60’ cable (1) to the 2’ breakout
cable. Make sure that two arrows on the top of them should be aimed
at each other.
3. Connect the BNC (yellow) on the end of 60’ cable (2) to the one out of
video inputs on the rear of DVR or a monitor/TV and DC jack (red) to
(3) AC adapter (ADT120500R). Plug the provided AC adapter
(ADT120500R) to AC outlet: refer to the illustration above.
Image Sensor
Video System
Resolution
Shutter Speed Control
Camera Application
Minimum Illumination
Power Supply
Operation Temperature
Dimensions
SONY Color CCD Sensor
NTSC
420 TV Lines of Resolution
Auto 1/60 ~ 1/100,000 seconds
Designed for Indoor or Outdoor use
0.5 Lux F1.2
DC 12V
-10°C ~ 50°C
55mm (Ø) x 95mm (L)
1 - Night Vision Camera
1 - 60ft 6pin Din Cable
1 - 2' Breakout Cable (BNC/RCA)
1 - Mounting Screw Set
1 - AC Power Supply
1 - Warranty Registration Card
1 - User's Manual