


Page 6 Delkin Devices User’s Manual
• Minor malfunctions while using the Reader-20, such as system hangs, can usually
be resolved by simply re-booting the computer. Serious or recurring malfunctions
may require re-installation of the Reader-20 drivers.
Network Conflicts - Windows®
The following procedure may be necessary when installing the e-Film Reader-20 onto a
computer connected to a network. In some cases, the computer may assign the Reader-
20 drive letters that have already been assigned to another drive, such as a network or
peripheral drive. This usually occurs after re-booting the computer with the Reader-20
connected. This conflict can be avoided by changing the drive letter assignment for
either the reader or the network drive. For more information, contact your network
administrator. If your computer is not connected to a network, and there are no drive
letter conflicts, these steps will not be necessary.
Windows ME and 98
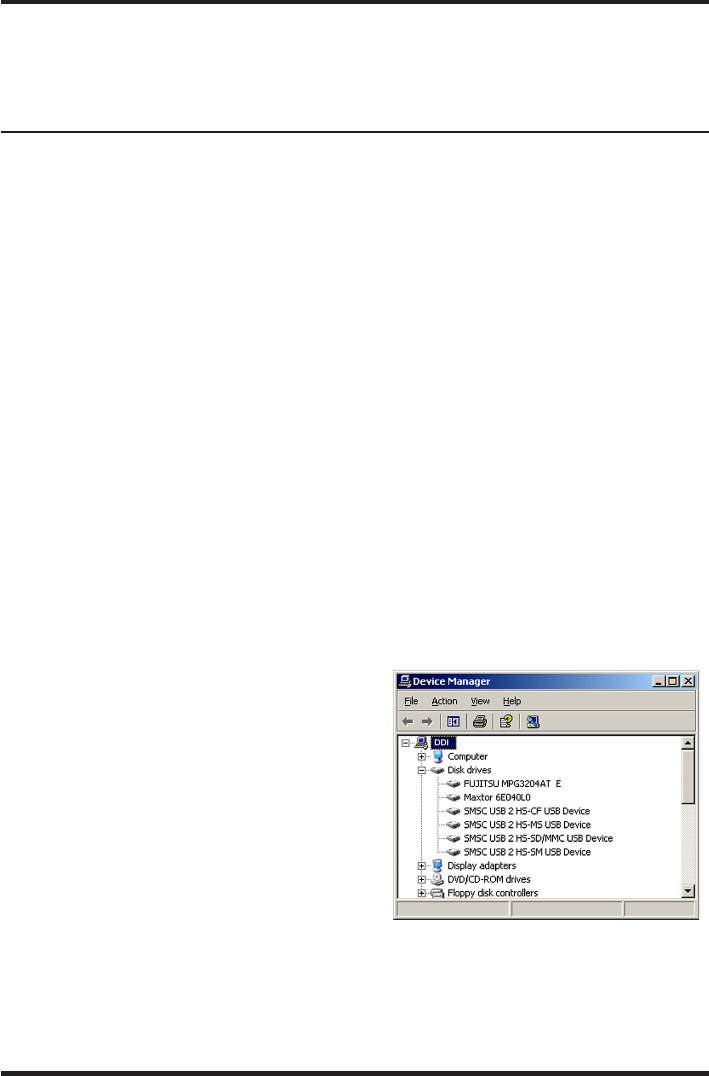
1. Take note of the drive letters assigned to the reader and any network drives. The
Reader-20 will show up as four removable disk icons in My Computer - one for each
card slot.
2. Right click the My Computer icon on the desktop.
3. Select Properties from the menu.
4. Click the Device Manager tab.
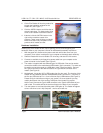
5. Click the plus sign (+) next to Disk Drives.
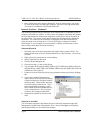
6. The card slots will be listed as SMSC USB 2 HS-CF USB Device, SMSC USB 2 HS-
MS USB Device, SMSC USB 2 HS-SD/MMC USB Device and SMSC USB 2 HS-SM
USB Device. (See Figure 8)
7. Double click one of the drives to bring up a properties window and click the Settings
tab.
Windows XP and 2000
The drive letters assigned to the Reader-20 can be manually assigned through Disk
Management, located under Administrative Tools. You must be logged on as System
Administrator before you can make these changes.
8. In the section labeled Reserved drive
letters; use the arrow to select and assign
a Start drive letter (the End drive letter will
change as well). Select a letter that does
not conflict with any other drives. This is
best accomplished by selecting a letter
that is farther down the alphabet than any
of your network drives. You will need to
re-boot for the changes to take effect.
9. Repeat the procedure for the other card
slots.
Figure 8
USB 2.0 CF / SM / SD / MMC / MS Reader/Writer DDREADER-20