


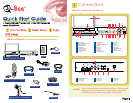
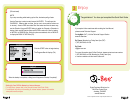
B Connect USB Mouse
C Connect Cameras
Connect Monitor
1 CONNECTIONS
A Connect Power Supply
Connect the power supply cord to the back of your Q-See unit and the power adapter
to a power source.
NET
AUDIO IN
1
3 1
4 VIDEO IN
DC 12V
USB
2
2
1 2 3 4
AUDIO OUT
S- VIDEO VIDEO OUT
+
USB
CAMERA CONNECTIONS
ALARM IN GNDRS485
NET
AUDIO IN
1
3 1
4 VIDEO IN
DC 12V
USB
2
2
1 2 3 4
AUDIO OUT
S- VIDEO VIDEO OUT
+
VIDEO OUT
3 1
4 VIDEO IN
DC 12V
2
VIDEO OUT
3 1
4 VIDEO IN
DC 12V
2
B
A
C
Cameras
Monitor
Yellow: Video Out
Black: Power In
Page 2
2
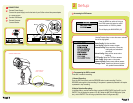
Setup
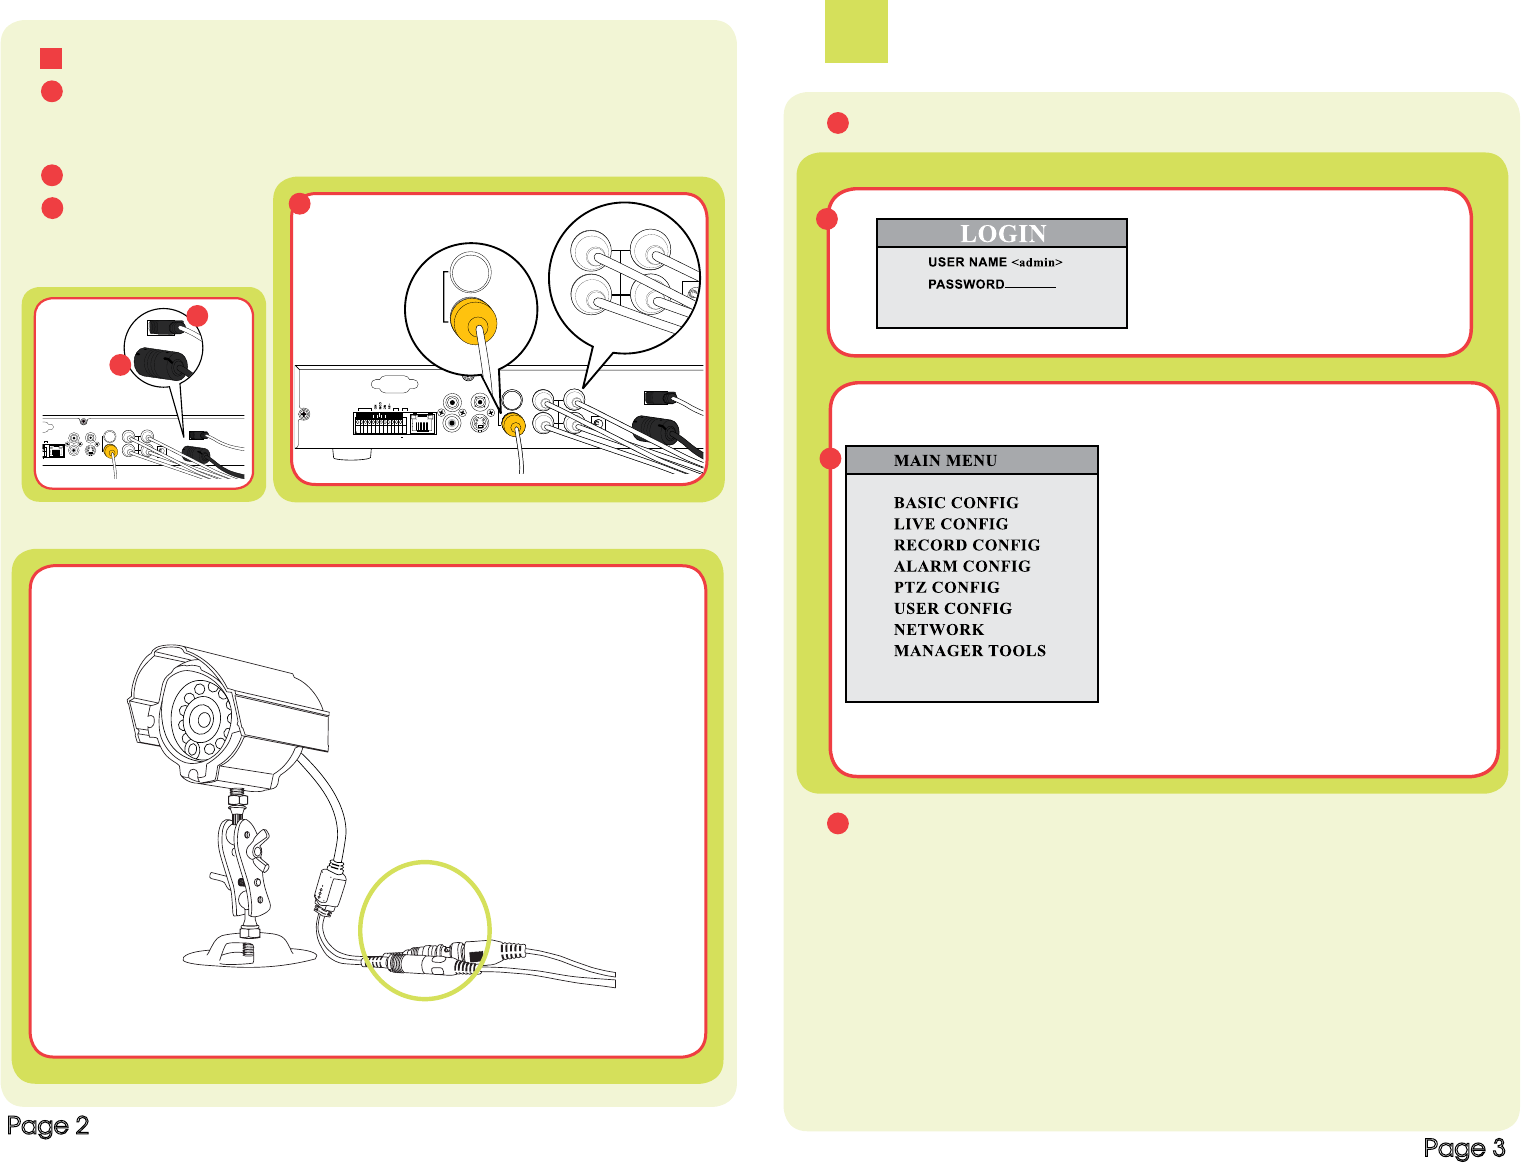
A Accessing the DVR menus
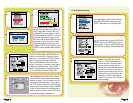
B Programming the DVR to record
There are 3 modes for recording.
1. Manual Recording:
From the DVR front panel, push the RECORD button to start recording. Push the
RECORD button again to stop recording. If the system is password protected it will require
a password to stop recording.
2. Motion Detection Recording:
In the Main Menu, use the Direction Keys to select ALARM CONFIG (red box B1) and hit
ENTER, This will display the screen in Pic B2. Select the MOTION ALARM option (blue
box), and hit ENTER. This will bring up the Motion Alarm Cong screen (B3).
A1
A2
Press the MENU key which will bring up
the LOGIN screen and enter the admin
password which is 123456 by default.
This will display the MAIN MENU (A2)
Use the Direction Keys to move the cursor, selected
line will be highlighted.
Basic Cong: Set time and date.
Live Cong: Adjust the camera images
Record Cong: Setup resolution, frame rate,
video qualty and scheduled
recordings
Alarm Cong: Setup monitor sensor alarm
recording
PTZ Cong: Setup Pan Tilt-Zoom cameras
User Cong: Setup users on the system
Network Cong: Setup remote internet access
Manager Tools: Access hard drive and system
info, update rmware defaults
Page 3