


PC320
Web Cam
User’s Guide
Version 1.0
For Notebook, LCD panel monitor
Operating System Requirements
Windows 98SE, Windows Me, Windows 2000,
Windows XP, Windows Vista™
Driver Software Installation
1. Insert the software CD into the CD-ROM
drive of your computer.
2. The installation program will run
automatically. If the installation does not
auto play, please run “autorun.exe” from
the CD-ROM’s root directory to install.
3. Click the “Web Camera Driver” icon to
install device drivers.
4. Click “DirectX-Update” to install DirectX
(9.0C) if you use old version or never
installed before.
5. After driver installation, please click
separately “ArcSoft WebCam Companion”
icon, and then follow the on-screen
instruction to install the application
software.
6. The wizard will install ArcSoft suite: four
softwares at the same time.
7. After first time installation, the system will
restart; there will be a new icon on the
desktop.
8. Connect your WebCam to an available
USB port on your computer. Windows
should detect your new device.
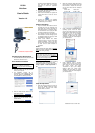
Hardware Installation
1. Plug the enclosed USB cable into camera
and USB port on the PC separately, and
then follow the on-screen instructions to
install the hardware. To avoid low voltage,
we recommend the user to plug the cable
connector to USB port on PC directly.
2. Once pressing the snap shot button, the
LED indicator on camera will light up and
the “AMCAP” dialog box will pop up while
the installation is successful.
3. Please select AMCAP and enable
“preview function” to view the video after
first-time installation. If there is no video
shown, please remove and connect again
to make sure the USB connection is
completed.
Notice:
Please download the latest update of “Service
Pack” (from Start Windows Update) to keep
the camera running smoothly.
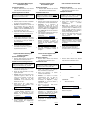
Power Source Adjustment
Choose the mode of “50Hz” or “60Hz” according
to your power source environment or video
output signal system to avoid the blurry image.
Amcap Option Video Capture Filter
OK
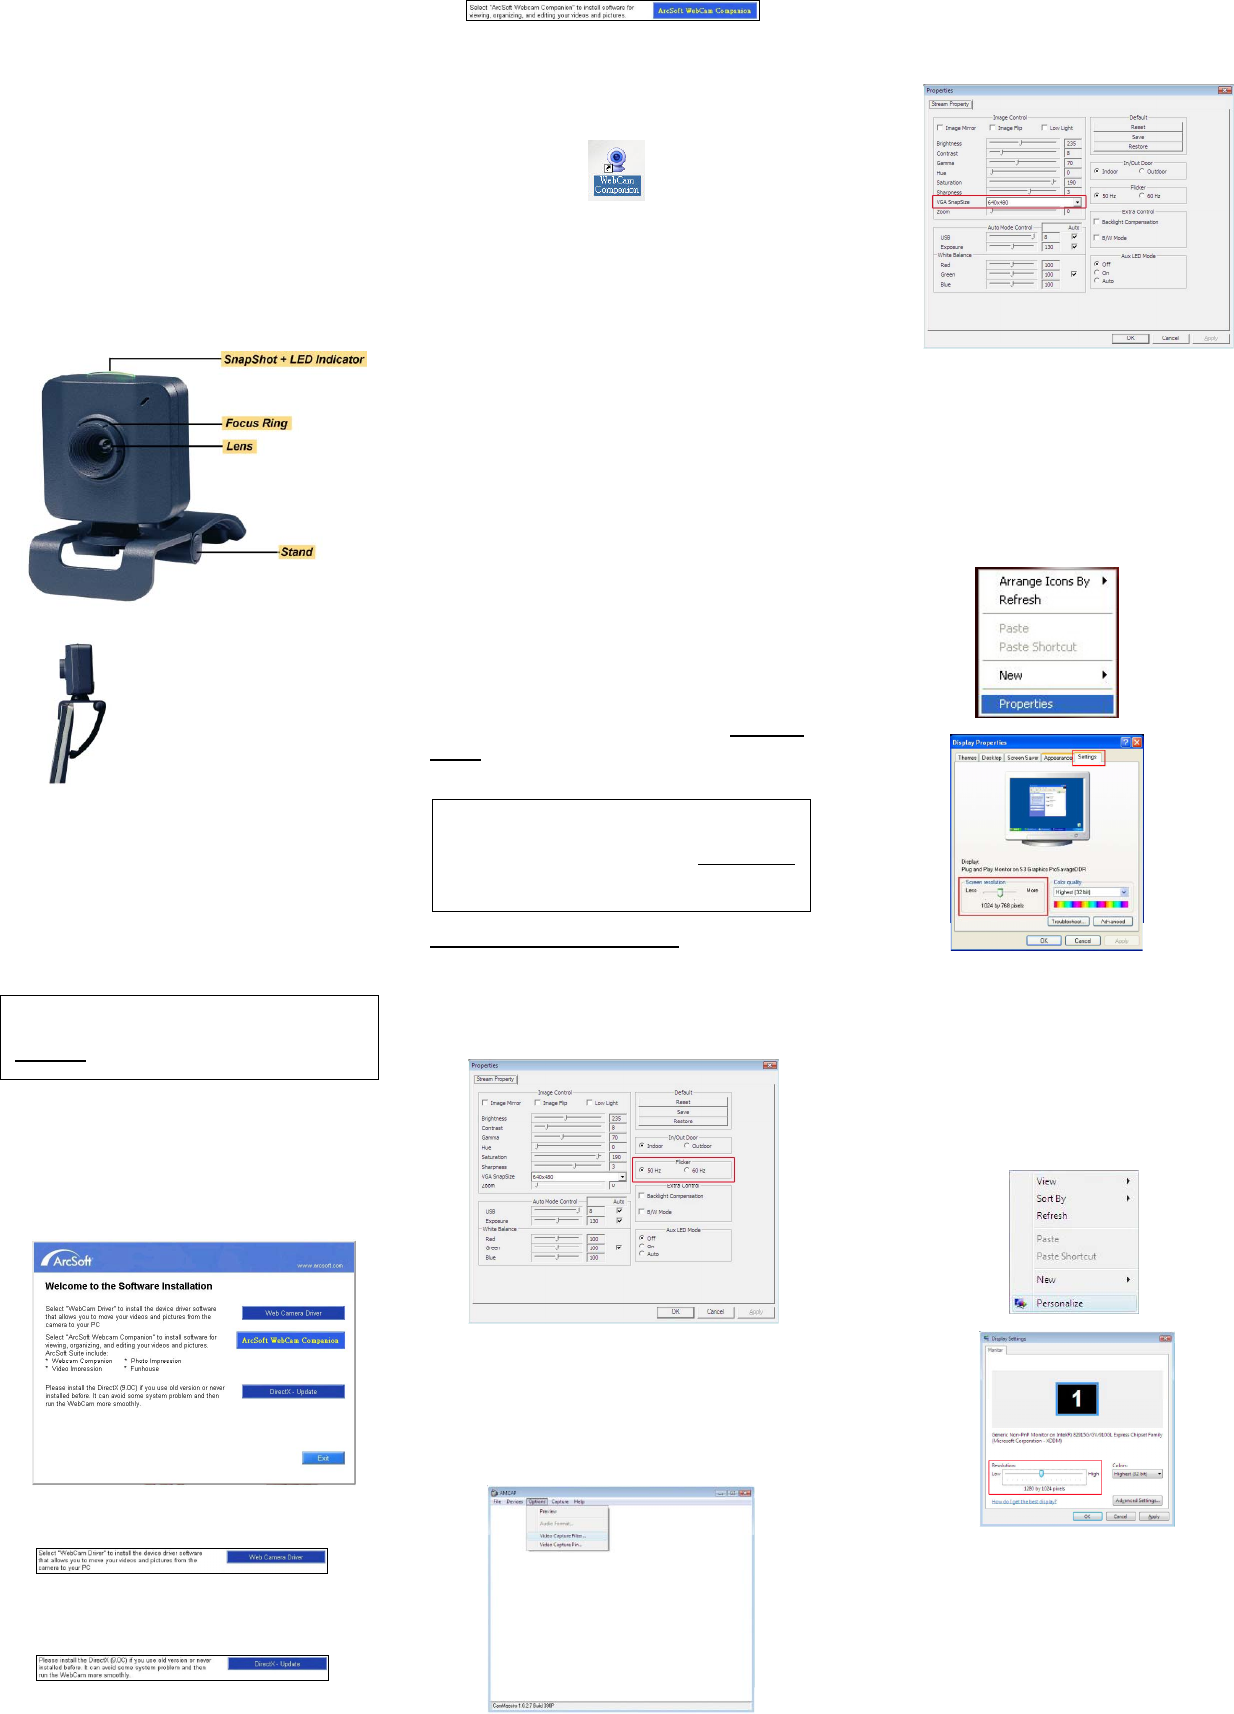
Snap Size Adjustment
1. Press the snap shot button on camera to
pop up the “AMCAP” dialog box. Please
select “Option” and then click “Video
Capture Filter” to continue.
2. When the “Properties” dialog box pops up,
please select “VGA SnapSize” and click
mouse button to choose the VGA snap
size you need. There are four selections
as below:
0: 640 * 480 1: 800 * 600
2: 1024 * 768 3: 1280 * 1024
3. Under Windows® 98SE/ME/2000/XP
operating system, move the mouse
cursor to any empty space on the screen.
Right click the mouse button and select
“Properties” to pop up the “Display
Properties” dialog box. Please select
“Settings” and then adjust the screen
resolution to match the “VGA SnapSize”
you selected before.
4. Under Windows Vista™ operating
system, move the mouse cursor to any
empty space on the screen. Right click
the mouse button and select
“Personalize” to pop up the “Display
Settings” dialog box. Please select
“Monitor” and then adjust the screen
resolution to match the “VGA SnapSize”
you selected before.
A
ttention:
Make sure to install driver and software
BEFORE
plugging the camera into USB port.
A
ttention:
If you have more than one image device in
your system, please select the CamMaestro
as the PC Camera device. In this way, you can
use this camera to ca
p
ture ima
g
es.
3100553661 Version 1.0 Mar. 2007