


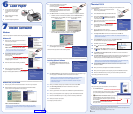
1 Remove everything from the box.
2 Remove all the blue tape and packing materials inside and around the printer.
3 Open the printer cover and
remove the plastic piece
from the ink cartridge holder.
Unpack
Unpack
Turn On the Printer
Turn On the Printer
Turn over
Insert the paper support into its slots
on the back of the sheet feeder.
(To install the roll paper holders,
see your Printer Basics book.)
Printer
Paper support
Printer Basics
Printer Software
CD-ROM
Ink cartridges
EPSON Stylus Photo 900
Start
Here
Start
Here
EPSON Stylus
®
Photo 900
Roll paper holders
Connection cables are not included with your printer. You need only one of the following cables:
• USB cable (PC and Mac
®
) or
• Parallel cable (PC only)
USB Cable Users (PC and Mac)
1 Shut down your computer. In Windows
®
, click Start and select your Shut Down
or Turn Off option.
Leave your computer turned off until section 7.
2 Plug the square end of the cable into your printer’s USB port until it stops.
3 Plug the flat end of the cable into your computer’s USB port until it stops.
(You can use any open USB port.)
Parallel Cable Users (PC only)
1 Shut down your computer. In Windows, click Start and select your Shut Down
or Turn Off option.
Leave your computer turned off until section 7.
2 Plug the end of the cable with the slotted connector into your printer’s parallel port,
then secure it with the wire clips.
3 Plug the other end of the cable into your computer’s parallel port and secure it
with the screws.
Connect the Printer
Connect the Printer
Square end
Flat end
Slotted end End with screws
Attach the
Paper Support
Attach the
Paper Support
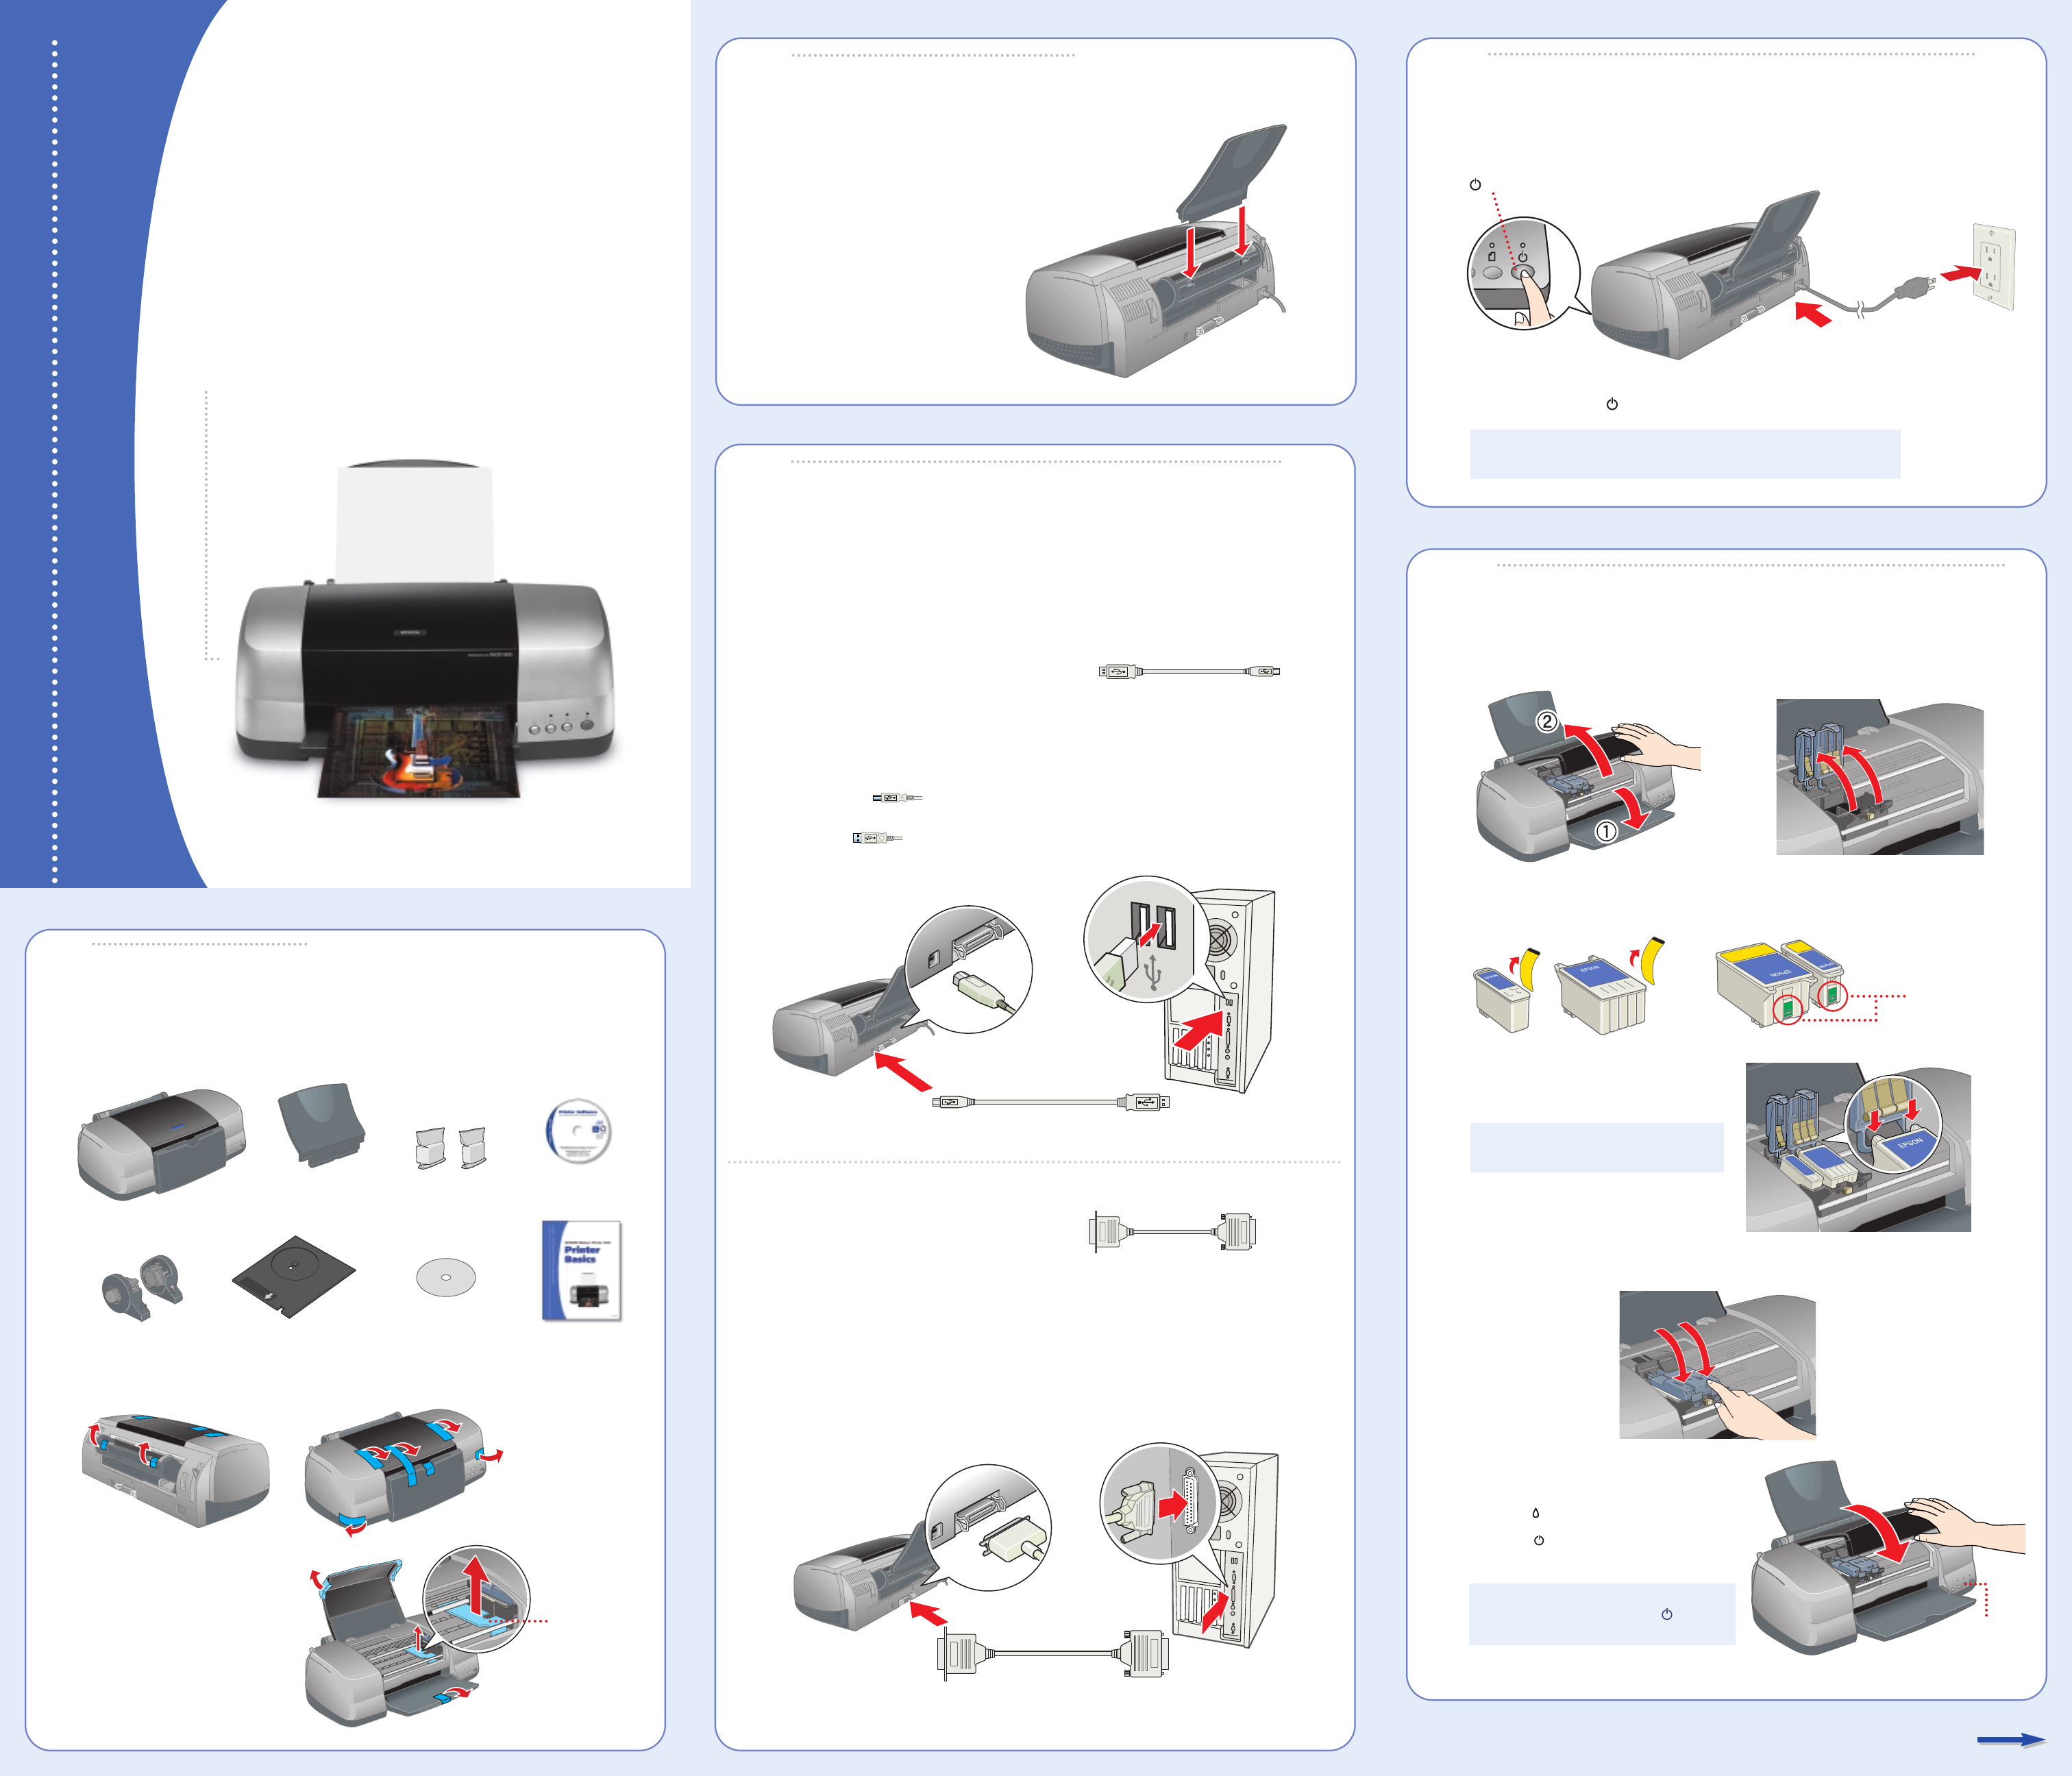
Install Ink Cartridges
Install Ink Cartridges
5
5
CD tray
CPD-15860R1
1 Plug the printer’s power cord into a grounded electrical outlet.
2 Press and release the power button to turn it on.
CAUTION: Never use an external switch, such as a wall switch
or power strip switch, to turn the printer on or off.
1 Open the output tray and the printer cover. Then lift up both ink cartridge clamps.
2 Unwrap the ink cartridges and remove the yellow tape.
3 Lower each cartridge into the holder.
Make sure the tabs rest on the hooks
in the back.
CAUTION: You must install both
cartridges or the printer won’t work.
4 Press down on the ink cartridge clamps until they click into place.
5 Close the printer cover.
6 Press the ink button.
The green power light flashes as your
printer charges ink for about 2 minutes.
CAUTION: Don’t turn off the printer or
interrupt charging while the power
light is flashing or you’ll waste ink.
Don’t touch the
green part
1
1
2
2
3
3
power button
4
4
Ink button
CD check disk
Remove