


BL00631-200(1)
E
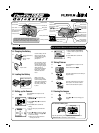
Camera Controls
Shutter button
Dual IS button
Zoom switch
Flash
AF-assist illuminator/
Self-timer lamp
Lens (lens cover)
Indicator lamp
w (Playback) button
4-direction
(nopq) button
LCD monitor
Tripod mount
Mode dial
Photo mode (p) button
Terminal cove
r
Microphone
Infrared port
POWER button
Speaker
MENU/OK button
Strap moun
t
Intelligent Face Detection
/bRed-eye removal button
DISP (Display)
/
BACK button
Batter
y
cover DC cou
p
ler cable cove
r
A/V OUT (Audio
/
Visual output) socke
t
USB socke
t
Memory Card slot
Battery release catch
Battery compartment
F50
F50
Picture Taking
Refer to Owner’s Manual for more detailed instructions
A. Charging the Battery
FinePix F50fd has internal memory that can store
images without Memory Card. Use a Memory Card (sold
separately) when recording a large number of images.
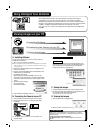
C. Setting up the Camera
Press POWER down fully to turn the
camera on.
1.
A screen appears on the
LCD monitor.
B Press n, o, p, or q to select the
language.
C Press MENU/OK to confirm the
setting.
2.
SET
SET
NO
NO
START MENU
START MENU
/ LANG.
/ LANG.
A You can select your preferred date
format.
B Press p or q to select Year, Month,
Day, Hour, or Minute. Press n or o
to correct the setting.
✽ Refer to the Owner’s Manual for
“Turning On and Off”.
3.
SET
SET
NO
NO
DATE / TIME NOT SET
DATE / TIME NOT SET
YY.MM.DD
YY.MM.DD
1. 1 12:00
1. 1 12:00
AM
AM
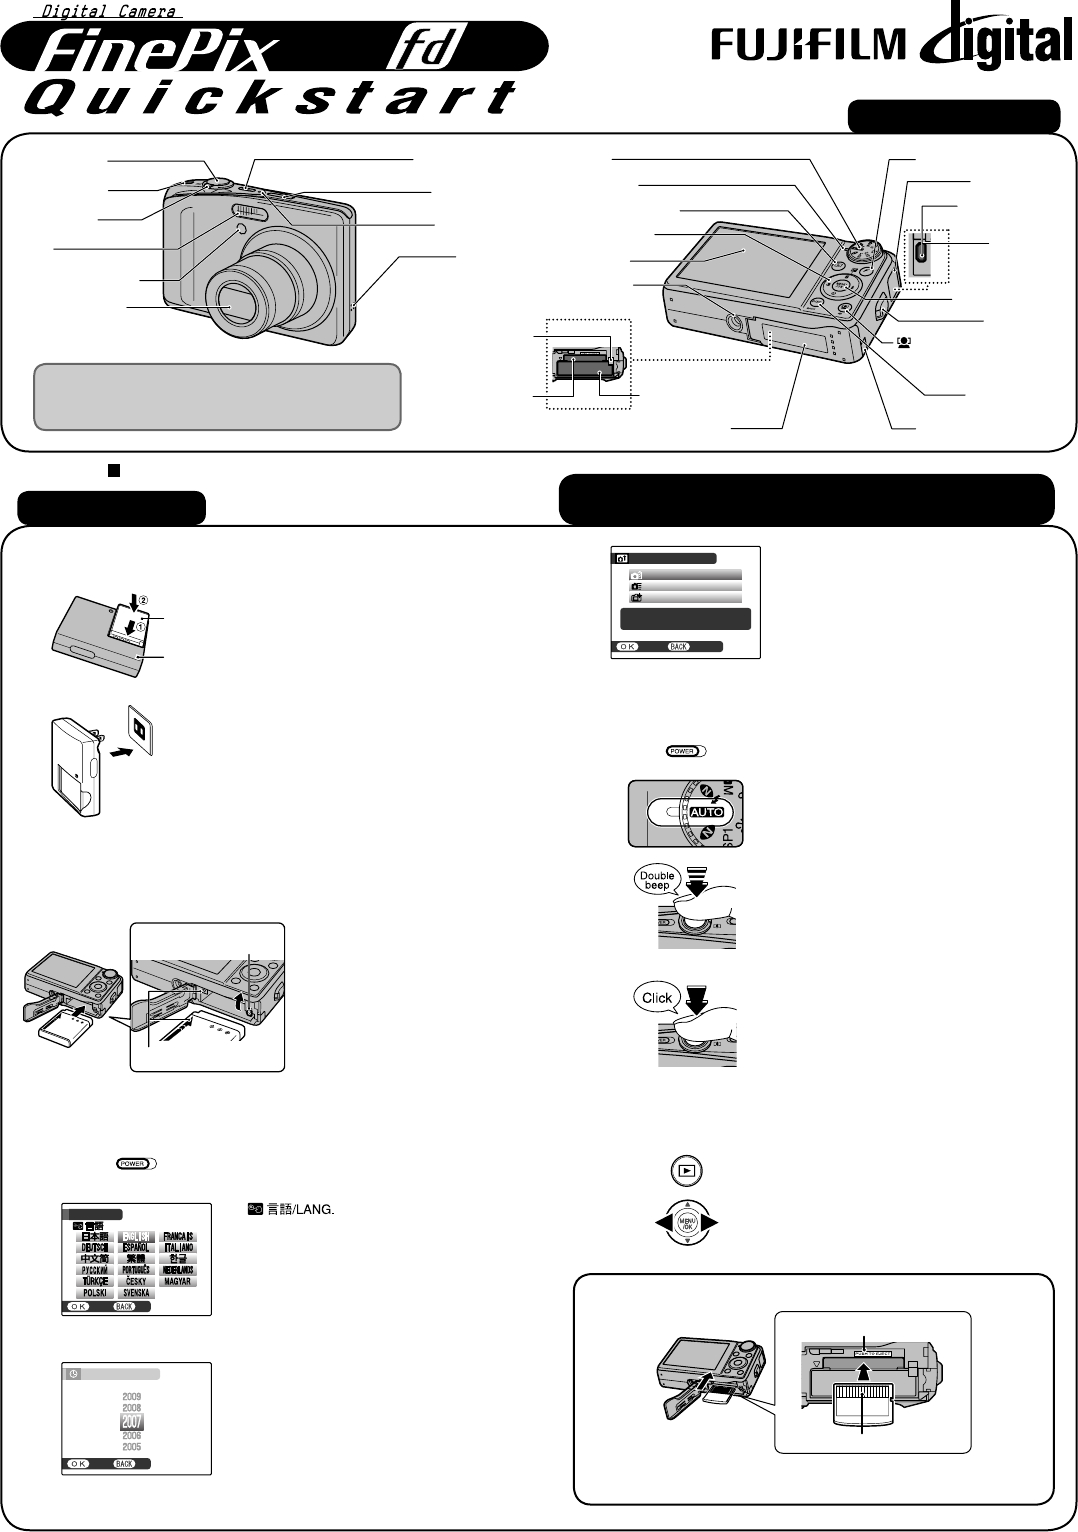
D. Taking Pictures
Press POWER down fully to turn the
camera on.
Press the shutter button down halfway to
adjust the focus.
Press the shutter button down fully to
take a picture. The camera makes a
“Click” sound and takes the picture.
1.
3.
4.
Halfway pressed
Fully pressed
E. Viewing the Images
Press w.
Press p or q to move through your
images.
2.
1.
Set the Mode dial to B.
2.
Load the battery into the
battery charger BC-50.
Set the battery correctly
as indicated by the
polarity icon.
1.
Rechargeable Battery
NP-50
Battery Charger
BC-50
2.
Plug the battery charger
into a power outlet. The
charging indicator lights
red and charging begins.
When charging is
completed, the indicator
lights green. Charging
ends after about 2.3
hours.
To power outlet
B. Loading the Battery
Make sure that the
indicators are aligned.
Push the battery release
catch aside while loading
the battery. Check that
the battery is firmly held
in place.
Battery release catch
Indicators
A Set the POWER MANAGEMENT
options. Select an option from the
menu.
B Press MENU/OK to confirm the
setting.
4.
SET NO
SET NO
POWER MANAGEMENT
POWER MANAGEMENT
POWER SAVE
POWER SAVE
Power saving for longer
Power saving for longer
battery life
battery life
QUICK AF
QUICK AF
CLEAR DISPLAY
CLEAR DISPLAY
How to insert a Memory Card.
Align the gold marking with the gold contact area, then insert an
xD-Picture Card or SD Memory Card completely.
Gold marking
Gold contact area