


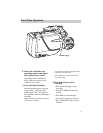

11
POWERCHARGE
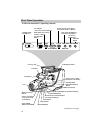
Powering the Camcorder
Charging the Battery
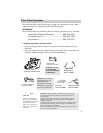
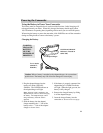
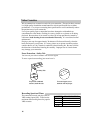
1. Plug the adapter/charger into the
nearest AC outlet (100-240V,
50/60Hz). The POWER indicator on
the adapter/charger will light.
Note: If the DC cable is attached to the
adapter/charger, remove it before charging
the battery. The adapter/charger cannot
charge the battery if the DC cable is
attached.
2. Slide the battery into the adapter/
charger matching the “–” side of the
battery to the “–” side of the adapter/
charger as shown above.
To AC Outlet
(100-240 V,
50/60 Hz.)
AC Adapter/Charger
POWER and CHARGE
Indicators (Located on
Other Side)
Using the Battery to Power Your Camcorder
The battery must be charged before it can be used the first time. Initial charging will
take approximately two hours. When fully charged, the battery should supply about
100-120 minutes of operating time (depending on how much you use zoom and pause).
When using the battery to power the camcorder, slide POWER to turn off the camcorder
during recording breaks to conserve the battery’s power.
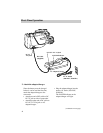
Caution: When a battery is attached to the adapter/charger, do not turn them
upside down. The battery may fall off and be damaged or cause injury.
WARNING:
LEAD-ACID
BATTERY.
MUST BE
DISPOSED OF
PROPERLY.
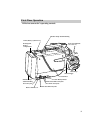
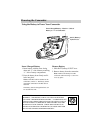
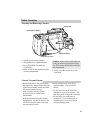
3. If the battery is properly connected, the
adapter/charger’s CHARGE indicator
will light. When the light goes out, the
battery is fully charged.
4. Remove the charged battery by sliding
it off the adapter/charger.
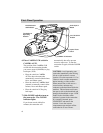
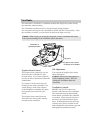
5. Insert the charged battery into the
camcorder as shown on the next page.