English
16
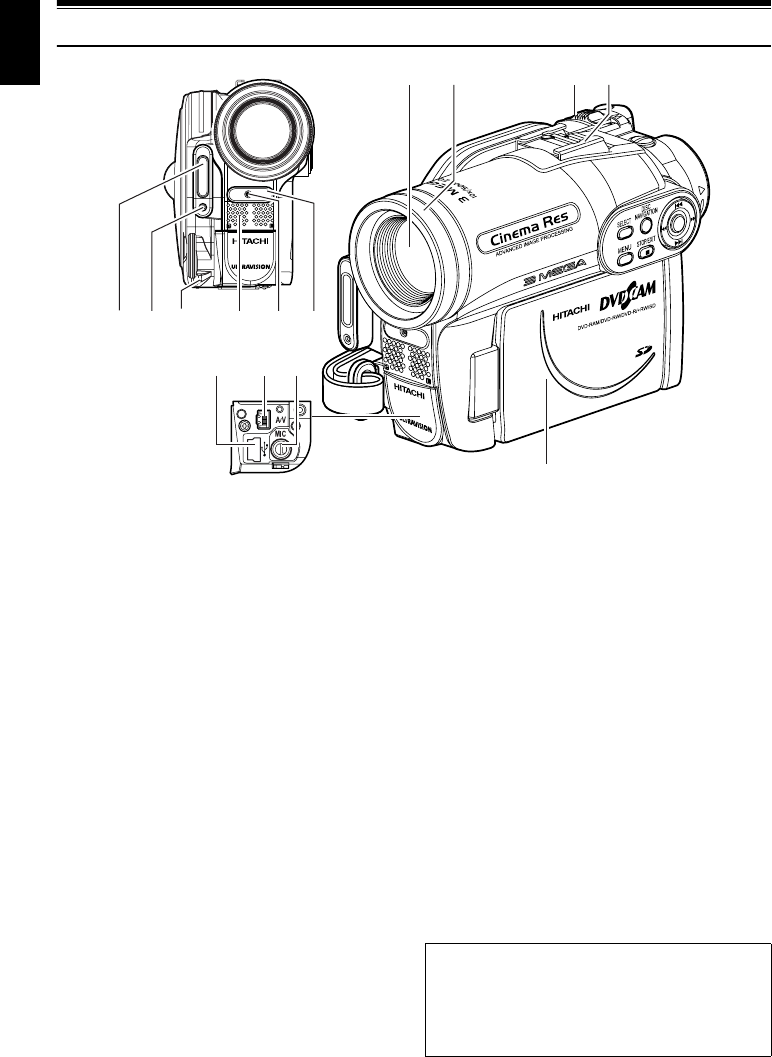
Names of Parts
1 Flash (for DZ-GX3300A only) (p. 56)
2 Light receiving sensor
(for DZ-GX3300A only)
This sensor controls the amount of light to be
emitted from the built-in flash. Take care not
to block with hand, etc. during recording.
3 Lens cap string attachment hole (p. 21)
4 Stereo microphone
Take care that the microphone is not blocked
by a hand, etc., during recording.
5 Recording indicator (p. 35)
The red indicator will light during recording.
6 Infrared receiver
(for DZ-GX3300A/GX3200A only) (p. 22)
When the remote control is used to operate
the DVD video camera/recorder, this
receiver will receive the infrared signal.
7 Optical 10× zoom lens
(for DZ-GX3300A/GX3200A only)
Optical 15× zoom lens
(for DZ-GX3100A only)
Optical 25× zoom lens
(for DZ-BX35A only)
(p. 51)
8 Lens hood (for DZ-GX3300A/GX3200A/
DZ-BX35A only) (p. 52)
Always remove this lens hood when using
the optional tele-conversion or wide-
conversion lens.
9 Zoom lever (p. 51)
Push the lever to the T side for telephoto, or
to the W side for wide-angle.
10 Accessory shoe (for DZ-GX3300A/
GX3200A only) (p. 56)
The optional video flash can be attached
here. (See the instruction manual of device to
be attached for details.)
11 PC connection terminal (TO PC) (for DZ-
GX3300A/GX3200A/GX3100A only) (p. 117)
12 AV input/output jack (p. 106)
13 External microphone jack (for DZ-
GX3300A/GX3200A/GX3100A only) (p. 66)
14 Wide-screen color liquid crystal display
(inside) (p. 32)
14
1312
6
78 9
(Inside the cover)
10
11
23 4 51
13
Although the external appearances of DZ-
GX3300A, DZ-GX3200A, DZ-GX3100A and
DZ-BX35A are different, the method of
operating these models is identical. DZ-
GX3300A illustrations are used in this manual.


