


38
Installing the Honeywell IP Utility and HD3MDIP/X Web-Client Software
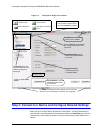
Interfacing with the EQUIP Device Via a Network Video Recorder
Your recording vendor has the option of using either the connection methods supported by
EQUIP V1 firmware or EQUIP V2.1 firmware. If the NVR vendor has implemented EQUIP V1
connection methods, the HD3MDIP/X camera will work on those NVRs. Similarly, if the NVR
vendor has implemented EQUIP V2.1 connection methods, the HD3MDIP/X camera will
work on those NVRs. There is no user configuration necessary.
For further information, refer to the documentation supplied with your NVR or contact your
NVR network administrator.
Step 5: Launch the Web-Client to View Live Video
Note Only one Administrator and one Guest can log on to the Web-Client
application at one time. After you are logged in as an Administrator, there is
no time out until you click Logout. To allow other Administrators to log on,
you must log out when the session is done.
Note After the IP Utility software is installed for the first time, you can change the
Administrator or Guest passwords and upgrade firmware.
Note It is important to click Apply in order to save any configuration change.
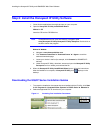
1. Log onto the Web-Client. There are two ways to launch the Web-Client and log on—
via the Honeywell IP Utility Program or directly from Internet Explorer.
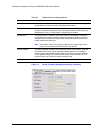
Honeywell IP Utility
a. Log onto the Honeywell IP Utility program.
b. From the Discovery pane, click to select the device to launch its browser.
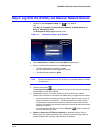
c. To enable or disable the HTTP server, select or clear the Enable HTTP Server
check box. By default, the HTTP server is enabled.
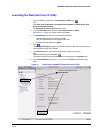
d. From the System tab, click Launch Browser.
The Web-Client application for the selected device opens in Internet Explorer.
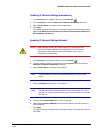
Internet Explorer
From Internet Explorer (v6.0+), enter the URL (IP address of the device) in the
Address bar to open the logon window.