44 EN
Master Page: Left
This feature lets you record still images that look like
photographs onto a tape.
1 Set the Recording Mode Switch to “HD”, “SD” or
“DV”.
2 Set the Power Switch to “A” or “M” while
pressing down the Lock Button located on the
switch.
3 Open the LCD monitor fully, or pull out the
viewfinder fully.
4 Press SNAPSHOT.
● The “O” indication appears and a still
image will be recorded for approx. 6 seconds,
then the camcorder re-enters the Record-
Standby mode.
● You can perform Snapshot also during
recording. A still image will be recorded for
approx. 6 seconds, then the normal recording
resumes.
To record still images not only on the tape but also
in the memory card
Set “REC SELECT” to “ / ”. (੬ pg. 40)
•The image size recorded in the memory card
differs depending on the recording mode; 640 x
480 (DV), 848 x 480 (SD) or 1280 x 720 (HD).
NOTES:
● To remove the shutter sound, refer to “BEEP” on
page 38.
● Certain modes of Program AE (੬ pg. 50) are
disabled during Snapshot recording. In such a
case, the icon blinks.
● If SNAPSHOT is pressed when “OIS” is set to
“ON” (੬ pg. 37), the Stabilizer will be disabled.
● During Snapshot recording, the image displayed
in the viewfinder may be partially missing.
However, there is no effect in the recorded image.
● When a cable is connected to the AV connector,
the shutter sound is not heard from the speaker,
however it is recorded onto the tape.
Motor Drive Mode
Keeping SNAPSHOT pressed in step 4 provides an
effect similar to serial photography. (Interval
between still images: approx. 1 second)
The Motor Drive mode is disabled when “REC
SELECT” is set to “ / ”. (੬ pg. 40)
Manual exposure control is recommended in the
following situations:
● When shooting using reverse lighting or when the
background is too bright.
● When shooting on a reflective natural background
such as at the beach or when skiing.
● When the background is overly dark or the subject
is bright.
1 Set the Power Switch to “M” while pressing down
the Lock Button located on the switch.
2 Open the LCD monitor fully, or pull out the
viewfinder fully.
3 Press the EXPOSURE Wheel in.
● The exposure control indicator appears.
4 To brighten the image, rotate the EXPOSURE
Wheel towards “+”. To darken the image, rotate
the EXPOSURE Wheel towards “–”. (maximum
±10)
● +3 exposure has the same effect as the
backlight compensation. (੬ pg. 45)
● –3 exposure has the same effect as when “r”
is set to “SPOTLIGHT”. (੬ pg. 50)
To return to automatic exposure control...
Press the EXPOSURE Wheel in. Or, set the Power
Switch to “A”.
NOTE:
You cannot use the manual exposure control at the
same time when “r” is set to “SPOTLIGHT” or
“SNOW” (੬ pg. 50), or with the backlight
compensation. (੬ pg. 45)
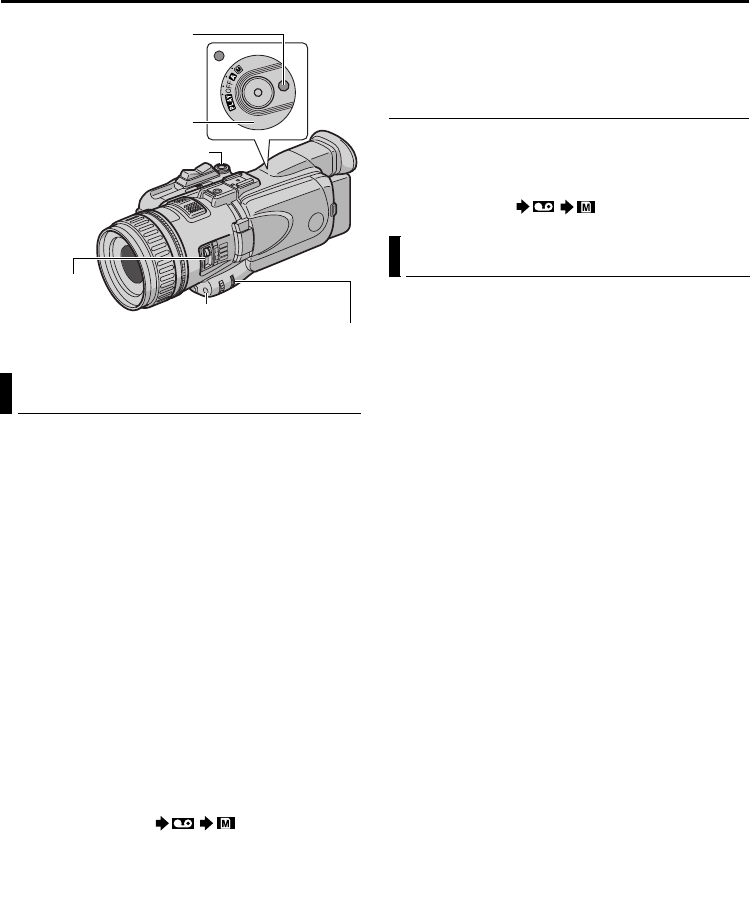
Snapshot (For Video Recording)
Lock Button
Recording
Mode Switch
SNAPSHOT Button
Power Switch
EXPOSURE Wheel
BACK LIGHT Button
Exposure Control
FEATURES FOR RECORDING (cont.)
GR-HD1US_07Advanced.fm Page 44 Tuesday, April 15, 2003 4:13 PM


