


54 EN
PLAYBACK
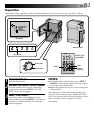
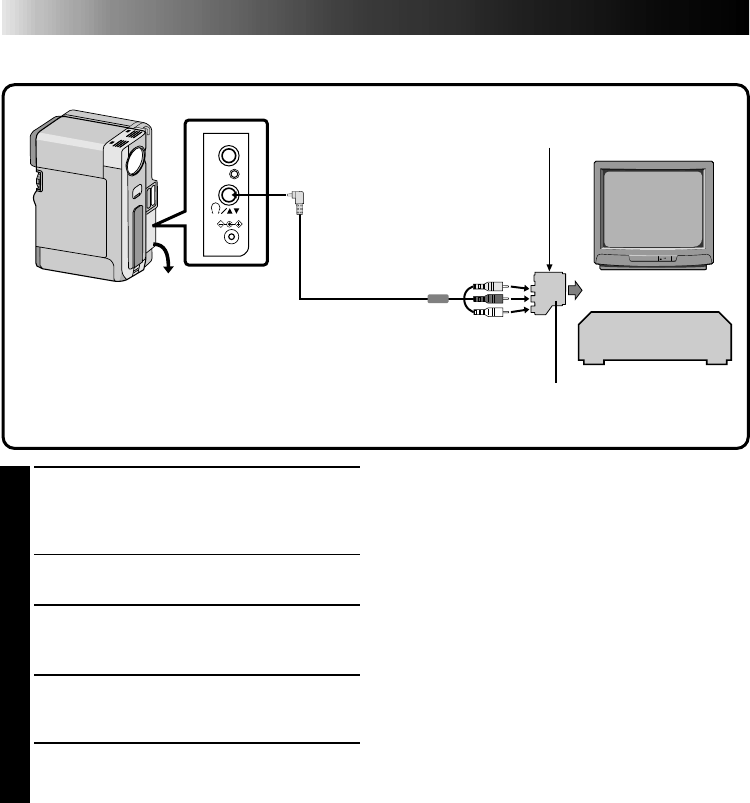
Basic Connections
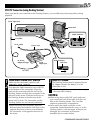
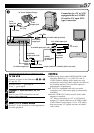
VCR/TV Connection (when connecting directly to the camcorder)
MIC
DC-IN
1
CONNECT CAMCORDER TO TV OR
VCR
Pull out the jack cover and open it. Connect as
shown in the illustration.
If Using A VCR . . . go to step 2.
If not . . . go to step 3.
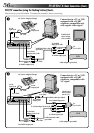
2
CONNECT VCR OUTPUT TO TV
INPUT
Refer to your VCR’s instruction manual.
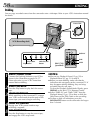
3
TURN ON POWER
Turn the Power Dial to “PLAY” and turn on the
TV/VCR.
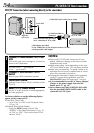
4
SELECT TV’S VIDEO MODE
Set the TV to the channel or mode appropriate
for video playback.
To choose whether or not the following displays
appear on the connected TV . . .
•Date/Time, Time Code
.... set to “ON” or “OFF” in the Playback Menu
(੬
pg. 52).
•Playback Sound Mode Display
.... Press the MENU button, and set “ON
SCREEN” in the Date/Time Menu (੬
pg. 11)
to “ON” or “OFF”. Then set the Power Dial
back to “PLAY”.
NOTES:
●
Turn on the TV/VCR after connection is com-
pleted. Otherwise damage to this unit and other
equipment may result.
●
Input mode setting varies depending on the type
of TV used. Refer to your TV’s instruction manual.
●
Make sure you adjust the TV sound volume to its
minimum level to avoid a sudden burst of sound
when the camcorder is turned on.
●
To keep the camcorder's display from appearing
on the TV screen during playback, press the
IND.ON/OFF button for longer than 1 second.
●
It is recommended to use the AC Power Adapter/
Charger as the power supply instead of the
battery pack. (
੬
pg. 10)
●
Never connect any other VIDEO/AUDIO cable
than the provided VIDEO/AUDIO cable to the
camcorder’s AV OUT jack.
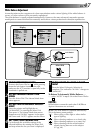
Cable adapter (provided)
If your VCR has the 21 pin AV input connector (SCART),
use the provided cable adapter.
VCR
To TV or VCR
To VIDEO/AUDIO IN
connectors
To AV OUT
VIDEO OUT select switch (set to CVBS)
Open the
jack cover.
VIDEO/AUDIO cable (provided)
(ø3.5, camcorder to TV or VCR)