


EN
41
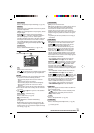
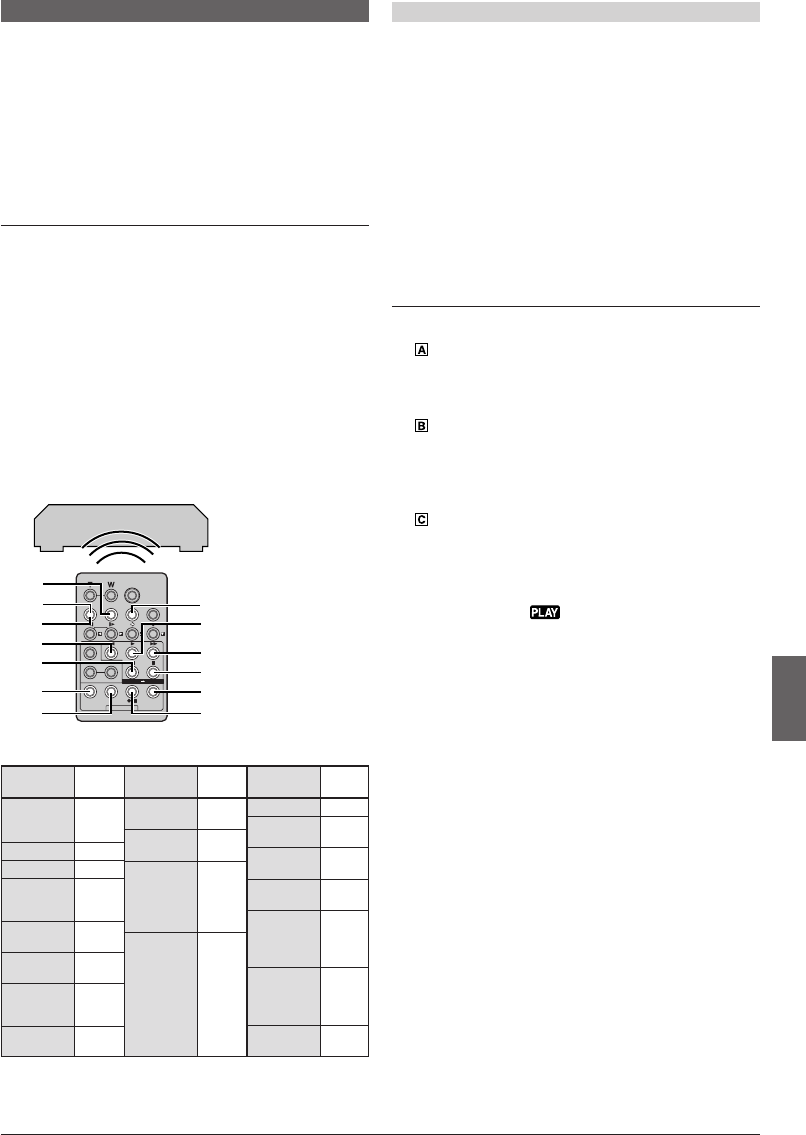
USING THE REMOTE CONTROL UNIT
34
0
9
2
5
1
8
7
6
I
U
l
VCR
(Recording deck)
IMPORTANT
Although the MBR is compatible with JVC VCRs
and those of many other makers, it may not work
with yours or may offer limited functions.
NOTES:
● If the VCR’s power does not come on in step 1, try
another code from the VCR CODE LIST.
● Some brands of VCR do not come on automatically. In
this case, turn the power on manually and try step 2.
● If the remote control is not able to control the VCR, use
the controls on the VCR.
● When the remote control’s batteries run out, the VCR
brand you have set will be erased.
In that case, replace the old battery with a new one to
reset the VCR brand.
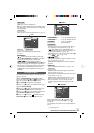
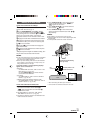
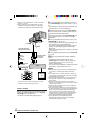
MAKE CONNECTIONS
Also refer to pg. 16 and 42.
1 A JVC VCR equipped with a remote pause
connector . . .
....connect the editing extension cable to the
Remote PAUSE connector.
A JVC VCR not equipped with a remote
pause connector but equipped with an
R.A.EDIT connector . . .
....connect the editing extension cable to the
R.A.EDIT connector.
A VCR other than above . . .
....connect the editing extension cable to the remote
control’s PAUSE IN connector j.
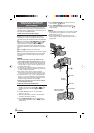
2 Insert a recorded tape into the camcorder. Set the
VIDEO/MEMORY Switch t to “VIDEO”, then set the
Power Switch @ to “ ” while pressing down the
Lock Button $ located on the switch.
3 Turn the VCR power on, insert a recordable tape
and engage the AUX mode (refer to the VCR’s
instructions).
NOTES:
Before Random Assemble Editing, make sure the
indications do not appear on the TV monitor. If they do, they
will be recorded onto the new tape.
To choose whether or not the following displays
appear on the connected TV . . .
• Date/Time
.... set “DATE/TIME” to “AUTO”, “ON” or “OFF” in the Menu
Screen (
੬ pg. 34, 36).
Or, press DISPLAY
U on the remote control to turn
on/off the date indication.
• Time Code
.... set “TIME CODE” to “ON” or “OFF” in the Menu Screen
(
੬ pg. 35, 36).
• Indications other than date/time and time code
.... set “ON SCREEN” to “LCD”, “LCD/TV” or “OFF” in the
Menu Screen (
੬ pg. 34, 36).
Continued on next page.
Random Assemble Editing [R.A.Edit]
Create edited videos easily using your camcorder as
the source player. You can select up to 8 “cuts” for
automatic editing, in any order you like. R.A.Edit is
more easily performed when the MBR (Multi-Brand
Remote) is set to operate with your brand of VCR (see
VCR CODE LIST), but can also be performed by
operating the VCR manually.
Before operation, make sure the batteries are installed
in the remote control (੬ pg. 5).
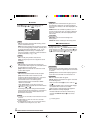
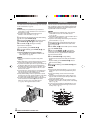
SET REMOTE/VCR CODE
1 Turn off the power to the VCR and point the remote
towards the VCR’s infrared sensor. Then, referring to
the VCR CODE LIST, press and hold MBR SET l,
and enter the brand code.
The code is automatically set once you release MBR
SET l, and the VCR’s power comes on.
2 Make sure the VCR’s power is on. Then, while
holding SHIFT I, press the button on the remote for
the desired function. The functions the remote can
control are PLAY, STOP, PAUSE, FF, REW and VCR
REC STBY (you do not need to press SHIFT I for this
one).
You are now ready to try Random Assemble Editing.
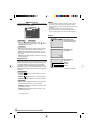
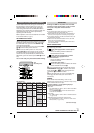
VCR BRAND
NAME
AKAI
BLAUPUNKT
DAEWOO
FERGUSON
GRUNDIG
HITACHI
JVC A
B
C
LG/
GOLDSTAR
BRAND
CODE
6 2
6 4
7 7
1 3
1 8
9 7
9 8
3 2
1 4
3 4
6 6
6 3
9 1
9 6
9 3
1 1
VCR BRAND
NAME
MITSUBISHI
NEC
PANASONIC
PHILIPS
BRAND
CODE
6 7
6 8
3 7
3 8
1 3
1 7
1 1
9 4
1 8
1 9
9 5
1 1
9 4
9 1
9 6
1 2
3 3
7 2
BRAND
CODE
9 4
3 6
3 5
9 1
9 6
1 5
1 0
6 5
6 0
3 9
3 1
9 1
9 6
9 7
3 2
6 9
6 1
VCR BRAND
NAME
SAMSUNG
SANYO
SELECO,
REX
SHARP
SONY
THOMSON,
TELEFUNKEN,
SABA,
NORDMENDE
TOSHIBA
VCR CODE LIST