


Recording Files
Recording Techniques Getting Started
Using the Touch Screen
LYT2308-002A-M
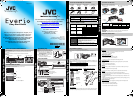
Easy Start Guide
Recording Files (cont.) Accessories
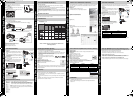
For more details on operating this product, please refer to
the “Detailed User Guide” at the following website:
http://manual.jvc.co.jp/index.html/
For additional online video tutorials, please visit:
http://camcorder.jvc.com/tutorials.jsp
This easy start guide is designed to navigate you to
using your new Everio quickly. Please refer to the
owner’s manual for a detailed listing of features.
LYT2308-002A-M
For more details on operating this product, please refer to
the “Detailed User Guide” at the following website:
http://manual.jvc.co.jp/index.html/
For additional online video tutorials, please visit:
http://camcorder.jvc.com/tutorials.jsp
Customer Care Center
TOLL FREE 1-800-252-5722
Register your EVERIO online at:
REGISTER.JVC.COM
and receive a special offer.
JVC U.S.A.
A Division of JVC Americas Corp.
1700 Valley Road, Wayne, NJ 07470
www.jvc.com
0111TKH-SW-VM
C1DW
SUPPLIED ACCESSORIES FOR THE CAMERA
* To order any of these accessories please visit www.store.jvc.com or call 1-800-252-5722
Note: Operations are confirmed on the following SD cards.
• Using cards other than those specified above may result in recording failure or data loss.
AC Adapter
AP-V20U*
Battery Pack
BN-VF815U
Remote Control
RM-V760U
USB Cable
(Type A - Mini Type B)
AV Cable HDMI Mini Cable CD-ROM Basic User Guide
Product Name* Description
Battery Pack
• BN-VF815U
• BN-VF823U
• Provides a longer recording time than the battery
pack that comes with this unit or it can also be used
as a spare battery pack.
Battery Charger
• AA-VF8U
• Enables the battery pack to be charged without
using this unit.
Memory Cards Capacity
A Video
3D Mode
AVCHD (TXP)
B Still images
3D (1920x1080/
16:9)
SD Cards
Supports 256 MB
to 2 GB
256 MB – –
512 MB – 120
1 GB – 250
2 GB – 500
SDHC Cards
<SD High capacity>
Supports 4 GB to
32 GB
4 GB 30 m 1000
8 GB 1 h 2200
16 GB 2 h 4400
32 GB 4 h 10 m 4999
SDXC Cards
<SD Extended capacity>
Supports max.
64 GB
48 GB 6 h 10 m 4999
64 GB 8 h 20 m 4999
Manufacturer Panasonic, TOSHIBA, SanDisk
Video A Class 4 or higher compatible SD card (2 GB) / Class 4 or higher
compatible SDHC card (4 GB to 32 GB) / Class 4 or higher
compatible SDXC card (48 GB to 64 GB)
(When recording with image quality “THR”, Class 10 is
recommended. (Class 6 or higher is required.))
(When recording with image quality “UXP”, Class 6 or higher is
recommended.)
Still Image B SD card (256 MB to 2 GB) / SDHC card (4 GB to 32 GB) /
SDXC card (48 GB to 64 GB)
INFO
SNAP
SHOT
START
/STOP
INDEX
AVAILABLE ACCESSORIES FOR THE CAMERA
TYPES OF USABLE SD CARDS
CHARGING THE BATTERY
Note: The battery pack is not charged at the time of purchase.
• The above are values when “MONITOR BRIGHTNESS” is set to “3” (standard).
CAUTION
• Be sure to use JVC battery packs. If you use any other battery packs besides JVC
battery packs, safety and performance cannot be guaranteed.
* SD card not included
Battery Type
Charging
Time
Continuous Recording Actual Recording
3D
AVCHD/MP4(MVC)
2D
3D
AVCHD/MP4(MVC)
2D
BN-VF815U (Supplied) 2 h 40 m
2 h/1 h 45 m 2 h 35 m 1 h/55 m 1 h 20 m
BN-VF823U 3 h 40 m
3 h 05 m/2 h 40 m 1 h 55 m 1h 35 m/1 h 20m 3 h 50 m
A Turn off this unit.
• Turn off the camcorder by pressing
the B button for about 2 seconds.
B Open the cover and insert an SD card.
A Close the LCD to turn Off the Power
B Open the battery cover and insert the
battery pack
C Connect AC adapter into DC
connector
D Connect the AC adapter to outlet
Charging in progress:
Blinks
Charging finished:
Goes out
Cover
AC Adapter
To AC Outlet
INSERTING THE SD CARD*
B Botton
Label
USING THE ICON BUTTONS/THUMBNAILS
There are two ways to operate the touch screen, namely “tap” and “drag”. The following
are some examples.
A Tap the displayed button (icon) or thumbnail (file) on the touch screen to make
selection.
B Drag the thumbnails on the touch screen to search for the desired file.
Example:
Select an item from the menu screen.
A Tap MENU on the touch screen to display the main menu.
B Tap the desired selection on the touch screen.
• Tap
∧ or ∨ to scroll the pages.
• Selections are also available in the Common (Q) menu.
00:01:23 00:12:34
2011
2011
Recording Screen
Playback Screen
Index Playback Screen
CHANGING MENU SETTINGS
Tap
GAIN UP
DIS
SMILE LEVEL
TOUCH PRIORITY AE/AF
VIDEO
Common (Q) menu
Ta p
RECORDING FILES
A Open the LCD monitor to turn on the unit.
B
Open the lens cover by sliding the switch down.
C
Verify that the unit is in the recording mode.
• If in the playback mode, tap
q
to switch.
• The mode changes between recording and
playback with every tap.
D Press the A/B button on the unit to select
the video or still image mode.
The Mode will be displayed in the LCD.
1
3
4
2
VIDEO RECORDING
0:00:00 [000:22]
AM10:10
Zooming
(Telephoto)(Wide angle)
• Press again to Stop Recording.
The information below will be
displayed on the LCD during
recording.
Video Quality
Intelligent Auto Mode
Recording Media
Battery Indicator
Scene Counter
Press to Start Recording
Remaining Recording Time
3D/2D
Mode
STILL IMAGE RECORDING
[ 8]
AM10:10
Lights up in green
when focused
Lights up during still
image recording
Recording Media
Battery Indicator
Remaining Number of Shots
Intelligent Auto Mode
Press halfway to focus
Press fully to take still image
Shutter Speed
3D/2D Mode
Image Size
Recording in Progress
Focus
RECORDING 3D IMAGES
3D images can be recorded and played back on this unit.
Switch to the 3D mode by pressing the 3D button such that “3D” is displayed on the
screen.
3D Recording Formats
There are 2 types of 3D recording formats. By default, “3D VIDEO REC FORMAT” in the
menu is set to “AVCHD”. To change the setting to “MP4(MVC)”, refer to the Detailed User
Guide.
• Videos recorded in MP4(MVC) format can only be played back in 3D by this unit.
• By dubbing videos recorded in AVCHD format to a Blu-ray recorder, the left and right
images can be recorded or played back separately.
• The use of a tripod is recommended.
3D LCD Monitor
3D images are supported on the camera’s LCD monitor. Press the “3D/2D” button on the
touch screen to change the display on the camera’s LCD monitor between 3D and 2D.
AVCHD Higher 3D playback compatibility
MP4(MVC) Higher 3D video quality
Basic Way to Hold a Camcorder
During 3D Recording
Shooting Distance During 3D
Recording
Hold the LCD
monitor while
recording
Keep elbows
close to your
sides to avoid
camera shake
Open your legs
slightly
50m (164')
10m (32'8")
1m
(3'3")
5m
(16'4")
It is recommended
to perform 3D
recording within the
optimal zone.
W
i
d
e
A
n
g
l
e
O
p
t
i
m
a
l
Z
o
n
e
T
e
l
e
p
h
o
t
o
O
p
t
i
m
a
l
Z
o
n
e
Preparation
– Always check available memory space and battery power in advance.
– Make sure your battery is fully charged.
– A spare battery may be useful.
Stabilizing Your Picture
Try these tips to improve the image:
– Look for a place to sit down and take your video.
– Look for something you can set your camera on.
– Consider using a tripod or a monopod to further steady your video.
Camera Movement
The most enjoyable and professional looking videos generally have very little camera
movement
– Treat all movements as a special effect.
– If you must move the camera, do it slowly.
Zooming
As a general rule, your video will look better if you zoom the lens before you start your
recording:
– Focus on the subject first, then begin recording.
– If you must zoom during a recording, treat it as a special effect and zoom slowly.
Exposure
– Remember to shoot with the sun or the primary light source behind you.
– Keeping the range of contrast in your scene to a reasonable level is the easiest way to
improve the picture quality.
– Pay special attention to objects in the LCD screen that appear very washed out or over
exposed.
– Making a simple change in how the camera is aimed or by zooming in slightly, you may
reduce contrast to a reasonable range.
Length of Recording
Many recordings are ruined by stopping the recording too soon and missing the best
moment:
– Always try for at least a 10 second recording.
– When in doubt, let the recording continue longer.
– It is much easier to edit unneeded material later.
C1DW_CW_EN_QSG.fm Page 1 Tuesday, December 28, 2010 3:56 PM