


7
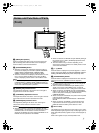
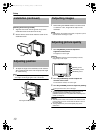
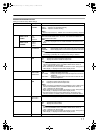
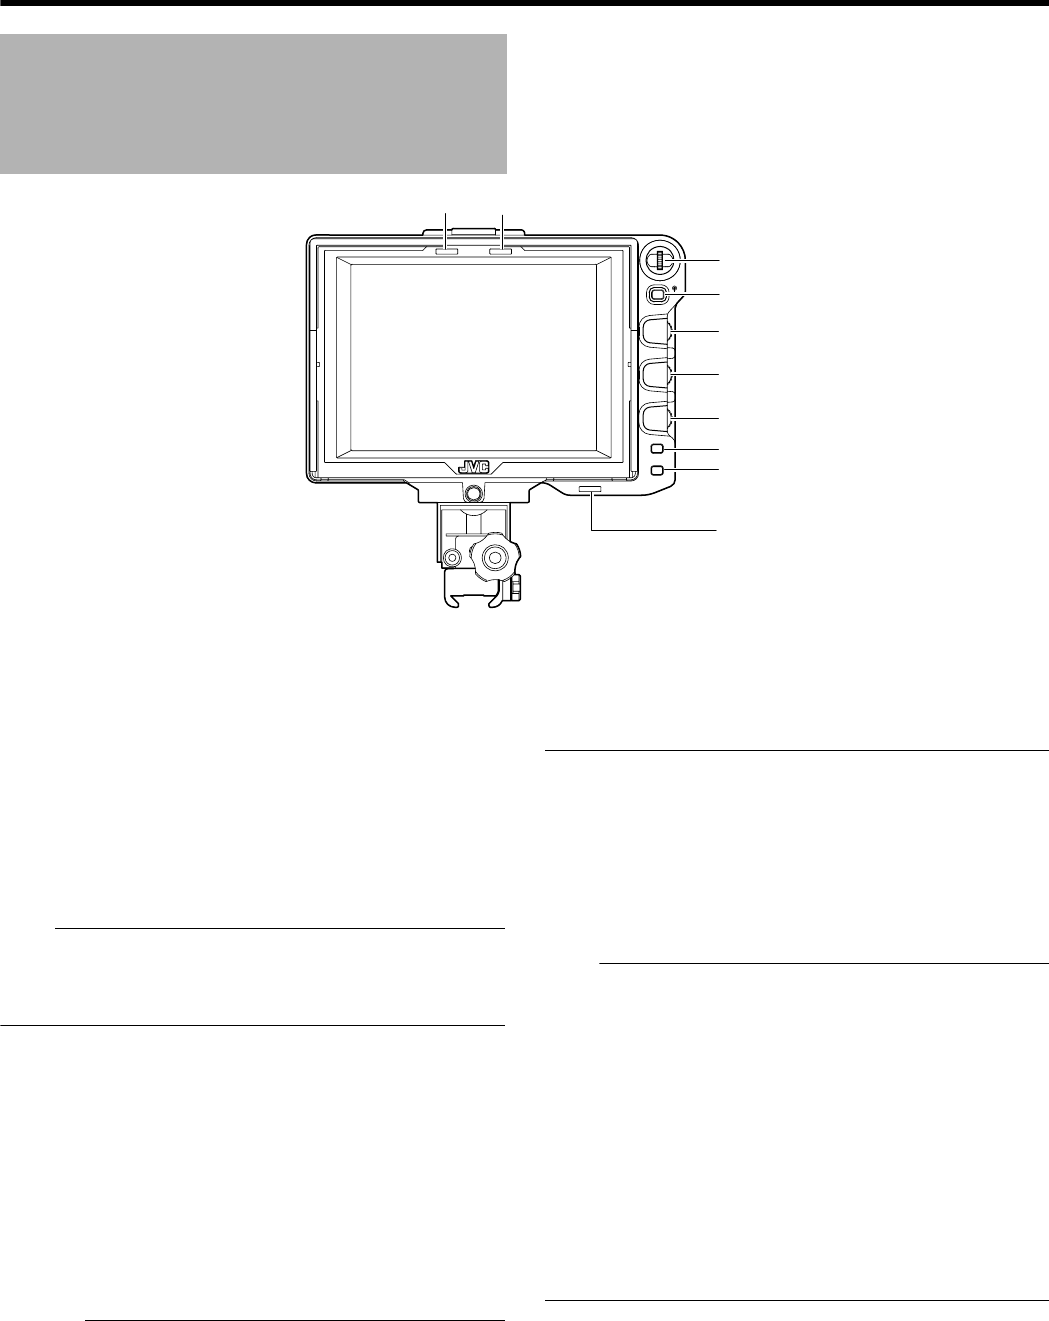
A [MENU] Dial (Button)
Scroll up and down this dial to move u p and down the cursor
(X) for selecting items when the Menu screen is displayed.
Press the dial to confirm the selected item.
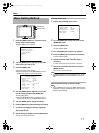
B [STATUS/MENU] Button
● When the normal screen is displayed, press this button to
exit the status display set in the Menu (ASPECT MARKER,
SAFETY ZONE, CENTER MARK, CAMERA NAME,
ZEBRA). Press this button again to display the status.
●
When the normal screen is displayed, press this button for more
than 1 second to display the Menu screen. When the Menu
screen is displayed, press this button to exit the Menu screen.
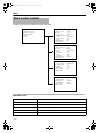
Note:
● Items where the [ASPECT MARKER], [SAFETY ZONE],
[CENTER MARK], [CAMERA NAME], [ZEBRA] display are
set to AOFFB in the Menu will not be displayed on the Status
screen even when this button is pressed.
C [BRIGHT] Adjustment Control
This adjusts the brightness of the screen. Turn to the right to
brighten and turn to the left to darken.
D [CONTRAST] Adjustment Control
This adjusts the contrast of the screen. Turn to the right to increase
the contrast and turn to the left to decrease the contrast.
E [PEAKING] Adjustment Control
This adjusts the peaking of the screen. Turn to the right to
sharpen the contour and turn to the left to soften.
Caution:
● When this product is connected to GY-HD250U, the LCD
monitor display of the camera can be changed if you tu rn the
PEAKING control on the camera. However, the monitor
display at VF-HP840U cannot be changed. PEAKING for VF-
HP840U must be operated on VF-HP840U.
● When connected to GY-HD250U and [VF SIGNAL] setting at
the camera is set to ARGBB, [PEAKING] adjustment at the
camera is forced to off.
● The above feature may not function depending on the
version of the camera’s software. For details, please consult
JVC’s authorized dealers.
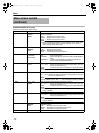
F [1 : 1] Button
Press this button to display the input video signals 1: 1 without
resizing. During this display, the [ASPECT MARKER], [SAFETY
ZONE], [CENTER MARK] display will be temporarily AOFFB.
G [FOCUS ASSIST] Button
Press this button to display the focused area in color. Accurate
focusing can be done. (PEAKING cannot be adjusted.)
Note:
● The color and level of the focused area can be changed at
the Menu screen. (A Page 14)
●
When connected to GY-HD250U and [VF SIGNAL] is set to
A
RGB
B
at the camera LCD/VF MENU screen, set FOCUS
ASSIST at the camera to
A
OFF
B
. Settings at VF will be invalid.
● When connected to GY-HD250U and the FOCUS ASSIST
setting on the camera is ON, pressing the [FOCUS ASSIST]
button of this product will display APLEASE CHECK
CAMERA SETTINGB.
● When connected to GY-HD250U, the product will not operate
under the following conditions.
During BARS ON, SKIN COLOR ADJUST or SKIN AREA
SW ON
● When connected to GY-HD250U, as the character being
output from the camera is recognized as focus area, set
[ANALOG OUTPUT CHAR.] at the camera to AOFFB.
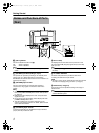
H TALLY Lamp
This displays the monitor status of the input screen in red or green.
When Tally PGM (Program) signals are input, the lamp lights up in red.
When Tally PVM (Preview) signals are input, the lamp lights up
in green.
When CALL signals are input, the lamp blinks in red.
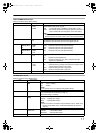
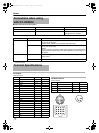
Names and Functions of Parts
(Front)
MENU
STATUS
BRIGHT
CONTRAST
PEAKING
1:1
FOCUS
ASSIST
5
6
4
5
6
4
H
C
D
E
F
G
H
A
B
H
VF-HP840U_EN.book Page 7 Thursday, January 17, 2008 2:48 PM