


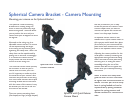

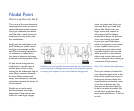


Nodal Point
This is one of the most frequently
asked questions when it comes to
stitcher-based panorama creation.
Once you understand the basics,
you’ll be able to easily locate the
nodal point for any camera and
lens combination.
Simply put, the nodal point is the
point inside your camera where
the light rays converge and fl ip
over. When shooting a panorama
it’s necessary to rotate about
this point to eliminate the image
mismatch caused by parallax error.
It’s also worth noting that the
nodal point is not the same as
the fi lm plane, which is often
marked on the underneath side of
many 35mm cameras. Generally,
for most 35mm cameras and
lenses, the nodal point is located
somewhere towards the center of
the lens barrel.
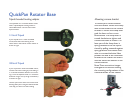
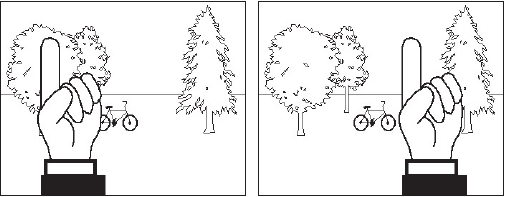
Parallax error can be easily
demonstrated by this simple
experiment. Close one eye and
hold your index fi nger upright
about six inches away from your
open eye. Rock your head from
side to side. Notice how your
fi nger moves with respect to
the background. This relative
movement is due to the fact that
you’re not rotating your head
around your eye’s nodal point,
which is somewhere in the center
of your eyeball. Instead, you’re
rotating about your spine which
is several inches to the rear and
off to one side. It is this relative
side-to-side motion that we will
strive to eliminate when setting up
a camera for VR panoramas.
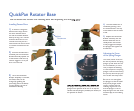
Step 1: The side-to-side adjustment
Once your camera is fastened to
your camera bracket, move to the
front of the tripod head so you’re
looking into the lens. Adjust the
camera bracket so that the cen ter
of the lens is di rect ly over the
pivot axis of the tripod head. Try
to be as accurate as possible. You
should strive to get this adjust-
ment within plus/minus a 1/16th of
an inch.
What is it and how do I fi nd it?
Parallax error can be easily demonstrated. It’s the rel a tive move-
ment caused by a shifting point of view. In this ex am ple, you eye
is moving with respect to your hand and the back ground.