5 - TAKING YOUR PICTURES
Step 4: Take the Second Picture
iPIX® Photography with Nikon Digital Cameras
39
Step 4: Take the Second Picture
The first picture you take using the Auto Exposure Lock will establish the
exposure for both the front and back hemispheres.
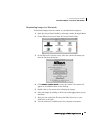
1. Move the rotator clockwise 180° until it clicks into place.
While rotating the camera, be sure the tripod does not move.
2. Squeeze your thumb and forefinger together to take the picture. This
prevents the camera from moving and your pictures from blurring.
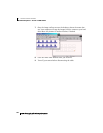
3. Once the picture is taken, a preview image will appear in the color LCD
screen. This picture will become the second half of your iPIX image.
4. Reset the AE Lock by following the procedure in Step 1.
5. Repeat Steps 1 through 4 for any additional images.
Always take pictures in pairs, resetting the exposure lock for each new
pair.
Step 5: Finish Your Photo Session
The black and white LCD display on the top of the camera shows the num-
ber of remaining pictures.
Disassemble the camera, lens, rotator, and tripod. Return the components
to their protective places in your kit.


