


The FH-835G is used when scanning medium-format (120/220) or 59 mm × 82 mm film for electron microscopes. The number of frames that can be
scanned depends on the type of film; up to four frames for 6 × 4.5 film, up to three frames for 6 × 6 film, and up to two frames for 6 × 7–6 × 9 film.
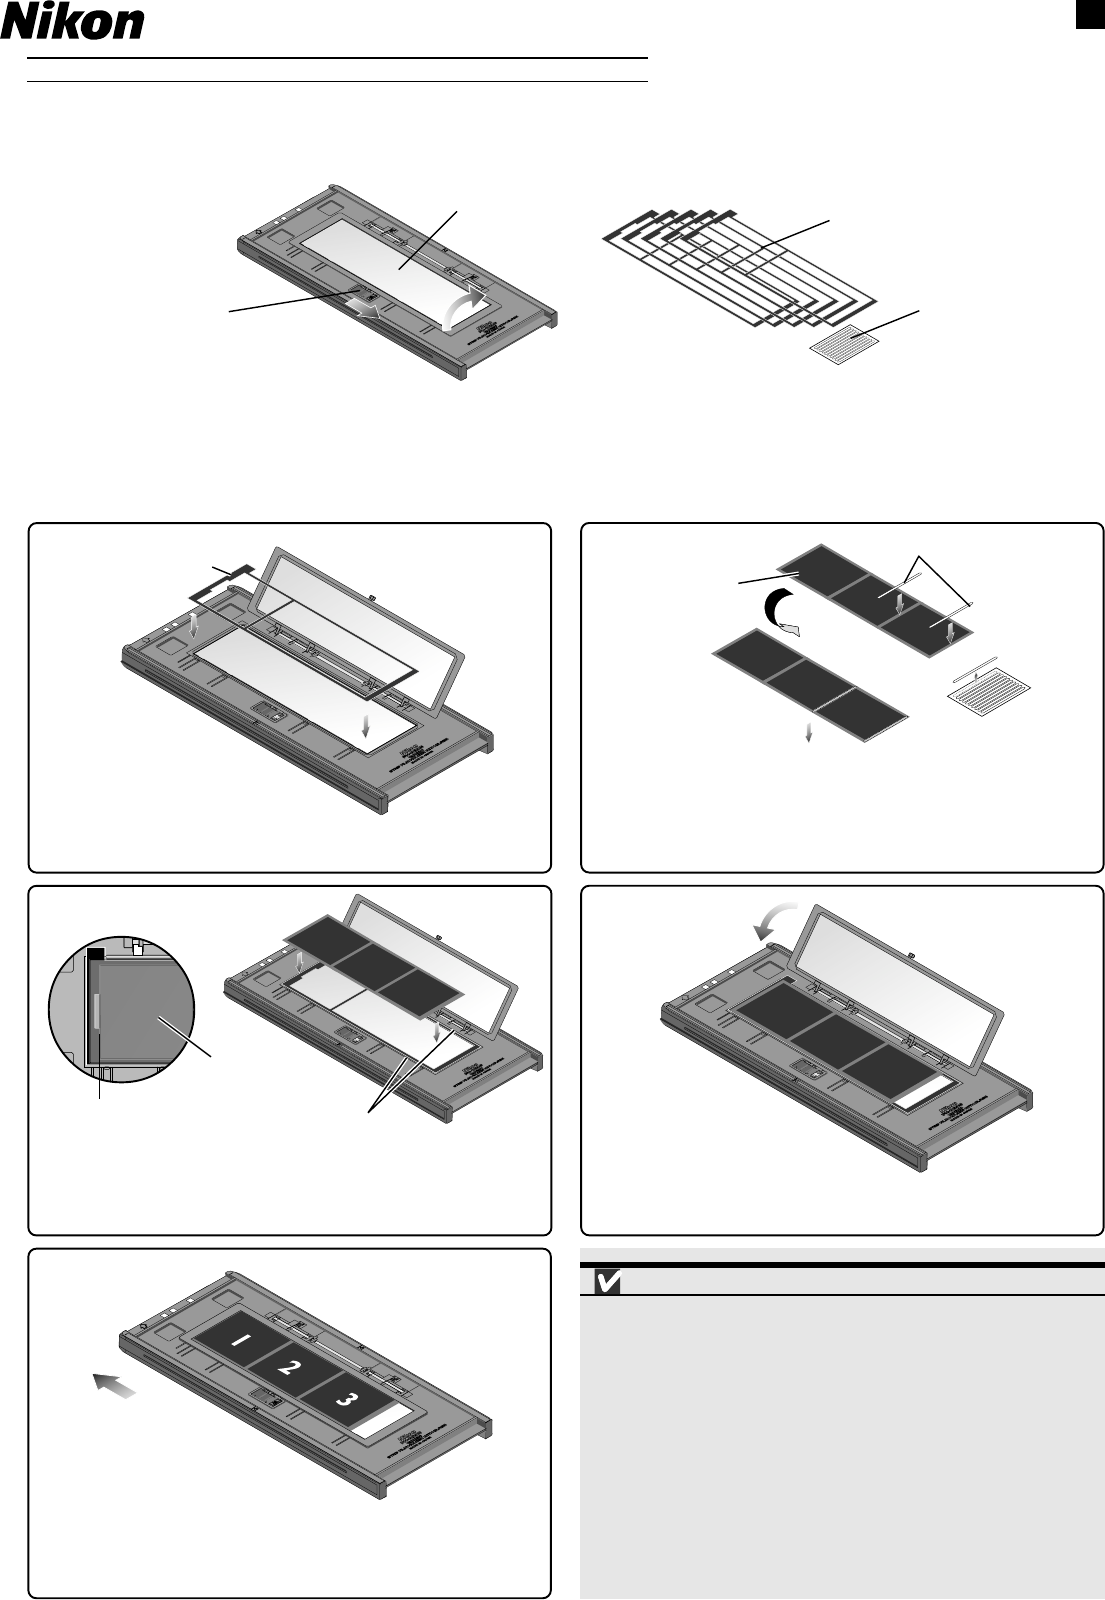
Using the FH-869G Glass-Covered Holder for Brownie Film: A CAUTION
Newton’s rings (a radial interference pattern) may appear when scanning film that has been bent out of shape or otherwise distorted. To prevent such
interference, attach seals to the matte emulsion surface of the film, between each pair of frames, with the exception of the first and second frames; then place
the film on top of the masking sheet with the matte emulsion surface down (shiny surface up). Seals can be reused.
Cautions
Use only one type of film at a time. Do not place negative and positive film in
the holder at the same time.
Be sure to align the end of the first frame of the film with the film line on the holder.
Leaving a gap between the film and the line could interfere with accurate color
reproduction.
Multiple single-frame strips of film can be inserted in the holder at the same
time, but be sure not to mix positive and negative film.
The glass in the lower portion of the holder has been treated to prevent inter-
ference. Avoid leaving fingerprints or other stains on the glass.
To avoid damaging the film, use a blower to remove dust and lint from the film
and holder. Leaving dust, lint, or other foreign objects on the film or holder
during scanning could result in reduced image quality or in damage to the film.
Sliding knob
Glass
cover
FH-869G Glass-Covered Holder for Brownie Film
Lower the upper holders until they click into place.
4
Matte emulsion
surface
Attach seals to the matte emulsion surface in between the frames to be
scanned (except for the first and second frame).
2
Seals
Masking sheet
Seal
Set a masking sheet of appropriate size in the film holder.
Masking sheet
1
Place the film to be scanned in between the film guides, with the shiny
surface facing up, and the matte emulsion surface (to which you attached
the seals) facing down. Align the edge of the first exposure (not the
unexposed portion at the very end of the film) with the inner edge of
the masking sheet, as shown in the illustration.
Film guides
3
Insert the film holder in the direction of the arrow.
Thumbnails are displayed in the thumbnail drawer in the scan window in
the order shown below.
Direction of insertion
5
Turn the film over so that the seals face downwards before inserting the film
Seals
Exposed film
Inner edge of masking sheet
En