


83
5
Advanced Shooting Techniques
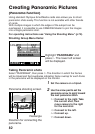
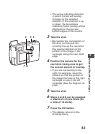
• The arrow indicating direction
in which frames will overlap
changes to the selected
direction. If this direction is up
or down, the boundaries
indicating frame overlap will be
displayed on the top and
bottom edges of the monitor.
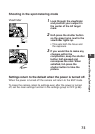
3 Take the shot.
• Remember the composition of
the shot, so that you can
correctly line up the next shot.
Pay special attention to the
portion of the image in the
rectangle along the next stitch
edge.
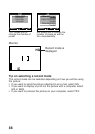
4 Position the camera for the
next shot, taking care to get
the correct amount of overlap.
• If you are connecting to the
right, for example, move the
camera so that the portion of
the image that was in the right
rectangle is now in the left
rectangle (See the diagram on
p.84).
5 Take the shot.
6 Steps 4 and 5 can be repeated
a maximum of nine times (for
a total of 10 shots).
7 Press the OK button.
• The display returns to the
shooting menu.
2 3 5
7 8