12 Pelco Manual C538M-A (3/04)
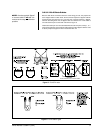
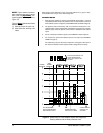
When setting frame addresses on the front panel switches for a group of daisy-
chained REL units, keep in mind a few working rules:
WORKING RULES
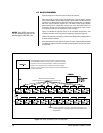
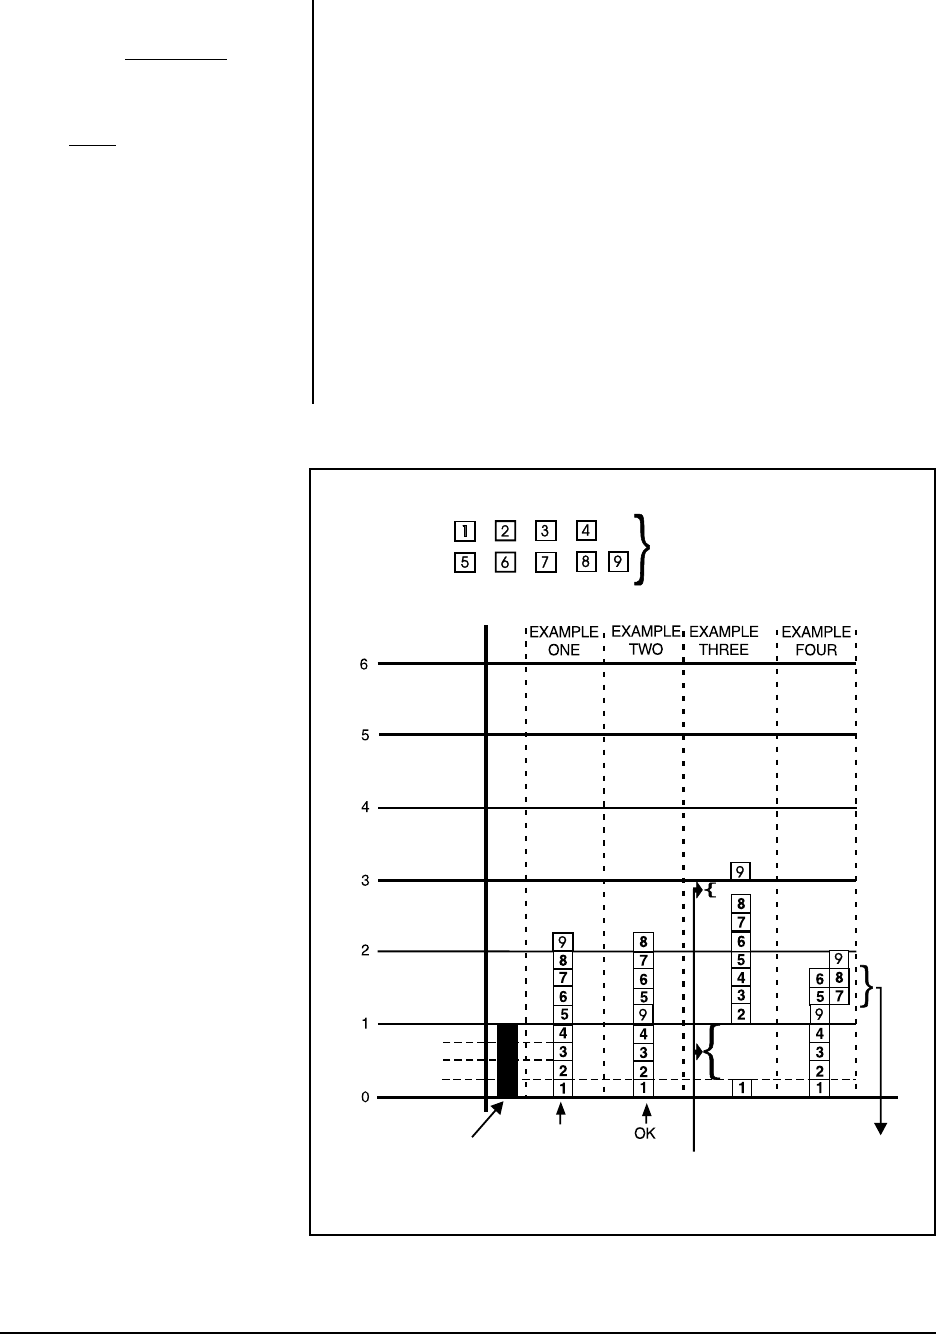
1. Start with frame address 0, which is associated with physical GPI 1, and work
sequentially forward until all relay interface units are accounted for. Insure that
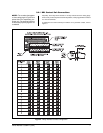
frame address space is contiguous (see EXAMPLE ONE and TWO of Figure 9).
2. The physical order in which relay units are connected is irrelevant. In a cas-
caded situation, however, leftover REL combinations using less than one frame
address space should be placed at the tail-end of allocated frame address
space.
3. Do not overlap frame address spaces (see EXAMPLE FOUR in Figure 9).
4. Do not leave any open frame address spaces in the layout (see EXAMPLE
THREE in Figure 9).
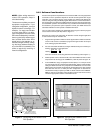
For explanatory purposes, the setup in Figure 9 is used again in other parts of
the manual to illustrate various aspects of REL configuration and setup.
Figure 9. Relationship of Frame Address Space with Respect to
Starting Address and the Relay Interface Units
NOTE:
Figure 9 does not neces-
sarily represent the order in which
REL units are
physically
con-
nected together (for that, refer to
Figure 14).
Figure 9
does
illustrate that frame
address settings:
(1) Must be unique for each unit.
(2) Must follow the working rules
listed.
EACH BOX REPRESENTS THE
FRAME ADDRESS SPACE
(EIGHT GPIs) USED BY ONE
REL UNIT.
3
2
1
0
3
2
1
0
3
2
1
0
3
2
1
0
3
2
1
0
3
2
1
0
FRAME
ADDRESS
SUB-
FRAME
ADDRESS
UNIT REFERENCE:
ONE FRAME ADDRESS
SPACE SPANS 32 GPIs
ADDRESS SPACING
GAPS NOT ALLOWED
FRAME ADDRESS
OVERLAP NOT
ALLOWED
OK


