Pelco Manual C1446M-B (7/98) 7
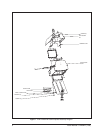
10.Two vent cover plates with gaskets affixed come attached to the camera sled
as loose equipment. Locate them for use in the following steps.
On the bottom of the enclosure, remove two screws and washers that attach
the vent grill and foam filter to the front of the enclosure. Using the
same screws and washers, attach a vent cover plate and gasket to the
front of the enclosure.
11. On the bottom of the enclosure, remove two screws and washers that attach
the vent grill (without foam filter) to the rear of the enclosure. Using the same
screws and washers, attach a vent cover plate and gasket to the rear of the
enclosure.
Proceed to Section 3.3, WIRING.
3.3 WIRING
3.3.1 Camera
1. Bring a BNC cable into the enclosure for the camera's video output.
2. Bring wiring into the enclosure for camera synchronization and motorized lens
controls if you are going to use these functions.
3. For camera power, refer to Section 3.3.2, POWER.
3.3.2 Power
3.3.2.1 EH4712DB/EH4718DB Model Only
The only power required is for the camera. Bring the wiring for the camera into the
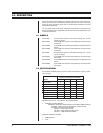
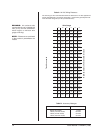
enclosure. If you are using 24 VAC, refer to Table A to determine the size of wire to
use.
Proceed to Section 3.4, CAMERA/LENS INSTALLATION.
3.3.2.2 Models with Heater-Blower (-1/-2/-3)
Determine whether the camera and accessories (blower and heaters) use the same
power or different power.
SAME POWER REQUIREMENTS
1. Add the camera’s wattage to the wattages of the accessories. Refer to Table B
for wattages of the accessories.
2. Determine the size of wire to use. If you are using 24 VAC, refer to Table A to
determine the size of wire to use.
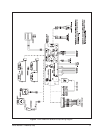
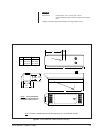
3. Bring wires for AC high, AC neutral, and ground into the enclosure. Refer to
Figure 2 and connect the wires as follows:
a. Remove the plastic cover over the power supply section of the circuit
board inside the enclosure.
b. Connect AC high to AC HI of the 3-connector terminal block.
c. Connect AC neutral to AC NT of the 3-connector terminal block.
d. Connect ground to GND of the 3-connector terminal block.
e. Do not reinstall the plastic cover over the power supply yet. It will be done
later.
Proceed to Section 3.4, CAMERA/LENS INSTALLATION.
CAUTION:
There are
two ways to supply power
to the camera: (1) when
the power requirements
for the camera and
enclosure’s accessories
are the same (for ex-
ample, if the camera and
accessories use 24 VAC)
and (2) when the power
requirements for the cam-
era and the enclosure’s
accessories are different
(for example, if the cam-
era uses 24 VAC and the
accessories use 120
VAC). Refer to Figure 2.


