C494M-D (1/96) 7
TAMPER SWITCH INSTALLATION
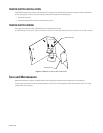
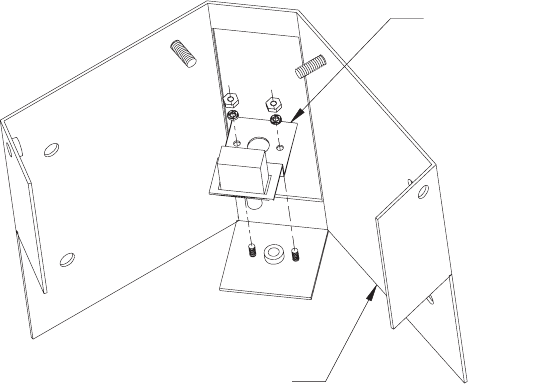
The HS2000 enclosure comes standard from the factory with a tamper switch installed. Should it become necessary to install a replacement
switch, refer to Figure 1 for the correct position of the bracket/switch and perform the following steps:
1. Remove the front cover.
2. Install the bracket/switch and secure with lockwashers and nuts.
TAMPER SWITCH WIRING
The tamper switch comes with both a Normally Open and a Normally Closed contact.
For a Normally Open circuit, use the “open” and “common” terminals; for a Normally Closed circuit, use the “closed” and “common” terminals.
Figure 1.
HS2000 Series Tamper Switch Installation
Care and Maintenance
Maintenance performed at regularly scheduled intervals will help prolong the operational life and appearance of the equipment.
Clean the Lexan window with a mild non-abrasive detergent in water and a soft cloth regularly to help maintain picture clarity. For a heavily
soiled window, use vinyl cleaner.
BRACKET/SWITCH
MOUNTING PLATE


