


C2217M (6/05)
ICS210-CM
Corner Mount
Important Safeguards and Warnings
Prior to installation and use of this product, the following WARNINGS should be observed.
1. Installation and servicing should be done only by qualified service personnel and conform to all local codes.
2. Only use replacement parts recommended by Pelco.
3. The installation method and materials should be capable of supporting four times the maximum specified load.
4. To prevent damage from water leakage when installing a mount outdoors on a roof or wall, apply sealant around the bolt holes between the mount
and mounting surface.
Description
The ICS210-CM is a corner mount specifically designed for the ICS210 Camclosure
®
integrated camera system. The mount is the perfect solution for
installing the ICS210 in a tight area such as a stairwell, hallway, or elevator.
Installation
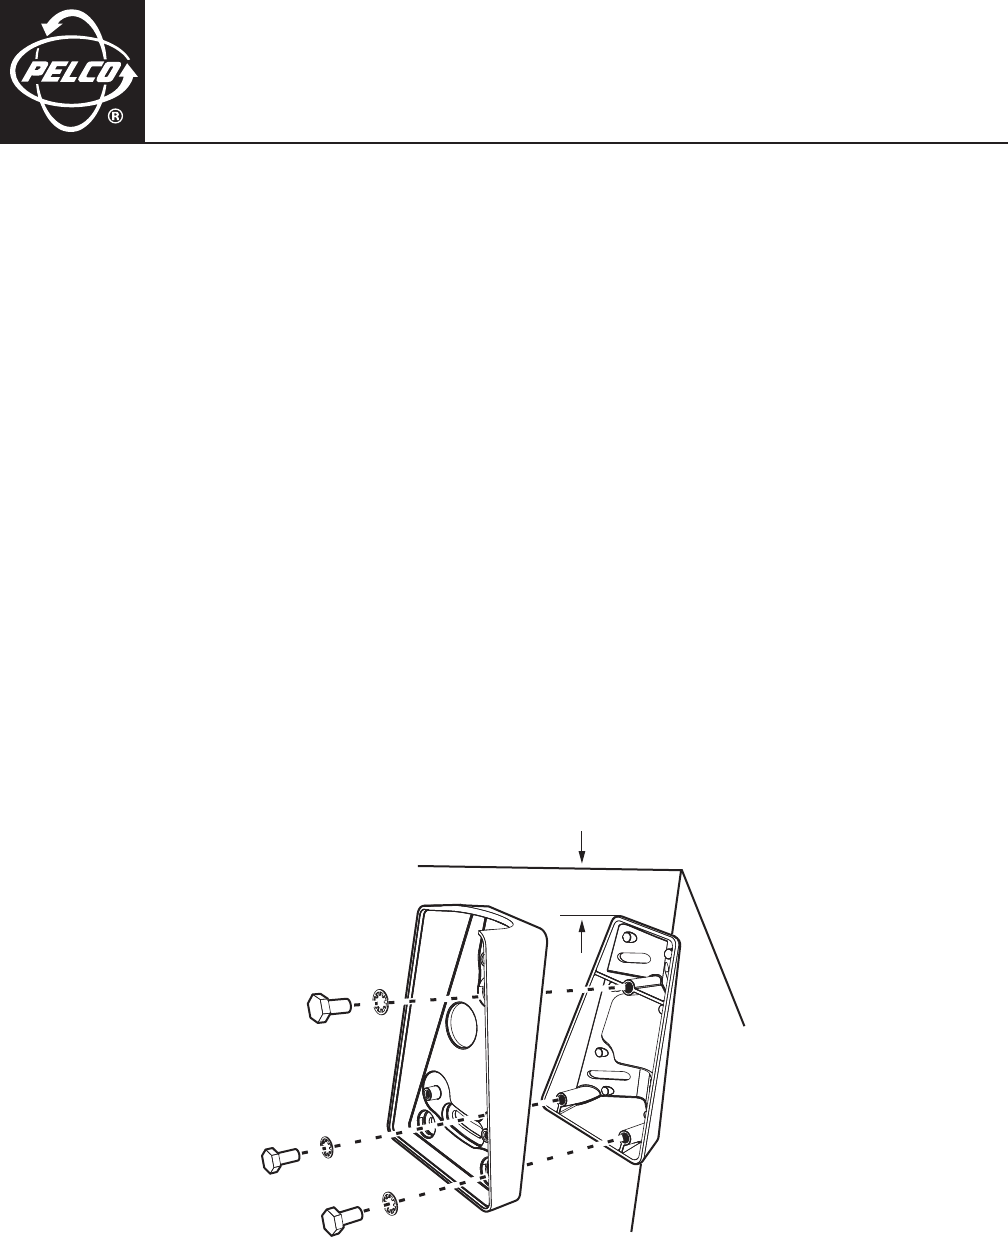
To install the ICS210-CM do the following (refer to Figure 1):
1. Using the ICS210-CM as a template, mark the four fastener positions on the mounting surface. Prepare the surface.
NOTE:
A 0.50-inch clearance between the top of the corner mount and the ceiling is required to complete the installation of the ICS210 to the ICS210-CM
(refer to Figure 1).
2. Route the wiring/cabling through the mount. Attach the ICS210-CM to the surface with the appropriate hardware (not supplied). If you install the
corner mount outdoors, apply a sealant between the mount and the mounting surface.
3. Use the three screws and lock washers provided with the corner mount and attach the base of the ICS210 to the ICS210-CM. To complete the
installation, refer to the installation and operation manual supplied with the ICS210.
4. You must reorient the camera module inside the ICS210 when using the ICS210-CM corner mount. Refer to the ICS210 Installation/Operation manual
for instructions on how to install and adjust the camera module.
Figure 1.
ICS210-CM Installation
0.5”
CLEARANCE