6 Pelco Manual C397M (4/98)
j. On the bottom of the enclosure, remove the vent grill and filters at the
front of the enclosure. Replace the grill with one of the vent cover plates
that was attached to the camera sled as loose equipment.
k. On the bottom of the enclosure, attach the other vent cover plate over
the grill at the rear of the enclosure.
3. Mount the camera/lens to the sled with the 1/4-20 Phillips-head screws that
are provided in the parts bag. You can mount the camera to either side of the
sled for proper elevation of the camera inside the enclosure.
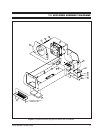
4. Install the sled and camera/lens in the enclosure:
a. If the camera’s lens is adjustable, extend the lens to its maximum length.
b. Place the sled over the mounting screws in the enclosure.
c. Slide the sled forward until the camera’s lens almost touches the window.
d. Tighten the screws to secure the camera sled to the enclosure.
5. Connect the video cable in the enclosure to the video output connection on
the camera.
6. If your camera has a motorized zoom lens control, connect or wire the camera’s
lens control to the LENS or LENS CONTROL connector on the circuit board.
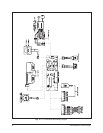
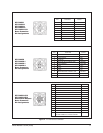
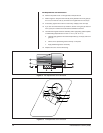
Refer to Figure 1 to see where to connect different lens connector options.
7. Wire power from the circuit board to the camera. There are two ways to con-
nect power (refer to Figure 1):
a. A three-pin plug with leads is supplied as loose equipment. Connect the
leads from the plug to the camera as follows:
Brown - AC HI
Blue - AC NT
Green - Ground
Remove the plastic cover over the power supply section of the circuit
board.
Connect the plug to the CAM1 socket on the circuit board.
Replace the plastic cover.
or
b. If your pan/tilt system uses 120 VAC and you ordered the optional 120 VAC
electrical outlet accessory (O/I-OUTLET), connect the 120 VAC plug to the
camera. Connect the three-pin plug to CAM1 (remove the plastic cover over
the circuit board and replace the cover after you plug in the connector).
8. Adjust the focus and iris on the camera, if necessary.
9. Close the enclosure lid.
Proceed to Section 3.3, WIRING.
NOTE:
If the AC power input to your
PT7700 unit is 120 VAC, the camera
must use 120 VAC. If the power in-
put is 230 VAC, the camera must use
230 VAC.


