Pelco Manual C342M-PSA (11/98) 7
3.0 INSTALLATION
3.1 MOUNTING
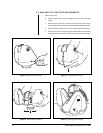
Attach the pan/tilt unit to a wall or ceiling mount. Follow the instructions that are
provided with the mount. Make sure the mounting surface and the selected mount
can support four times the combined weight of the pan/tilt unit and the camera
enclosure (including the camera and lens). The pan/tilt unit weighs approximately
21.5 pounds (9.68 kg). Refer to the manuals for your enclosure, camera, and lens
for the weights of those items.
Proceed to Section 3.2, ENCLOSURE INSTALLATION.
3.2 ENCLOSURE INSTALLATION
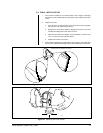
Attach the camera enclosure to the pan/tilt unit. Follow the instructions that are
provided with the enclosure.
Proceed to Section 3.3, ELECTRICAL INSTALLATION.
3.3 ELECTRICAL INSTALLATION
3.3.1 LRD41A11-X Legacy Receiver/Drivers
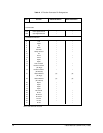
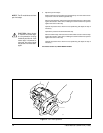
Connect the 37-pin round connector from the pan/tilt unit to the mating connector
on the receiver/driver.
NOTE:
To insure proper wiring and
operation of your equipment, it is rec-
ommended that you test the pan/tilt
unit and associated equipment in your
facility before installing it in the field.
Refer to Sections 3.2 through 3.4.
CAUTION:
The PT780
pan/tilt units are designed
for upright or inverted (base
up) operation. Never mount
the pan/tilt horizontally.
NOTE:
If you mount your pan/tilt unit
in the inverted position, you must in-
stall a rain cover (part number
90010019).
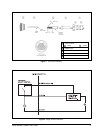
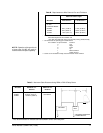
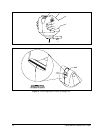
WARNING:
To prevent
damage to the wiper, if your
enclosure has one, AC high
to turn on the wiper (pin 25
of the 37-pin connector) must
come from the same circuit
that provides power to the
wiper (pin 15 of the 37-pin
connector). This is because
the wiper and the on/off con-
trol share the same AC neu-
tral (pin 16). See Figure 2.


