


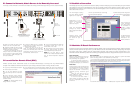

1. Attach the included AC power cord to
IP-Reach, and into an AC power outlet.
2. Attach a PS/2 keyboard and multisync
monitor to the corresponding ports in the
back of IP-Reach marked “Admin Console.”
3. Power ON IP-Reach.
4. After booting, IP-Reach will display the
Setup Wizard on the Admin Console screen.
Press ‘B’ on the Admin Console keyboard to
begin configuring IP-Reach.
5. On the Key Configuration Screen, enter
the 16-digit user license key located on the
software certificate included with your IP-
Reach unit. Press <Ctrl+S> to save.
6. On the Network Configuration Screen,
assign a unique name (e.g. “Server_Room”)
and IP Address parameters for IP-Reach.
7. The Main Menu appears. Browse
through the Admin Console options to
configure IP-Reach as appropriate to your
environment. Refer to the User Manual
found on the enclosed CD-ROM for detailed
descriptions of administrative parameters.
8. When satisfied with your IP-Reach con-
figuration, return to the main menu of the
Admin Console, and press ‘R’ to “Restart or
shutdown IP-Reach”. Press ‘S’ to shutdown,
and power OFF IP-Reach.
9. At this time, you may detach the PS/2
keyboard and multisync monitor from the
Admin Console ports, or leave them
attached for future monitoring or further
configuration.
ALTERNATIVE: As an alternative method
of performing initial configuration, you may
connect to IP-Reach via a web browser on a
Windows computer, instead of directly via a
keyboard and monitor as described above.
To do so, simply attach a crossover
Ethernet cable between the network ports of
IP-Reach and your computer; enter IP-
Reach’s default IP address into Internet
Explorer (192.168.0.192); and login with the
default username / password (“admin” /
“raritan”).
After authenticating, you will be directly
connected to your IP-Reach unit. On the left-
hand side of the window, double-click on
the “Admin Console” port to commence
remote administration of your IP-Reach unit.
IP-Reach
®
Quick Installation and Setup Guide
IP-Reach M Series
Quick Installation and Setup Guide
For more detailed installation and operating instructions, please
consult the User Manual found on the enclosed CD-ROM.
I. Prepare Servers and Network for Remote Operation
Congratulations on your purchase of IP-Reach, the industry-leading solution for multi-platform, high-performance, remote,
network-based KVM console access. IP-Reach enables highly-secure, multi-user, bandwidth-efficient, and software-independent
access to your servers’ KVM consoles via a web browser.
Before installing IP-Reach, first configure each server which you intend to access remotely with the following parameters. This
important installation procedure ensures optimal video / mouse performance and responsiveness.
All Servers
A. For optimal bandwidth efficiency and
video performance, set the desktop back-
ground to a predominantly solid, plain, light-
colored graphic.
B. Ensure that the server’s video resolution
and refresh rate are supported by IP-Reach,
and the signal is non-interlaced:
Text Mode 1024x768 @ 60Hz
640x480 @ 60Hz 1024x768 @ 70Hz
640x480 @ 72Hz 1024x768 @ 75Hz
640x480 @ 75Hz 1024x768 @ 85Hz
640x480 @ 85Hz 1152x864 @ 60Hz
800x600 @ 60Hz 1152x864 @ 75Hz
800x600 @ 72Hz 1280x1024 @ 60Hz
800x600 @ 75Hz
800x600 @ 85Hz
Network / Firewall
In order to enable IP-Reach, your network
and firewall must allow communication on
TCP Port 5000. Alternatively, IP-Reach can
be configured to use a different TCP port of
your own designation (in step II-6 below).
Windows XP
Disable “Enhanced Pointer Precision”, and set
the mouse motion speed exactly to the
middle speed setting; these options are locat-
ed in Control Panel > Mouse > Mouse Pointers.
Windows 2000 / ME
Set mouse pointer acceleration to “none”,
and the mouse motion speed exactly to the
middle speed setting.
Windows 95 / 98 / NT
Set mouse motion speed to the slowest
setting in Control Panel > Mouse > Motion.
Linux
Set mouse acceleration to exactly 1, and
threshold to exactly 1.
Sun Solaris
Set mouse acceleration to exactly 1.0. Also
be sure that your video card is set to a
supported resolution, and is outputting VGA
(H-and-V Sync, not composite sync). This
non-default configuration can be set in the
bootprom mode by issuing the command
“setenv output-device screen:r1024x768x70”,
followed by “boot” to reboot.
Macintosh
While no specific mouse setting is required,
when using IP-Reach to access and control
a Macintosh system, you must set the IP-
Reach client to “single cursor” mode. See
IP-Reach User Manual for more details.
II. Attach Local Console for Initial Configuration
Raritan Computer Inc.
400 Cottontail Lane
Somerset, NJ 08873
USA
Tel. 1-732-764-8886
Fax. 1-732-764-8887
E-mail: sales@raritan.com
http://www.raritan.com
Raritan Computer Europe, B.V.
P.O. Box 566
2900 AN Capelle aan den IJssel
The Netherlands
Tel. 31-10-284-4040
Fax. 31-10-284-4049
E-mail: sales.europe@raritan.com
http://www.raritan.com
Raritan Computer Japan, Inc.
Kuga Building 7F
11-6, Kuramae 4-chome
Taitoo-ku, Tokyo 111-0051, Japan
Tel. 81-3-5833-6360
Fax. 81-3-5833-6336
E-mail: sales.japan@raritan.com
http://www.raritan.co.jp
Raritan Computer Taiwan, Inc.
5F, 121, Lane 235,
Pao-Chiao Rd., Hsin Tien
Taipei Hsien, Taiwan, ROC
Tel. 886-2-8919-1333
Fax. 886-2-8919-1338
E-mail: sales.asia@raritan.com
http://www.raritan.com.tw
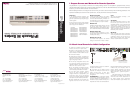
IP-Reach M1 / M2
To AC Power Outlet
1
2
Local Admin Console
KEYBOARD AND MONITOR USED TO
PERFORM INITIAL CONFIGURATION
255-80-3102 Rev0A