


50
Basic Setups for the Switcher
Chapter 3 Preparations
Basic Setups for the Switcher
This section describes the basic setup items for the switcher. Set up the switcher
before starting video switching or camera-control operations.
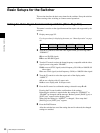
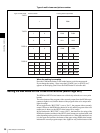
Setting the Video Signal Format and Aspect Ratio (Menu Page 951)
This menu is used to set the signal format and the aspect ratio supported by the
switcher.
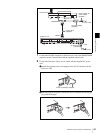
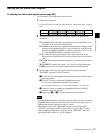
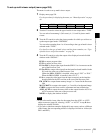
1
Display menu page 951.
For the procedure for displaying the menu, see “Menu Operation” on page
46.
2
Turn the F1 control to select the video signal format you are using under
“FORMAT.”
SD: to use SD-SDI signals
HD: to use HD-SDI signals
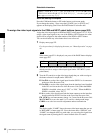
3
Turn the F2 control to select the frame frequency compatible with the video
signal you are using under “FRAME.”
59.94: to use an NTSC signal (vertical frequency: 59.94 Hz) or 1080/59.94i
video signal
50: to use a PAL signal (vertical frequency: 50 Hz) or 1080/50i video signal
4
Turn the F3 control to select the aspect ratio of the display under
“ASPECT.”
4:3: to use a display with 4:3 aspect ratio
16:9: to use a display with 16:9 aspect ratio
5
Press the F4 control to confirm the settings selected in steps 2 to 4.
Pressing the F4 control enables confirmation of the settings.
Rebooting the switcher is required after the settings for “FORMAT” or
“FRAME” are changed, and the message “Reboot system? [PAGE] (yes) or
[EXIT] (no)” appears on the display panel.
When only the setting for “ASPECT” is changed, “Save setup data?
[PAGE] (yes) or [EXIT] (no)” appears.
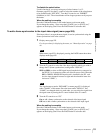
6
Press the PAGE button.
After the switcher has saved the setting data and is rebooted, the changed
settings are enabled.
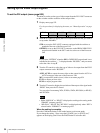
SYSTEM FORMAT FRAME ASPECT APPLY 1/5
SYS MODE
HD 59.94 16:9
Exec
951