


Others
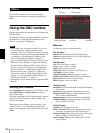
Using the SNC toolbox
108
Number
The set mask number is displayed in the Viewer when
Solid PTZ (page 45) is off.
Frame
When Solid PTZ (page 45) is off. display the frame of
the set mask to distinguish the mask area when the set
mask is overlapped.
Panorama area
Display the panorama when Solid PTZ (page 45) is on.
The set privacy mask is displayed by numbers on the
panorama. When the panorama is clicked, the camera
will focus on the place clicked.
Note
If a panorama image has not been created, the default
image is displayed.
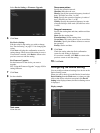
PTZ controller
Pan/tilt/zoom functions are available when Solid PTZ
(page 45) is on.
Pan/tilt operation
Click the arrows in the direction you want the camera
to move. Press and hold the arrows to move the
camera continuously.
Zoom operation
Click the button to zoom out, click the
button to zoom in. Press and holf the button to zoom
continuously.
The zoom bar displays the current zoom position
with Wide at the right end, and Tele at the left end.
Click the button to adjust the zoom to Wide,
Click the button to adjust the zoom to Tele.
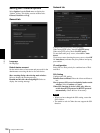
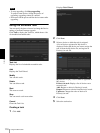
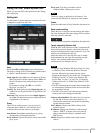
Privacy mask setting section
Allows you to set or delete the privacy mask.
You can set up to eight privacy masks.
Set: Register the area specified on the viewer as a
privacy mask area.
Click Set and the portion of the viewer image is
masked with the privacy mask. The color of the
privacy mask is that selected with the Color drop-
down list.
Note
If the mask area is close to the bottom of the image, the
background at the bottom may still be visible.
Color
Specify the color or mosaic of privacy masks. This
setting is common to every privacy mask.
The selectable colors are as follows:
Black, Gray1, Gray2, Gray3, Gray4, Gray5, Gray6,
White, Red, Green, Blue, Cyan, Yellow, Magenta
Clear all
Click to delete all privacy masks simultaneously.
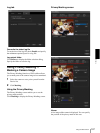
Setting a privacy mask
To set a privacy mask in a desired position, do the
following:
1
Specify the privacy mask area by dragging the
mouse on the viewer.
2
Select the color or mosaic of the mask from the
Color drop-down list.
Note
The color is common to every privacy mask. The
color last selected is applied.
3
Select the desired privacy mask number in the
privacy mask setting section, and then click Set of
the corresponding number.
The mask is displayed on the viewer.
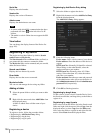
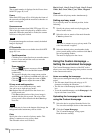
Using the Custom Homepage —
Setting the customized homepage
The Custom Homepage function of the SNC toolox
allows you to store the homepage that you have created
in the camera and watch it.
Notes on creating the homepage
When you are creating the homepage, note the following
points.
• The file name should be typed using up to 24
characters including the extension.
• The file size of the homepage should be 2.0 MB or
less.
• To see the created homepage, set the Homepage in the
Layout tab from viewer menu.
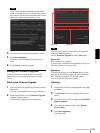
Uploading the homepage to the camera
using the Custom Homepage
1
Select the device to upload from the Device list.
You can select multiple devices at the same time.
2
Click the Custom Homepage.
The “Custom Homepage” dialog opens.
Read the notes carefully.