


Others
Using the SNC toolbox
102
Others
This section explains how to use the application
software and commands, including the supplied CD-
ROM.
Using the SNC toolbox
Explains the functions except those of the Network tab
in SNC toolbox.
To install SNC toolbox, to assign an IP address and to set
the network, see “Assigning the IP Address to the
Camera” on page 6 in “Preparation”.
Notes
• SNC toolbox may not operate correctly if you use a
personal firewall or antivirus software in your
computer. In this case, disable the software or assign
an IP address to the camera using another method. For
an example, see “Assigning the IP Address to the
Camera Using ARP Commands” on page 121.
• If you are using Windows XP Service Pack 2 or later,
Windows Vista or Windows 7, disable the Windows
Firewall function. Otherwise SNC toolbox will not
operate correctly. For the setting, see “Configuring
Windows Firewall” in “When using Windows XP
Service Pack 2 or later” on page 9, “Configuring
Windows Firewall” in “When using Windows Vista”
on page 11 or “Configuring Windows Firewall” in
“When using Windows 7” on page 13.
• The model on sale in China does not support the SSL
function.
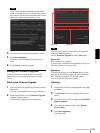
Starting SNC toolbox
Select Program from the Start menu of Windows, then
select SNC toolbox and SNC toolbox in sequence.
SNC toolbox starts.
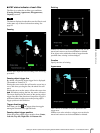
The main screen appears. SNC toolbox detects cameras
connected to the local network and lists them on the
Network tab window.
When you are using Windows Vista, message “User
Account Control – An unidentified program wants
access to your computer” may appear. In this case, click
Allow.
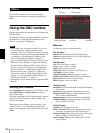
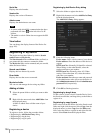
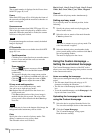
How to use SNC toolbox
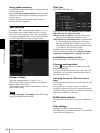
Menu bar
All functions can be selected from here.
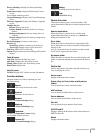
File (F) menu
Import: Reads the Device list file (CSV format).
Export: Outputs the Device list in a CSV format file.
Close: Exits SNC toolbox.
Edit (E) menu
Cut: Cuts off a device or folder.
Copy: Copies a device or folder.
Paste: Pastes a device or folder.
Select All: Selects all devices in the Device list.
Add Folder: Creates a folder.
Add Device Entry: Manually registers a device.
Modify Device Entry: Edits the device information.
Remove: Removes a device from a folder.
Delete: Deletes a device or folder.
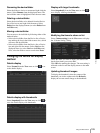
View (V) menu
Status Bar: Switches show/hide of status at the bottom
of the screen.
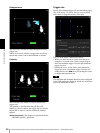
Normal: Displays detailed information on a device.
Snapshot small: Displays detailed information on a
device with a small thumbnail.
Snapshot large: Lists devices with large thumbnails.
Column Setting: Displays the setting screen for the
items to display on the list.
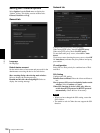
Tools (T) menu
Search: Searches again for devices.
Device Account: Displays the management screen for
user names and passwords related to the device.
Network Setting: Displays the screen for modifying the
address settings for the selected device.
Device Setting: Displays the settings screen for the
selected device.
Menu bar Function buttons
***
Device tree display
Device list
View button