


Chapter 5 Connections and Preparations
5-8 Chapter 5 Connections and Preparations
Settings
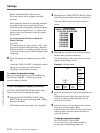
5 When the settings are completed, press the SET
key.
A message “NOW SAVING” is displayed, and the
settings are stored in nonvolatile memory.
The Image Control menu is restored.
To restore to the previous setting
Before pressing the SET key, press the MENU key.
The message “ABORT !” is displayed, and the
previous setting is restored.
Notes
• If an optional input board is not mounted to a slot of
corresponding connector numbers, CONNECT
cannot be selected for those numbers.
• When the settings of this display are changed, the
settings of the monitor display structure (page 5-9)
and those of the recording modes (page 5-12) are
automatically changed.
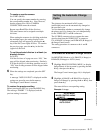
Setting Camera Names
You can specify desired names for connected cameras.
Use CAMERA NAME (Camera Name) of the
Indication Control menu for the setting.
Usable characters
You can set a name of up to 12 characters including
alphabetics, numerics, and some symbols. The
specified names are superimposed in the picture from
the cameras. CAM1 to CAM 16 are set at the factory.
Note
As the camera numbers are necessary for various
setting and selecting pictures for monitoring, it is
recommended that the number to be included in the
name.
Setting procedure
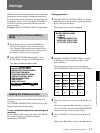
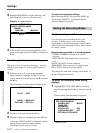
1 Highlight INDICATION CONTROL MENU (or
display Indict Menu) of the top menu by pressing
the V or v key, then press the b key.
The Indication Control menu is displayed.
SETUP MENU
INDICATION CONTROL MENU
M BORDER LINE : BLACK m
DATE FORMAT : M D Y
MONTH FORMAT : NUMBER
TIME FORMAT : 12H
FRNT TIME DISP : TM MD
MONI CHAR TYPE : WHITE
MONI CHAR POS : UP
MONI CHAR INFO
REC CHAR POSI : UP LEFT
REC CHAR INFO
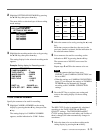
2 Highlight CAMERA NAME (or display
CameraName) by pressing the V or v key, then
press the b key.
The menu shifts to camera name setting, and the
first character of the name currently set for the
camera connected to the VIDEO IN 1 connector
flashes.
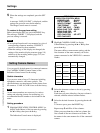
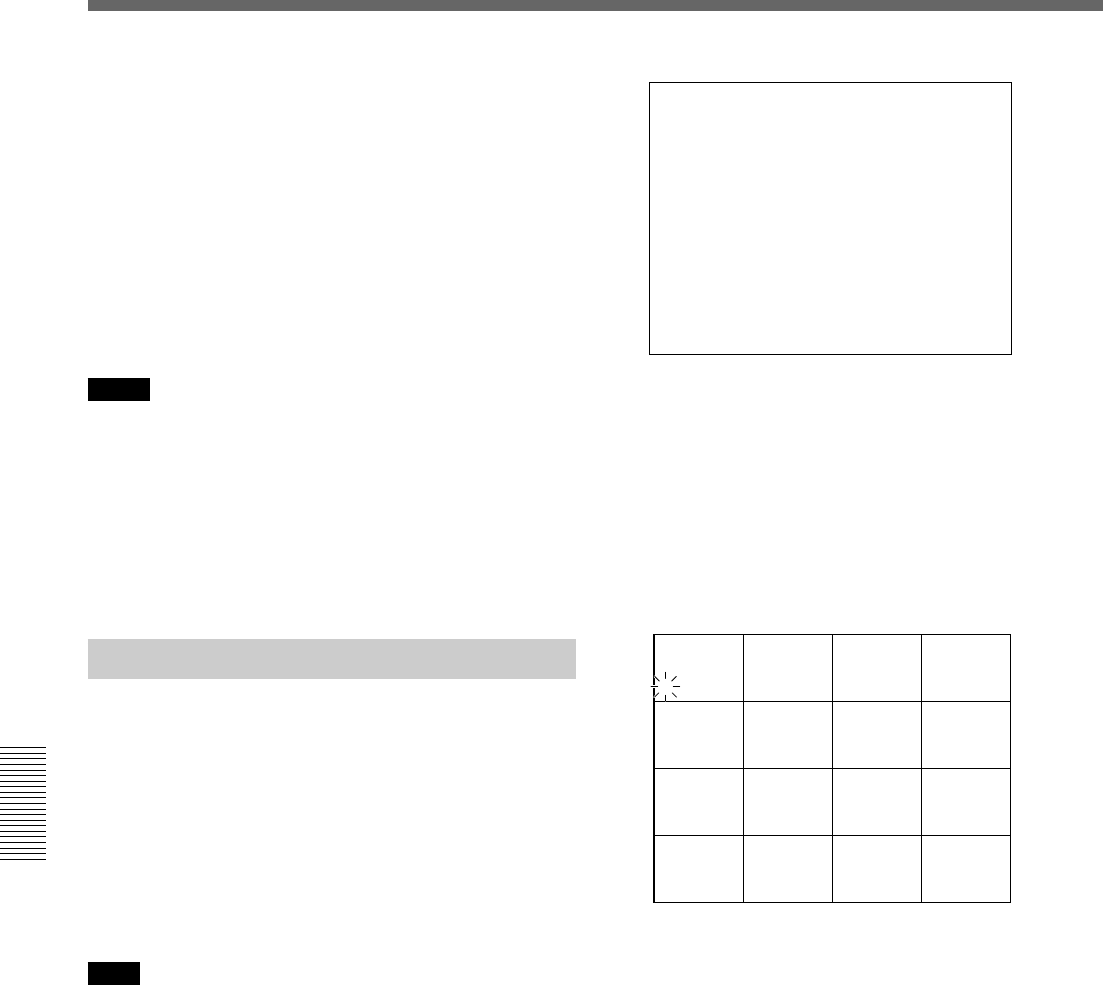
1 CAMERA 2 CAMERA 3 CAMERA 4 CAMERA
5 CAMERA 6 CAMERA 7 CAMERA 8 CAMERA
9 CAMERA 10 CAMERA 11 CAMERA 12 CAMERA
13 CAMERA 14 CAMERA 15 CAMERA 16 CAMERA
3 Select the character column to be set by pressing
the b or B key.
Each time you press either key, the next column is
selected, and that selected column flashes.
4 Select the desired character by pressing the V or v
key.
To insert a space, press the RESET key.
Repeat steps 3 and 4 for all the columns.
When you press the b key at the last column, the
first column of the next camera now flashes. Set
the names in the same manner for all the connected
camera.