


4
Precautions
•Choose the mounting location carefully, observing the following:
—Do not install the unit where;
•it will interfere with normal driving operations.
•it will injure driver or passengers.
•the ambient temperature exceeds 55 °C (131 F°).
•it will be exposed to direct sunlight or hot air from a heater.
•it will be exposed to rain, water, or high humidity.
•it will be exposed to a lot of dust.
•it will become magnetized.
•it will be subject to excessive vibration.
•there are wire harnesses or pipelines under the place.
•it will jam any working parts of the car.
•it will get the wires under a screw, or caught in moving parts.
•Use only the supplied mounting hardware for a safe and secure
installation.
•If the unit is installed at an angle, when inserting and removing the
“MG Memory stick,” take care not to drop it.
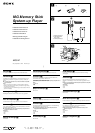
Installation (4)
1 Deciding installation position, and cleaning the installation
area.
Clean the installation area of any dirt or oil before applying
installed tape on the holder 2 (see above illustration 4-4).
Note
Be sure nothing obstructs the handle, lever, etc.
2 Mark the position of screw holes in the installation position.
Use the screw hole of the holder 2 as a template.
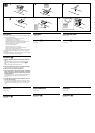
3 Make a hole of 2 mm at the marked position.
4 Warm up the surface of the installation position and installed
tape on the holder 2 to between 20 ºC and 30 ºC. Adjust the
holder to the desired position, press down firmly, and install
the supplied screw 1.
After installing the screw, cover the protruding end of the screw
to avoid damage to cords. Gum tape may be used for this
purpose.
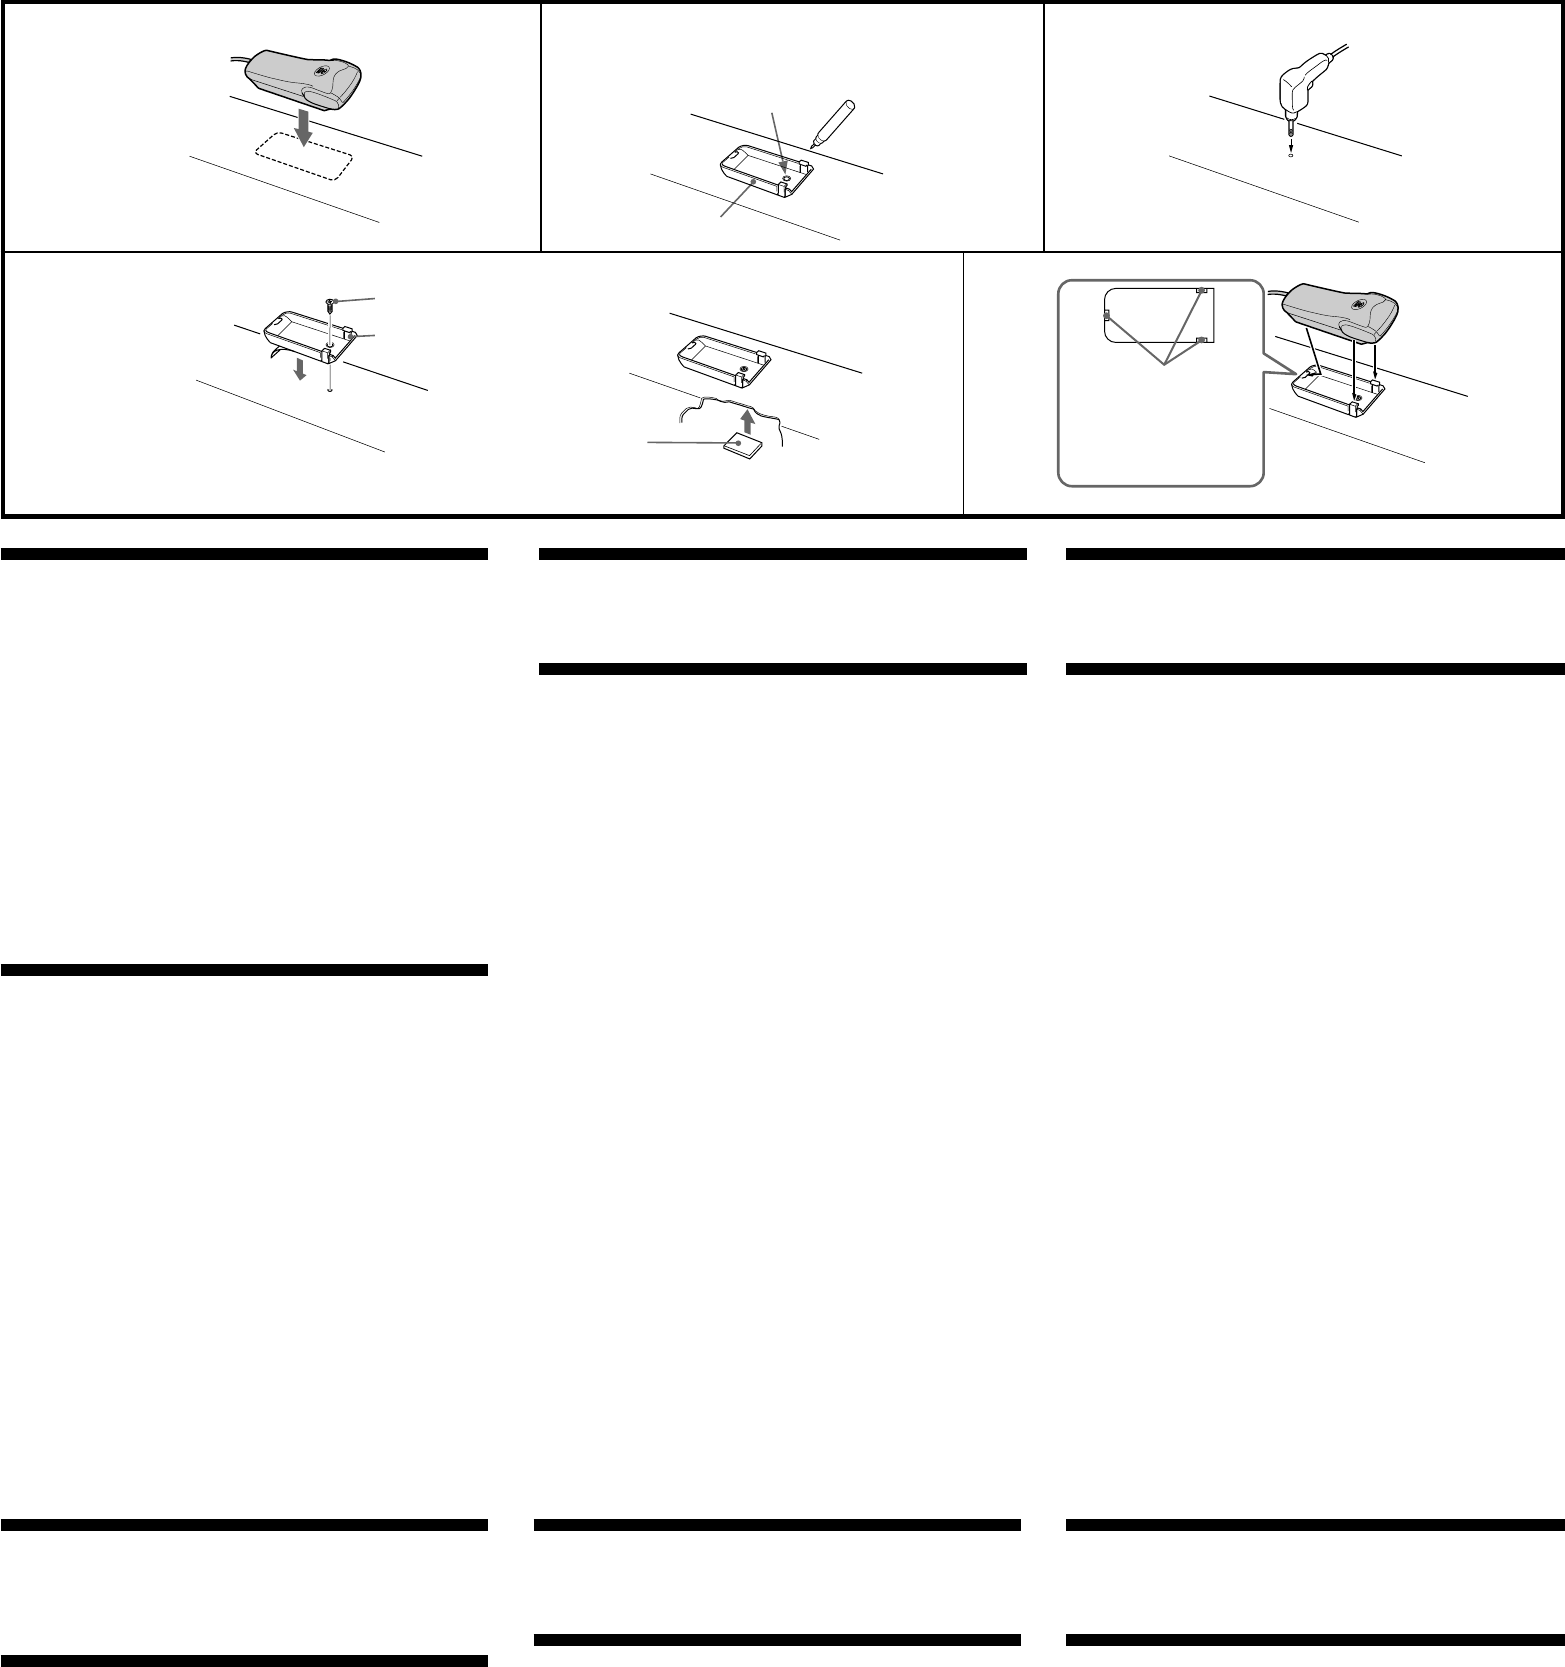
5 To install, align the 3 lockup holes on the bottom of the unit
with the 3 holder catches.
Secure the long cord with the supplied cord clamp 3 so that it
does not interfere with driving. Take extra care that the cord does
not become twisted around the gear lever as an accident may
occur.
Précautions
•##<FR-7>##
Installation (4)
##<FR-8>##
Precauciones
•##<ES-7>##
Instalación (4)
##<ES-8>##
Vorsichtsmaßnahmen
•##<DE-7>##
Installation (4)
##<DE-8>##
Voorzorgsmaatregelen
•##<NL-7>##
Installeren (4)
##<NL-8>##
Precauzioni
•##<IT-7>##
Installazione (4)
##<IT-8>##
4
1
3
5
2
2
screw hole
##<FR-4>##
##<ES-4>##
##<DE-4>##
##<NL-4>##
##<IT-4>##
2
gum tape, etc.
##<FR-5>##
##<ES-5>##
##<DE-5>##
##<NL-5>##
##<IT-5>##
lockup holes
##<FR-6>##
##<ES-6>##
##<DE-6>##
##<NL-6>##
##<IT-6>##
1