


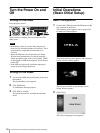

Initial Operations (Basic Initial Setup)
18
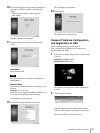
Configure the settings according to the
operation environment, and click [Next] for
each of the settings screen.
Note
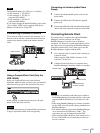
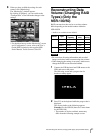
When using the NSR-100/50, connect the
following devices to each of the LAN ports.
LAN1: Network cameras
LAN2: Remote clients
LAN3: External storage devices (This may not
be supported depending on the software version.
For details, consult your dealer.)
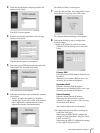
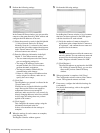
When using a DHCP server to configure
address settings automatically
Select [DHCP].
When configuring addresses manually
(1) Select [Static].
(2) Enter the following information.
IP Address
Enter the desired IP address.
Caution
• Before you enter the desired IP address,
make sure that it is not already otherwise
used on the network. Entering an IP
address already in use may lead to erratic
operation of the unit, but no error
messages appear to indicate the fact.
• Because of IP address attribution rules,
setting an invalid address such as the ones
below is not allowed.
Example: 224.0.0.0 to 255.255.255.255
0.0.0.0
127.0.0.1, etc.
Netmask
Enter the subnet mask address.
Note
The default settings for network devices are
as follows.
IP Address: 192.168.[0/1/2]*.1
Netmask: 255.255.255.0
* The settings for each of the network
devices #1, #2, and #3 (only network
device #1 for the NSR-25).
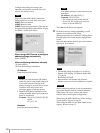
The [Monitor Model] screen appears.
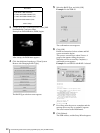
9
Perform screen size settings depending on each
monitor port, and then click [Next].
When two monitors are connected, clicking [Dual
Head] displays the second monitor configuration
screen.
Select the appropriate monitor type and resolution
(pixels) for your monitor.
Notes
• The default setting for monitors is as follows.
Generic LCD Display; LCD Panel 1600x1200;
31.5-90; 60
Resolution 1024x768
• Most monitors will operate with [Generic
Monitor], but you can select [Others] as required.
Caution
When configuring settings for the second monitor,
the second monitor must be connected when the
NSR restarts. Be sure to connect the second
monitor before finishing the configurations.
When using the NSR-100/50, the [Video Setting]
screen appears. Proceed to step 10.
When using the NSR-25, the [Host Name] screen
appears. Proceed to step 11.