


30
䋨
䋨䋨
䋨7䋮
䋮䋮
䋮5䋩
䋩䋩
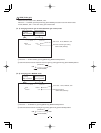
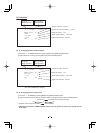
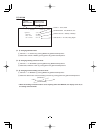
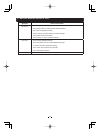
䋩 Changing RS232C baud rate
䋨
䋨䋨
䋨7䋮
䋮䋮
䋮6䋩
䋩䋩
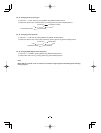
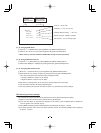
䋩 Changing OSD OUTPUT mode
㽲 Move the “㸢” to BAUD RATE by pushing [MENU UP], [MENU DOWN] buttons.
㽳 Select either 9600bps or 19200bps by pushing [DATA UP], [DATA DOWN] buttons.
䋨
䋨䋨
䋨7䋮
䋮䋮
䋮4䋩
䋩䋩
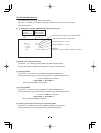
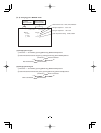
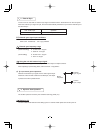
䋩 Changing RGB SYNC
㽲 Move the “㸢” to RGB SYNC by pushing [MENU UP], [MENU DOWN] buttons.
㽳 Select G, ALL ON or ALL OFF by pushing [DATA UP], [DATA DOWN] buttons.
* When Y/P
b/Pr is selected at OUTPUT, RGB SYNC change cannot be performed.
OUTPUT Y/Pb/Pr, RGB
RGB SYNC G, ALL ON, ALL OFF
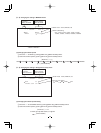
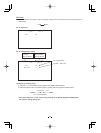
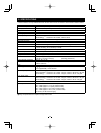
-- 7 OPTION -- <FILE A>
SHADING MANUAL Setting 㧙128 to 127
OUTPUT RGB
RS232C baud rate 9600bps, 19200bps
RGB SYNC G
SHADING OFF
BAUD RATE 9600bps
OSD OUTPUT ALL ON, Analog, Digital
OSD OUTPUT ALL ON
Move up and down
by pushing
MENU UP,DOWN
Select the desired
value by pushing
DATA UP,DOWN
Ԙ Move the"→" to OSD OUTPUT by pushing [MENU UP], [MENU DOWN] buttons.
ԙ Select either ALL ON, Analog, or Digital by pushing [DATA UP], [DATA DOWN] buttons.
㧖ALL ON can be performed in both the analog and digital monitor.
If Analog is selected, it outputs only for analog.
If Digital is selected, it outputs only for digital.
Please select a mode depending on the type of the monitor display that is connected.
If incorrect mode is selected, the display might disappear.
In that case, please cycle the power, and refer to section “7.2 (8) Returning to factory settings”.
䋨
䋨䋨
䋨8䋩
䋩䋩
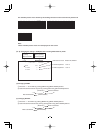
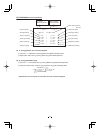
䋩 Returning to factory settings
The contents set of each scene file can be returned to the factory default status (preset status).
(1) Select a scene file to set to the factory default status by [FILE] button.
(2) If the color bar pattern or characters are displayed on the screen, press the [DISP] button to disable the
color bar pattern and character display.
(3) Push [MENU DOWN] and [DATA DOWN] buttons simultaneously for approx. 1 second.
(4) The preset operation starts. When the preset operation finishes, the character PRESET OK is displayed
for approx. 1 second.