


5
5
2
2
PHOTO – Taking photos with your Gmini
PHOTO – Taking photos with your Gmini
TM
TM
402 Camcorder
402 Camcorder
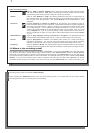
2.1 Taking a photo
1. From the Main screen, select the Camera icon, then click on ENTER.
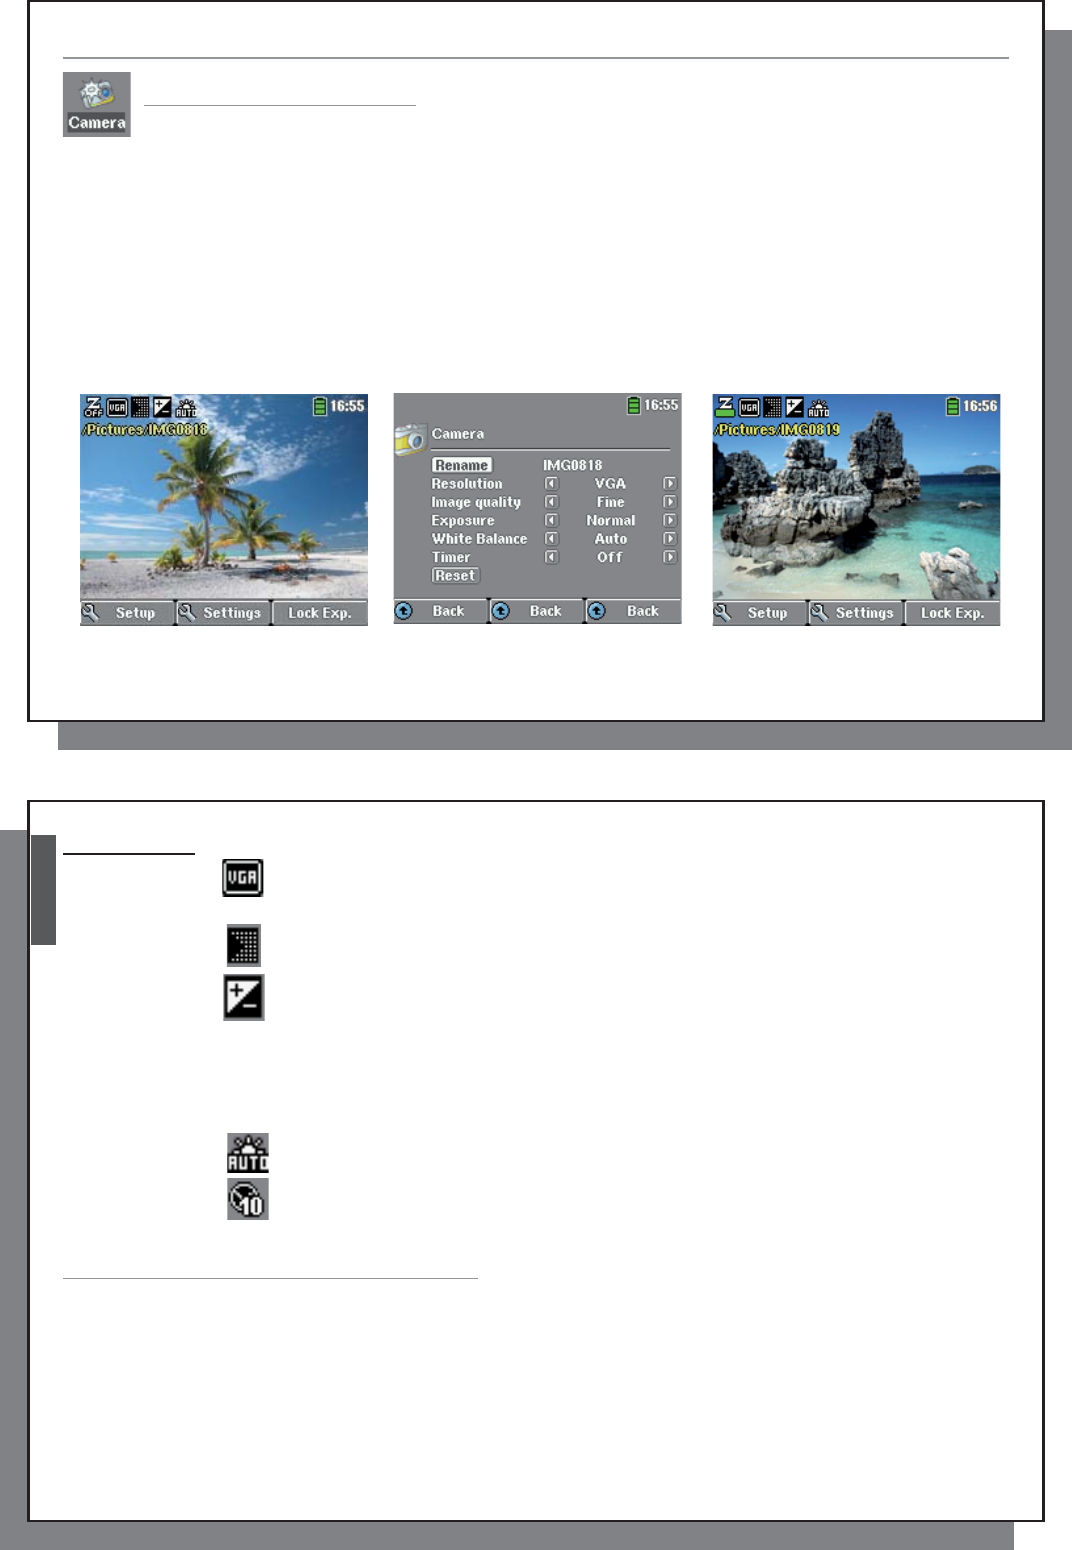
2. On this Viewfi nder screen, you can adjust the exposure settings by pressing the F2 button (Settings). You can
also zoom in and out using the up and down buttons. For more information on the F3 button (Fix), see the
section Controlling the image quality.
3. On the Settings screen, use the directional buttons UP and DOWN to select a setting, and LEFT and RIGHT to
change it. To change the fi le name, select the Rename button and press enter. You will be taken to the Virtual
Keyboard (see the Using the Virtual Keyboard section in the Browser chapter of the complete Adobe
®
PDF
user manual for more information.) Press one of the Function buttons (Back) or ESC/STOP to go back the
Viewfi nder screen.
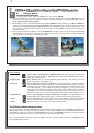
4. Once you have adjusted the settings, press the ENTER button to take a photo. You might notice that the HDD
indicator lights up as the device is saving the image on its hard drive. The name of the next image changes
and your Gmini
™
is now ready to take the next picture.
2 3 4
The table below explains the different settings. The corresponding screen icons are also shown.
6
6
English
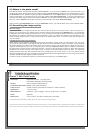
Photo settings
Resolution Options: VGA or 1.2 Megapixels. 1.2 Megapixels (1280 x 960) will give the best image
quality, but the largest fi le size. VGA (640 x 480) will give the smallest fi le size, but the
images will not be as sharp.
Image quality Basic, Normal, Fine. For the best possible image (although it will take up more disk
space) set this to Fine (fi ne dots icon).
Exposure Between Brighter +2, Normal and Darker -2. This permits you to adjust to bright or
dark conditions. Setting it in the negatives, will decrease the amount of picture exposure
and make your image darker. Setting it positive will increase the exposure and make
your image brighter. If your subject has a bright background, you may want to over
expose your image a little bit so that the person’s face is more visible, thus you would set
it to Brighter +1 or +2. If you are taking a photo where there is a lot of snow or the sun’s
refl ection on water, you may want to reduce the exposure, thus set it to Darker -1 or -2.
White balance Options: Auto, Daylight, Cloudy, Fluorescent or Tungsten. This parameter lets the
camera adjust to the ambient light source in order to record colors in the best way.
Timer Options: Off, 5 seconds or 10 seconds. The timer setting allows you to delay the moment
at which the photo is taken, for example if you want to include yourself in the picture.
Reset Reset the values in this screen to the factory default settings.
2.2 Taking a photo using the timer
On the main screen, select the Camera icon and press enter. Press the F2 buttons (Settings) and highlight the
Timer setting. Select for example 10 seconds. Press a Function button (Back) to return to the Viewfi nder screen.
The Timer icon appears on the top of the Viewfi nder screen. Now press ENTER. A stopwatch symbol will appear
on the screen and counts down from 10 to 0. The Gmini
™
402 will now take a photo.
Note: The Timer function will stay active for successive pictures you take unless you return to the Main menu or
set the Timer Setting to OFF.