


AXIS P3301/-V Installation Guide Page 5
ENGLISH
Install the hardware
Mount the camera
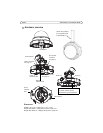
The AXIS P3301/-V can be mounted with the cables routed through the wall/ceiling, or from above
or below. There are cover plates for the openings on both sides of the dome cover.
The AXIS P3301/-V can also be fitted with a metal conduit for protecting the cabling when
connected via the side openings. See the illustrations on page 4.
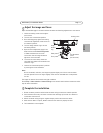
1. Using the drill template, drill two holes in the ceiling/wall. Ensure the camera is positioned so
that the tamper-proof screws can be tightened using the supplied screwdriver.
2. Route the required cables. See Connect the cables, on page 6 for details.
3. Fasten the camera unit to a ceiling or wall, using screws and plugs appropriate for the ceiling/
wall material.
4. Proceed to Connect the cables, on page 6.
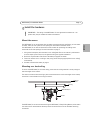
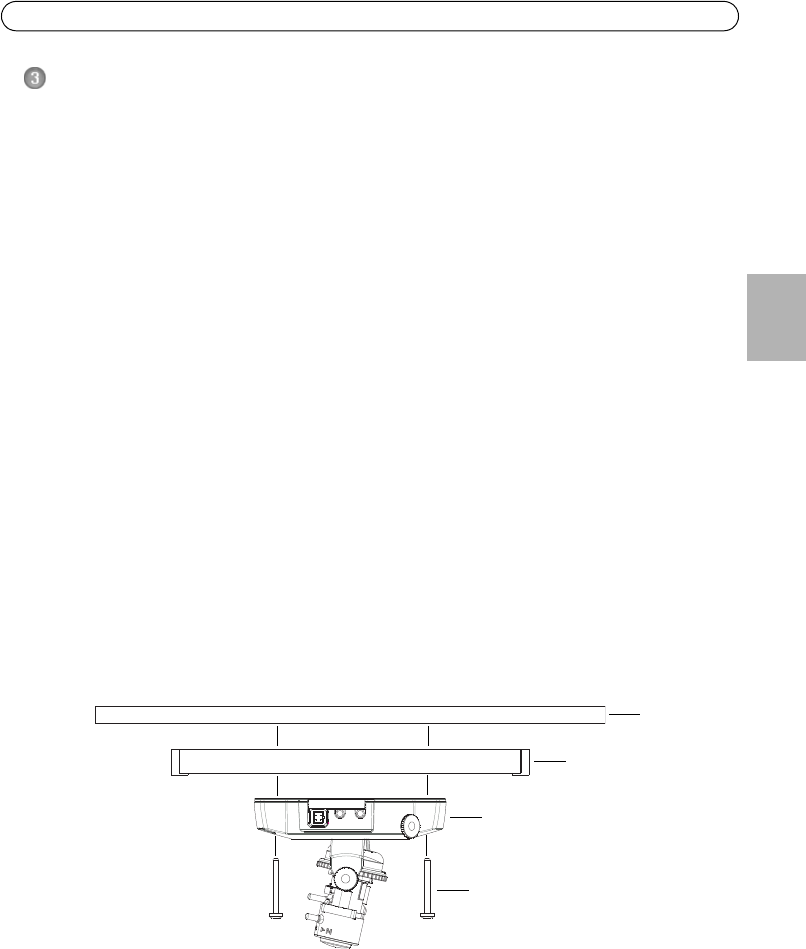
Mounting on a hard ceiling
To mount the AXIS P3301/-V on a hard ceiling, check that the ceiling material is sturdy enough to
hold the weight of the camera.
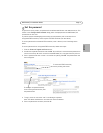
The camera can also be secured using a plate or board that better carries the weight of the camera,
and which is more suitable for securing the screws.
The AXIS P3301/-V can also be mounted using the AXIS P3301/-V Drop Ceiling Mount, which allows
the camera to be mounted more discreetly. Please see www.axis.com for all available mounting
accessories.
!
IMPORTANT! - The casing of the AXIS P3301-V is not approved for outdoor use - the
product may only be installed in indoor environments.
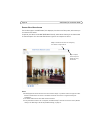
Plate or
Ceiling
AXIS P3301/-V
Screws
board