


AXIS T95A00/T95A10 Dome Housing Page 5
ENGLISH
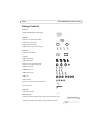
Tools not included
*The RJ45 connector is attached after the cable has been pulled through the cable gland.
Other required parts
Note:
Not all screws provided are required for all camera installations.
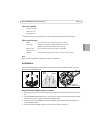
Installation
Prepare the following steps indoors before you proceed to do the installation outdoors. This will
save time at the installation site.
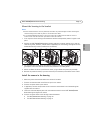
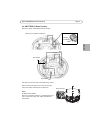
Attach Universal Adaptor plate to camera
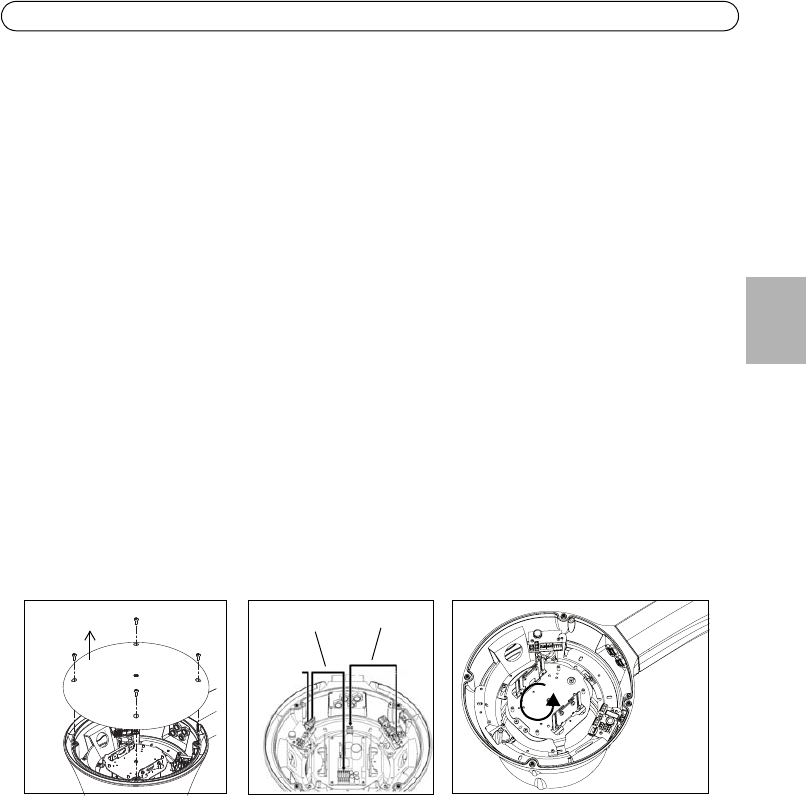
1. Remove the top cover of the housing (with four screws) from the housing using the 3mm allen
key.
2. For AXIS T95A00 Dome Housing only - remove the two connectors (with black and blue cables)
attached to the power supply on the Universal Adapter plate.
3. Loosen the three screws holding the Universal Adaptor plate. Slightly rotate and remove the
Universal Adaptor plate.
4. Attach the Universal Adaptor plate to the camera. For details see page 13.
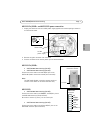
Phillips screw driver
RJ45 crimp tool
*
Adjustable wrench
Bracket see www.axis.com for available brackets and accessories
Power cable AWG20, 100-240 VAC cable (AXIS T95A00 Dome Housing)
AWG22, 24 VAC cable (AXIS T95A10 Dome Housing)
Network cable CAT 5 shielded twisted pair (STP) cable recommended
RJ45 connector
Soft cloth Recommended for protecting the dome while installing the housing
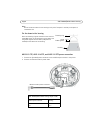
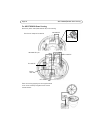
Top cover
Black
cable
Blue
cable
Universal
Adaptor plate